One Piece Odyssey is a third-person action role-playing adventure game. During their journey, the Straw Hat Pirates, led by Monkey D. Luffy, are caught in a severe sea storm. They find themselves on a mysterious island full of thickets, in the middle of a storm, and are separated from each other. The crew embarks on a new adventure journey full of wonders of raging nature, powerful enemies, and strange encounters with the locals of the island.
Walkthrough One Piece Odyssey 100%
Welcome to our walkthrough guide One Piece Odyssey (2023). With this guide, you'll be able to play the game from start to finish, knowing the strategies for every dungeon, every quest, every boss fight, and more!
One Piece Odyssey, the game that got a lot of traction when it was announced due to the developer promising to stay true to the essence one piece in fact, and after showing a few gameplay videos and screenshots, it seems like fans of the series are actually happy and excited. So, let's delve into the passage of the fascinating plot of the game!
Playable characters
| Character | Attack type | Availability |
|---|---|---|
 Luffy |  | Already playable. |
 Roronoa Zoro |  | Already playable. |
 Us |  | Already playable. |
 Usopp | | Already playable. |
 Sanji | | Already playable. |
 Tony Tony Chopper | | Already playable. |
 Nico Robin | | Already playable. |
 Frankie | | Not playable. |
 Creek | ? Apk type | Not playable. |
Other characters
| Character | Attack type | Availability |
|---|---|---|
 Limit | N / A | Support character only. |
 Adio | | Guest character only. |
One Piece Odyssey Mission List - Main Quests and Objectives
There are a total of nine chapters in the main story of One Piece Odyssey, each with different objectives to complete. Each chapter and step is detailed below in One Piece Odyssey mission list.
Chapter 1: Isle of Storms
- Exploration of the mysterious islands
- Restoration of lost power
- Explore Thunderhead Ruins
- Restore your strength
Chapter 2: Memories of the Desert Kingdom, Alabasta
- Victory over Crocodile
- Head to the rain base
- Find a crocodile
- Travel to the capital Alubarna
- Stop Crocodile's Plans
- Return Vivi
- Stop the bombing
- Victory over Crocodile
- Meet your friends
- Board Cheerful
- Return to a strange place
Chapter 3: Wind Colossus and Dust Ruins
- Challenge the dusty ruins
- Cross the Quicksand
- Challenge the dust runs
- Defeat the Colossus
- To the next adventure
Chapter 4: Investigation of water seven, a city on the sea
- Explore Water Seven
- Defeated Rob Lucci
- Save Luffy and Robin
- Rescue the kidnapped Usopp
- Bring back Franky and Usopp
- Enies Lobby Escape
- Return to Water Seven
- Join the Party
- Go to the beach
Chapter 5: The Water Colossus and the Ice Block Ruins
- Go to the Inland Sea
- Return to Adio's house
- Find Lim's Crystal Ball
- Return to Adio's house
- Explore the ruins
- Embark on a new adventure
- To the next adventure
Chapter 6: Primary War: Battle of Marineford
- Survive Paramount War 1
- Survive Paramount War 2
- Survive Paramount War 3
- Survive Paramount War 4
- Survive Paramount War 5
- To the next adventure
Chapter 7: Collect! Straw Hat Pirates
- Find Sanji
- Make some cola
- Bring back Brook's body
- To the next adventure
Chapter 8: Kingdom in Conflict: Battle of Dressros
- Defeat Doflamingo
- Head to the New Royal Plateau
- Defeat Doflamingo
- Search in the war-torn city
Final Chapter: What These Hands Can Grab
- Return to Woford
- Evaluate the situation
- Go for Adio
- Challenge the Sky Tower
- Decipher the strange letter
- Go to Memory
- Find the key to writing
- Go to Memory
- Find the key to the notes
- Go to Adio
- Stop Adio
- Travel Preparation

Walkthrough - Chapter 1: Island of Storms
After the opening cut-scenes where we end up on a mysterious island and our Sunny ship sinks, we get control over Luffy for the first time!
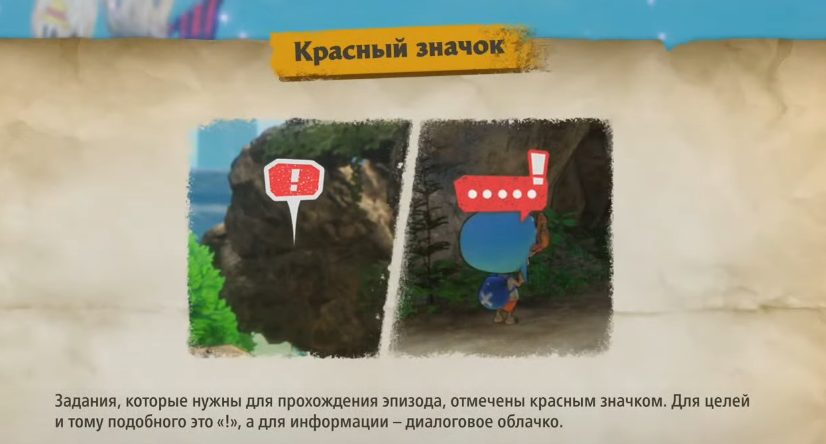
Once we get our first target, we are told about the icons on the screen. "!" is the location of your target, while the red speech bubble is target information.
After reading the introduction, move forward and talk to Franky. After a short conversation with him, he will join the team. From here we can go south to a small piece of land, but there is nothing for us here.
Throughout the game, you will find tons of points of interest, which are the "magnifying glass" icons you see around the world. If they are not red, they only serve to show you more about the world. Right at the start of the game, we'll have loads of them all over the place, showing you animals, monsters, perspectives, etc. Check them out, as they're mostly really good.
Instead, head north from where Franky is supposed to find Usopp. I wonder where Nami, Zoro and Brook are. Soon after, he will also join the party.
Make your way east (no items here) to find Sanji. Of course he's really worried about Nami (of course he is haha). Further east is Robin, who was SHOCKED. After another small scene, she will also join the party.
Next to Robin is Chopper, our little reindeer. He tells us that he can actually smell Nami through the cave. What a nice nose! Thanks to Chopper, it seems like we now have a clue as to where to find Nami (and hopefully Zoro and Brook). Go through the cave and we will be in a new area.
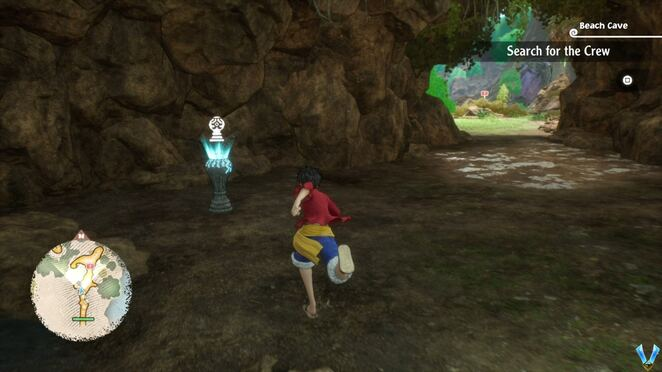
When we enter this area, move forward and examine the artifact on the left. These are our save points! It fully restores our HP, which is why they are important. Unfortunately, they don't restore TP (at least for now), so use your TP carefully in the future. Note that if you end up dying, you will restart with last savepoint, not from the nearest savepoint, so keep that in mind.
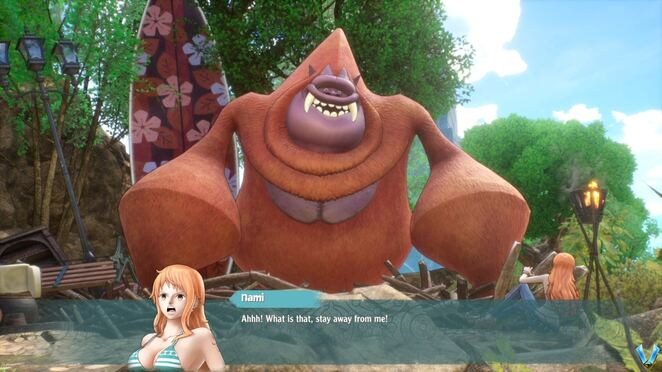
Travel north from the caveto trigger a scene where we enter the area itself, we are shown some of the flora and fauna of the place, and more importantly, they show us poor Nami! She is with a huge gorilla. Eee!
Time to save her! From where we regain control, ignore the small path to the left as it's a dead end and head northeast. As we go, we will see glowing spots on the branches of trees, and we will get information about rubber rocket. It's kind of like a grappling hook. We use Luffy's elastic arms to grab onto such points to cross holes and climb some walls.

Cross the chasm here and continue down the fairly easy path, jumping over the logs of the trees blocking your path. There is an interesting point that shows several metal capsules that have grown into the roots of a tree. Maybe we'll find out later? May be?
Keep going up, jump over another hole, and ahead of us will be an area full of treasures. There are some sparkles and a couple of pots/barrels to smash.

NOTE: All items you find this way are random. I went through this area 3 times and almost always I got different things. There may be items that will always spawn, but be sure to pick them up whenever you see them and smash pots and barrels as you come across them.
Go ahead and collect the items here and then climb the wall to the north-northwest to trigger our very first fight. We fight these little monkey boys by name Asa. We were also given our first ![]() a small tutorial about combat.
a small tutorial about combat.
Combat in this game is quite simple. We have a rock-paper-scissors game where one type of attack beats another but is weak to the other. These types are: Power (. Right now, however, in this fight we are just attacking while things like attack and TP are being explained to us. We can't use skills, so just use normal attacks until Ace is defeated.
Keep going forward after the fight, cross the pit and approach another fight with Asa. This is another scenario fight where we can now use skills. Please note that we have a bunch of skills so try them all whenever you can. Right now, however, they want us to use rubber rocket. Go ahead and use it... the animation here is REALLY cool! This will also end the fight haha.

Continue north, grab the sparkle on the left when you see it, and continue north. You will pass under the tunnel and we will see the shipwreck on our right. There is a fork ahead. Moving to the right brings us to this shipwreck, but we can't go explore yet because Nami is in danger.
Head west, to trigger a scene as we approach penguin-like enemies.

As we start the fight with Usopp, paralyzed and unable to move. Here we are taught dramatic battles. These battles are actually very frequent and can even occur in random battles. Basically, they give you a target in combat so you can gain extra EXP. Sometimes the enemies are a bit stronger, but not always.
In combat, you will see Usopp alone in a group with 3 enemies, while your other 3 party members against 1 enemy. Here you will want to kill a single enemy and then the other enemies will most likely attack Usopp. They hit quite hard and he will actually go down in 3 hits. In the 3 times I've been in this fight, he always gets hit twice before you get a turn with Chopper. Little Chopper if our healer so makes him use his "Heal" skill to heal Usopp so that he can withstand the attack of the third bird. Once he takes the third hit, the birds will be nearly dead.
Once this fight is over, continue west along the path and we'll be told to climb the vines. Actually we can just use our rocket gum-gumto climb to the top. Continue south, grabbing any items you find along the way, and to the extreme south is a fork. We can't go south here, so head north using the path on the left. In the end, we will create a scene when we reach that places where we will get close to them, but more Ace will attack us.
In this fight, we are taught the types of attacks that I mentioned above: Power (. We can also change party members by clicking ![]() which is great and be sure to do this often to take advantage of your opponent's weaknesses.
which is great and be sure to do this often to take advantage of your opponent's weaknesses.

We have some weak mobs in this fight. These are practically the same Eisa, but with a different "element".
The scenes continue after the fight where Zoro appears and saves Nami from the gorilla... then the fight with Sanji begins. After that, however, move forward and now it's time to actually start fighting him.
It may look like a boss fight, but it really isn't. We need to start the fight using Powerful Energy Apple on Nami to heal her. After that, we need to deal with the small monkey enemies, as usual, then the boss Del Kong. As you may have already noticed, we are a bit overwhelmed with lv.40+. Del Kong will deal with about 120 dmg. our characters, which are very few. You can also take him down in just a couple of moves as you deal a ton of damage to him, so have fun.
Watch the scenes after the fight where we find some materials that can be used to fix the Sunny and eventually we will return to the beach. We'll also find Brooke here...has he been here all this time?
In any case, after these scenes, we will have the actual opening of the game where we will see how we ended up here (taking to the sky with "Knock Up Stream". This scene also plays if you do not touch the controller when starting the game. This really good, so enjoy it!
It's time to find our Straw Hat. Unfortunately, we cannot do much here. We can't explore the area we just went through when looking for Nami, so I guess we'll have to explore that once we find Luffy's straw hat.
For now, head north from where you regain control to where you originally found Usopp. That's where the anchor of our ship is. Look at the scene that plays out as we get her out of the way and now we can get through!
Go in search of a new area, southern forest. We won't be here for long. Look at the scene that's playing out and we'll be in a boss fight called fiery spike. Again, just like against Del Kong, this is not a fight we should be worried about as we are very strong at the moment. It should come down in just a couple of hits.
After this fight, we will have several more scenes where a girl dressed in white will appear in front of us and take away her strength. How can this be?

Having lost his powers, it's time to fight the Fire Colossus again. This time, however, fighting will be impossible. We are so weak that we can hardly do any damage to her. After a couple of hits, more scenes will play out where a mysterious person appears and starts attacking us. I don't know if he is original to this story, but I like him!

Once the scenes are over, it's time to follow him. Does he seem like a good guy? I can not say. We'll go through the tunnel and get to his house. It's really a nice place! As we get here the scenes will continue and he will introduce himself as Adioand tell us about Lima, the girl dressed in white who stole our powers.
Once you regain control, head up the stairs and into the house for scenes to continue. Adio will mention about the cave and that it should be wise for us to go there, and who knows? Maybe we'll find one of those cubes with our power there.
Before we talk to Adio, there are some things we can do. Start by exiting the balcony to the north to find a chest outside with Sazae Kancho Pescatore.

Head up the stairs in the middle of the room to find what appears to be his bedroom. There is another chest here on the balcony, this time with bronze soup for bats.

Speak to Lim nearby if you wish, and then go down the stairs and speak to Adio. Tell him you're ready to leave (you can't explore here at all) and he'll join the party as a guest.
Now that we have Adio with us, head north up the slope and through the tunnel to get to the next area, Circular inland sea.
Once you get down here, go down the slope and as you go you will see a path on your minimap heading northeast. We can't go there right now as we can't remember how to extend our arms haha. Oh well, we'll have to come back as soon as we remember. Move forward a little more to get some information about the enemies. You will be told about "hostility" and that the enemies will attack you as soon as the icon turns red. You will also gain an advantage if you touch enemies from behind. Secret attack!

Go ahead and fight this enemy of Eisa and then continue past the bridge to reach a new enemy, Sazae Kancho. This crab snail enemy actually gave me lvl 3 thanks to the fact that it was a dramatic battle, but unfortunately that's no guarantee. Grab the item at the foot of the dead tree and there will be a fork in front. We can't follow the path on the left right now, so follow the upper path instead to trigger a scene where we find a cave. Walk forward and enter once you regain control.
Lake Shore Cave
Once inside the cave, after the scenes, head forward to find a save point. Go ahead, heal and save your game, then head north up the wall to trigger another scene where we find a chest. Nami is very happy to find him! When she opens it she will find an accessory badge DEF +48. They don't seem to have a name and instead they just tell you what they do.

From here, head east up the wall for a small scene and then down the stone steps on the right. Grab the sparkle below and cross the bridge going east to see another scene... the bridge is broken. Ouch. Come to for another scene where we are attacked by a huge squirrel dog named Death Squirrel. Well, it's a fight with several enemies, including some bronze bats (super easy enemies) and some Aces. You might think that the Death Squirrel is a tougher enemy than the rest, but that's not the case. It will also fall in one or two hits.
After the fight, we will have a scene where we will find Adio listening to the conversation. Who could it be? Anyway, back with Luffy, approach the crystal here to trigger more scenes where we get some of our powers back.

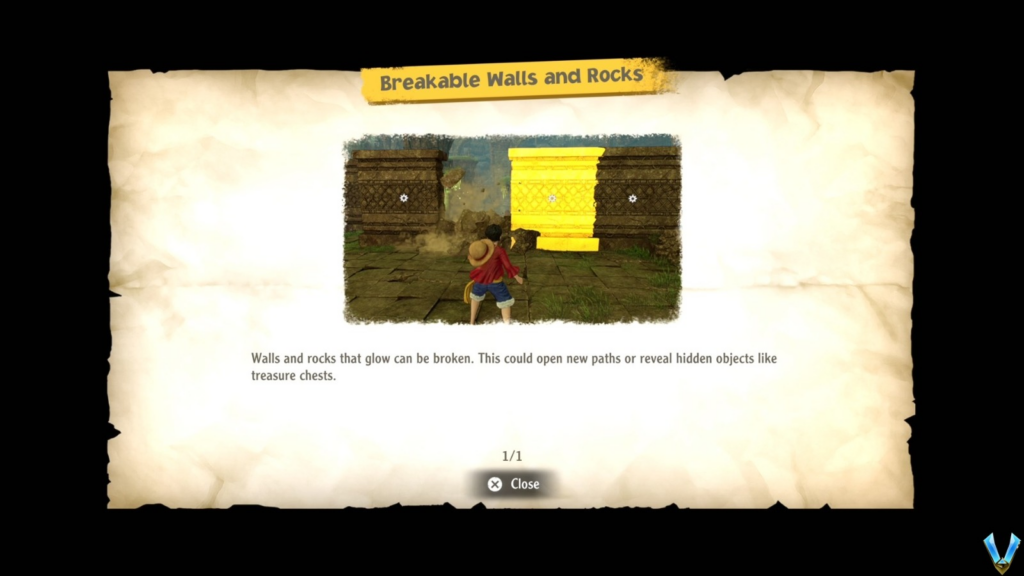
Here everyone will get some of their Lost Forces. Star Skills are the ones you use on the World Map, while Red Cross Swords are Combat Skills. You will also see that some of them have 3 circles next to them. We need to find more dice so we can put them into those skills and make them stronger. Once we regain control, we'll be told about breaking walls and rocks and seeing Haki.
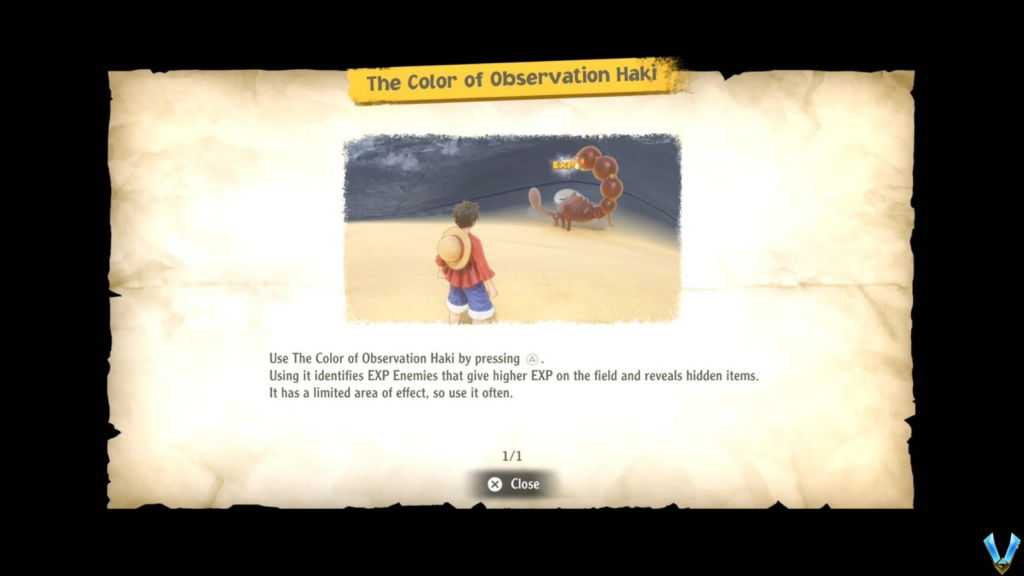
I think what is more important is what we are told about Cube Fragments, which are the cubes I told you about to boost your skills.

And while doing so, you will see that there is a star icon on the wall to the north of you. You can break them. Break them all and you will find some sparkling items behind them, but more importantly, you Find Luffy's Cube Fragment x3 next to the vines going down. Use them to power up the Gum-Gum Pistol or Gum-Gum Gatling. I personally went with the Gatling.

Approach the vines, go through the hole and open the chest for an accessory GUTS+42 Badge. Go through another hole, kill the enemy and pick up the item. Now look back at where the chest is and look above it for a grapple point. Use it to climb up there and up the vines to find another chest, this time with HP icon +130, and ahead fragment of Nami's cube.

Approach the vines and look across for a place you can grab onto across the hole. Do this, go down the vines and grab the item. Now climb to their top and look to the west for a capture point in the distance. Grab onto it to reach an area with a chest and 3 bronze bats surrounding it...why are they doing this?
Well, we will fight them... 6 of them to be exact. There is nothing difficult about them, and Luffy's Gatling can kill them in groups quite easily. After the fight, the group tries to open the chest to find one of those monkey enemies thanking us for killing those bats. He will thank us and disappear. Open the chest now to find ATK badge +87 inside. After that, go forward and break the walls in the north to find a chest behind them with Energy Apple.

Climb the nearby stairs to find Fragment Cube Zoro, and then head west up the vines. Here we will see a large metal gate. Approach him to play told us about the team exchange. This basically allows us to move around with any of the pirates. You can see in their skill list what everyone is good at. Zoro can cut through such gates and barrels, Luffy can stretch and use his vision of Haki, etc.

Click now or change to Zoro and open the gate. Past it is a path going south and some breaking walls in front of you. Break the walls first to find a chest with Energy Apple, but it is guarded by the enemy.

Head south, jumping down the ledges, and below you'll have to fight a bat. Kill him, pick up a nearby item and head south. Break the wall and when you see the grapple point be sure to aim and grab Usopp Cube Fragment, before getting caught. You also grab it by aiming and shooting, just like grappling.

Once you grab it, grab the item and go to where we will have to fight 3 Death Squirrels. Here we are taught bullies, stronger versions of normal enemies. They have the world It next to their name and also gives you more EXP and berries. We are also told about weaknesses and resistance. In addition to similarities in skills such as , skills also have elements that also have enemies that should deal more or less damage. We will need to use both in tandem to maximize damage.

After the fight, go forward and leave the cave.

The sequel is coming very soon!
Was the article helpful?