

Passage of the game Lost Lands 9: Tales of the First Brotherhood 100%. All the secrets, puzzles, mini games, collectibles and achievements in one place...
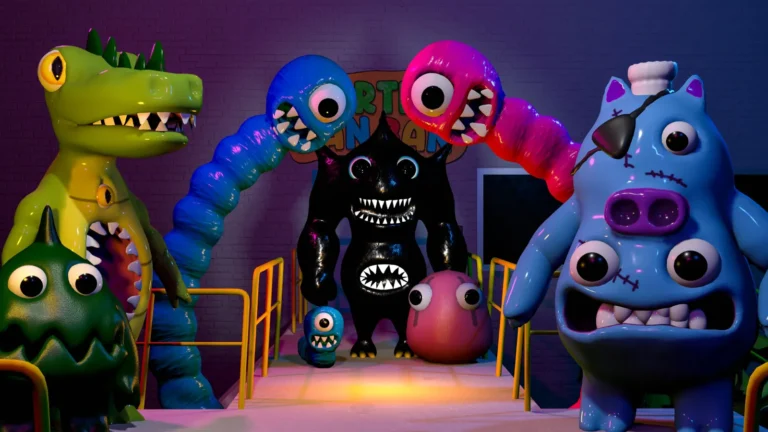
Walkthrough Garten of BanBan 3 100% - complete guide
Hello! I am happy to share with you a guide to completing story missions, solving puzzles, finding pencils, criminals, and exiting the children's room and much more in the game "Garten of BanBan 3". Let's start!
Beginning of the game
- Start a new game and you will find yourself in a hall next to a broken elevator. Pay attention to the information shared with you by a mysterious stranger. He will ask you to get to the Water Sector, but for this you need to collect two batteries in order to use the remote control and control the drone.
- Look around. To the left of the door is the reception desk. Go behind it and find the first battery on the long table. Now pay attention to the lift opposite the reception desk. Climb up the steps and reach the far wall. In the corner near the fence, on the floor is the second battery. Pick her up.
- Now you can fly the drone! Go downstairs and go to the big door. Press the right mouse button to summon a drone near you. Left-click to point the drone in the direction of flight. Remember that the drone can only move in straight lines, so you will have to avoid obstacles to activate various objects. At this point, order the drone to press the two red buttons on the left and right sides of the big door.
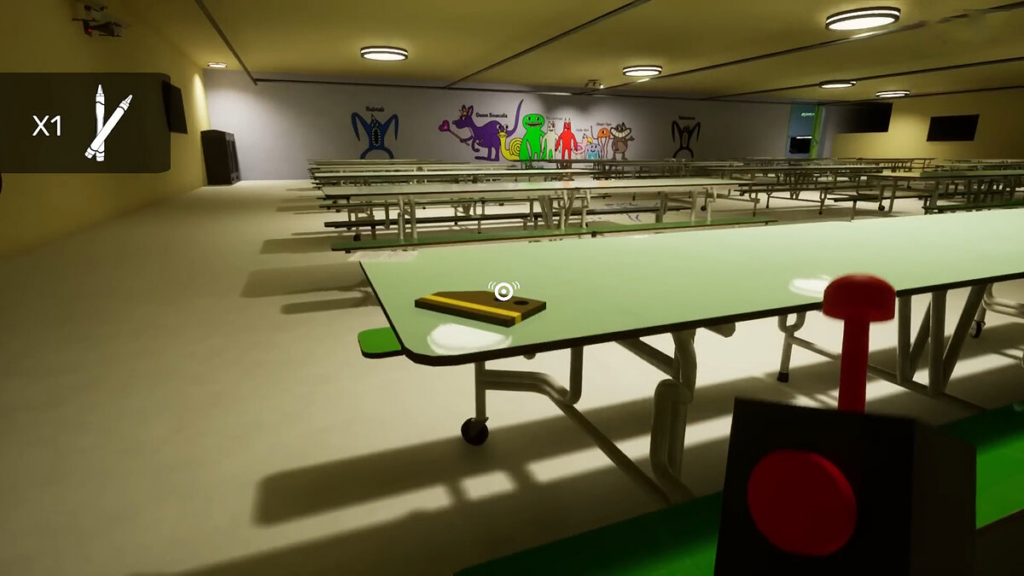
- Go through the door and you will find yourself in a huge room with many tables and benches. You need to go around and collect 8 pencils, which are scattered next to the floor drawings. Once you have collected all 8 pencils, go to the far left corner, where there is a hole in the wall for ejection of garbage. In turn, throw all the pencils into this hole one by one.
- On the table opposite the garbage hole you will find a yellow key card. Pick it up and interact with the remote located to the left of the hole. This is how you launch the cleaning robot. The robot will drive around the room and if it doesn't find any pencils, a purple key card will fall out of the right slot next to the garbage hole. With this card you can use the local funicular!
- Return to the reception area and approach the purple funicular on the right. Pay attention to the ceiling of the funicular, where there are four panels. Interact with the panels to set the direction of the funicular. In this case, you need to move to the Water Sector, so take the funicular to the right.
How to get through the Water sector
When you enter, pay attention to the glazed room on the left at the beginning of the corridor. Go around it and find an opening on the right that the drone can fly through. Right-click to summon the drone and bring it inside the glassed-in area. Position yourself so that the drone is between you and the glass, and then order it to fly towards you to break the glass. Get inside through the broken window and find brown key card on the table.
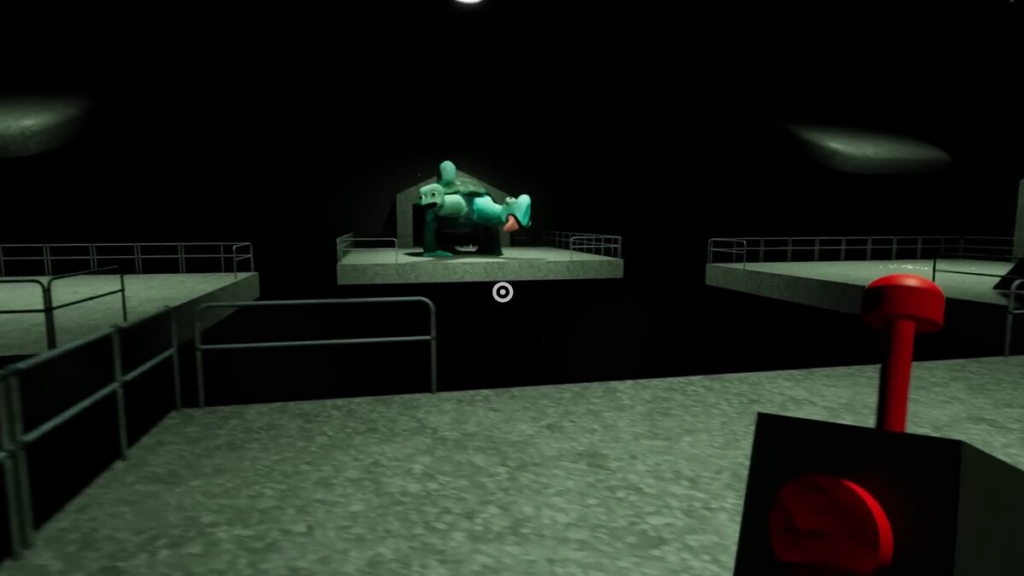
Return to the Water Sector corridor, turn left and open the door opposite the funicular by interacting with the panel on the left. Go down the stairs, go under the huge octopus-like creature, go up the other stairs and notice the concrete slab on the right with the sign "Communication Kiosk". Go around it and find the terminal. Interact with it and listen to the information provided by the monster. When you get to the beach, find the little octopus and talk to him again.
Now you will control this octopus. By clicking the right mouse button, you can select electrical discharges. First head to the chest and the corner door to get green key card from sand. Climb the stairs and activate the terminal. At the top there will be four buttons, and at the bottom, under the bridge you are standing on, there are two more buttons. You need to activate the terminal and then shoot electrical bolts at the red buttons. Only one red button can be active at a time. If you don't see the red button at the top, go downstairs and look at both buttons under the bridge. Perhaps one of them caught fire. Also remember that electrical discharges have a special flight path, not a straight line. If the button is far away, aim just above it so that the discharge reaches the active area of the button.
Once you successfully complete 2 or 3 of these mini-games, the bridge door will open. Go through it and activate the wall panel at the very end. Move along the bridge in the opposite direction, where another door will open. Listen to the snail in the long hallway and the octopus episode will end.

When you wake up, you will find yourself in the game room. Your task is to catch 10 "criminals". In fact, you must collect 10 pink buckets with eyes. The prison where you have to put these "criminals" is right behind you. Turn around, look up and find the first bucket (1/10) on the corner. Approach the stairs to the left of the prison and find another bucket (2/10) at their base on the left. There is a tree next to the steps, look for the third bucket (3/10) in its roots. Keep moving to the end of the room and find the fourth bucket (4/10) next to the blue flower on the floor. At the very end, under a canopy, you will see several tables and chairs. On two chairs you can find the fifth (5/10) and sixth buckets (6/10). Climb up the slope and take the seventh bucket (7/10). Look to the right to find the chief's office. On the table you will find the eighth bucket (8/10). Return to the beginning, to the prison, and go up the steps on the left. You will find the last two buckets (9, 10/10) in front of you. Return to the prison and interact with it 10 times to place all the buckets. Once this is done, the door on the left will open. Take away blue key card from the niche of the blue door.
Continue forward where you will see a rise. Climb up it, then turn right and look under the table to find a hidden button. Interact with the button and a secret panel on the wall will open. Activate it and the platforms will begin to descend from the opposite wall. Use the climb jump to reach the lower platform, and then jump to the next higher one. During the jump, take the video cassette from the green corner shelf. This item is optional, but you can view its contents at the starting location.
Return to the prison and go up the steps on the left. Activate the terminal using blue key cardthat you received earlier. Colored spots will appear along the long dark path. You need to quickly jump over these three spots to reach the islet. Repeat this action and reach the second island. Continue like this until the end. It is important to remember that you need to bounce on each of the three spots when you hear the three characteristic musical sounds. When you successfully complete this challenge, click on the panel on the opposite wall and go back, following the same way. If the room turns red after passing, it means that you made a mistake and you should go back and repeat the steps. Once you complete this challenge in both directions, a door will open through which you can leave this room.
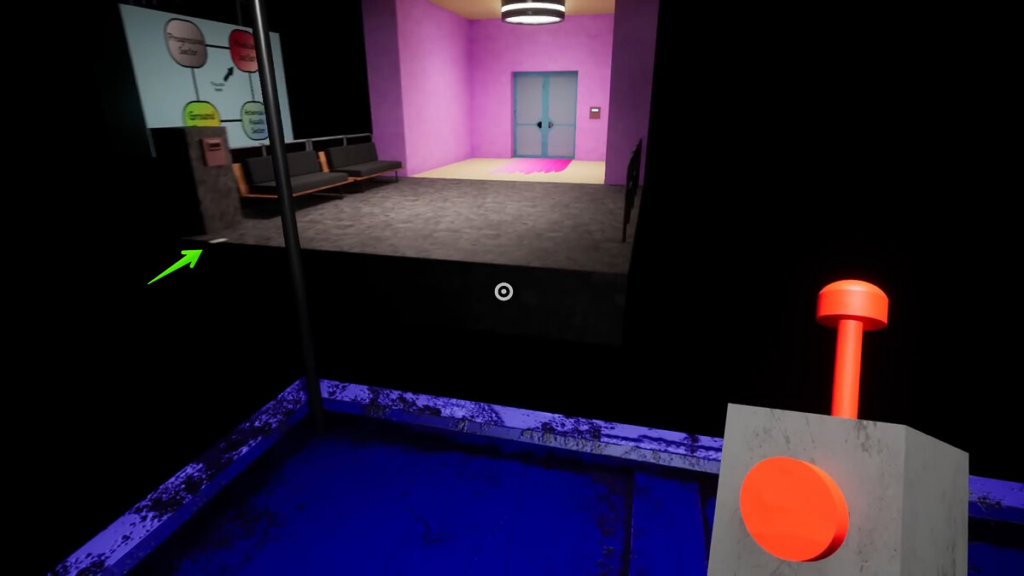
By the way, if you are interested in trying to be caught by the monster, you can look behind the blue door, which is located on the left side of the Water Sector corridor. Or you can take the funicular and go to the medical sector.
Medical sector: the creation of Nabnablina
In this part, I will share with you information on how to complete the process of creating a Nubnablin, a special creature specially designed for lonely Nubnabs.
At first, you will need to find the only available door and go to the room where Nabnablin is located. It is important to place her on the operating table, so interact with the monster twice to bring it to the table. Pay attention to the table in the corner to the left of the front door, on which the necessary tools are located. You will need a remote to control the drone, tongs to adjust the colored pipes, and a syringe to draw and infuse liquid into the Nubnablin.
When you're ready, interact with the panel Start Procedure near the small door. Use the remote control to control the drone and press all the red buttons. If you notice that the colors of the pipes in the corner have become different, use tongs to adjust them until they turn green.
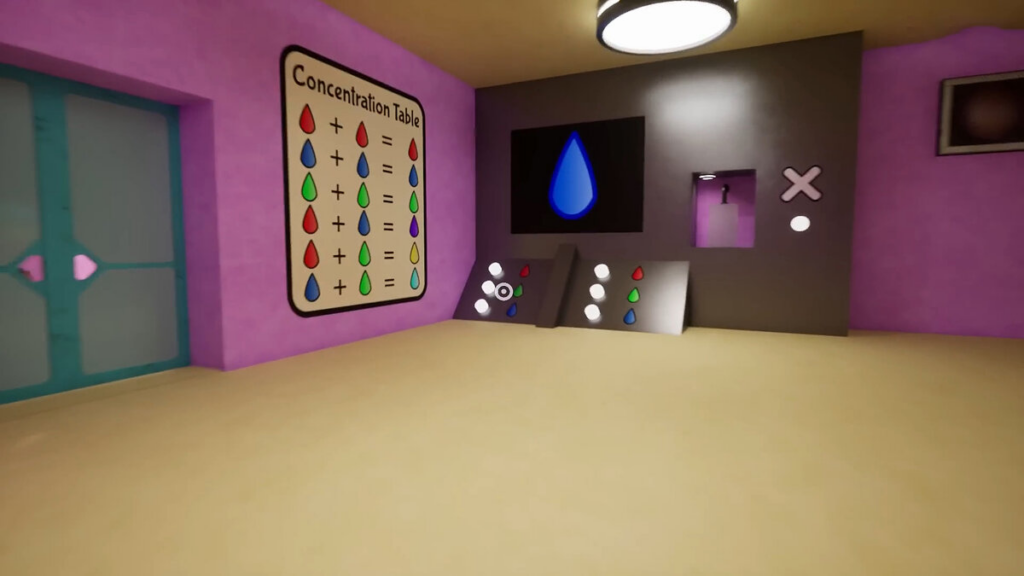
When a colored drop appears on the screen, approach it and pay attention to the table on the left. Depending on the color of the drop on the screen, you need to press two buttons below the monitor, based on the equations in the table. For example, to get a purple drop, you need to mix red and blue liquids. Press the corresponding buttons below the purple drop screen. When doing this, do not forget to take a syringe and fill it from the flask located to the right of the monitor. Please note that the color of the drop on the screen may change, so be careful. If you make a mistake while injecting Nabnablin with the wrong liquid, it will come to life and deal a fatal blow to you, and you will have to start the process over again.
In general, when a drop appears, first mix the liquids and inject them into the Nubnablin, and then proceed to activate the red buttons or repair the colored pipes. After successfully completing all the steps, a niche will open in which you will find a floppy disk. Don't forget to take her with you before returning to the main area.
Main zone
If you found a video cassette in the game room where the rose buckets were collected, go up to the high ground on the right and insert the cassette into the monitor to view the recording. This action does not affect the further development of the game, but may offer interesting information.
Return to the Water Sector
After that, return to the Water Sector and move forward along the corridor, then turn left. You will see a huge glazed room on your left. Using yellow key card, which you received at the beginning of the game, open this room. Then take the floppy disk and insert it into the audio player located on the wall opposite the door. Watch the cut-scene where Nabnab and Nabnalina meet. After watching the scene, return to the funicular to meet the octopus.
After a long car ride along with the monsters, you will take control of the octopus again. Your task is to shoot electric charges at the red buttons. First, shoot the first two buttons to make a bridge appear. Then go to the center of the room. You will see three panels on the left. They will be activated one by one. Start by activating the leftmost panel. You have to deal with four slowly moving buttons. Shoot each of them accurately, then move on to the second panel. The buttons will move faster, but the task will remain the same. When the third panel is activated, the buttons will move very quickly. In this case, you just need to shoot at the same point, hoping for luck. As soon as you activate all four buttons, a bridge will appear. Move across the bridge and interact with the terminal to open the door and complete this episode.
How to escape a room
I woke up in the children's room, at the table. A frightening monster with long ears has warned me of an evil overseer who is watching me. If the room turns blue, then it will mean that I made a mistake, and the warden will discover my escape. Will have to start over. When I gained control of the character, I went to the far left corner of the table, where I noticed a passage blocked by four dice. I removed all four cubes to go into a small closet, where I found two red cubes. In order not to arouse the monster's suspicions, I returned the four dice to their places. I interacted with them in the following order: gray, green, red, yellow.
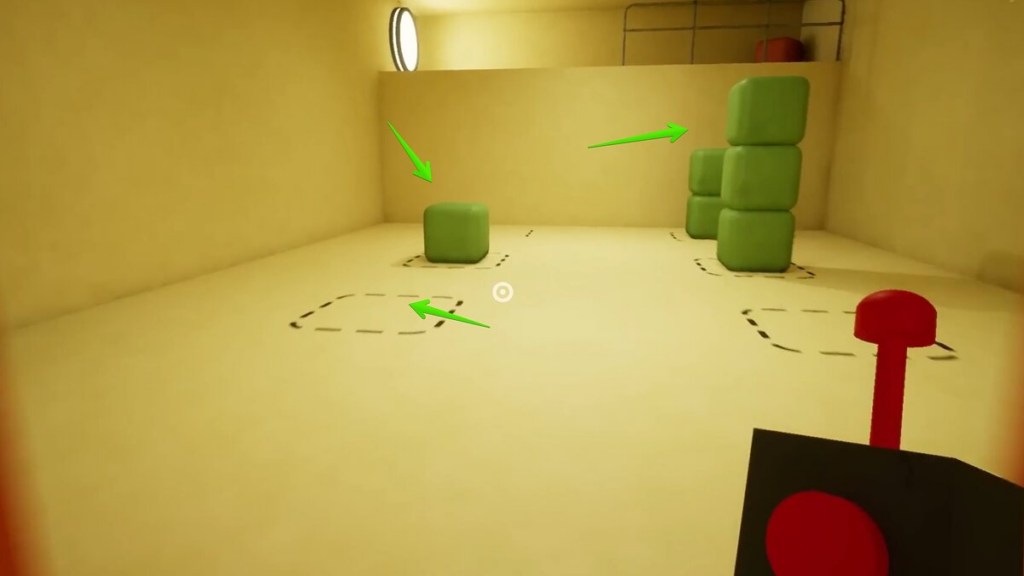
I noticed that one of the side rooms was open. I entered this room without closing the door as it was open by default. I placed one of the two red cubes on the empty space on the left where the square was drawn. Then I went to the end of the room and placed the second cube on top of the stack of two green cubes. I climbed the first red cube, jumped over to the other piles, and took out the third red cube, remembering to take the previous two red cubes with me.
At that moment, the lighting in the room changed. Given that I returned the cubes to the corner, I simply returned to the table and sat in my chair. The monster still did not see what was happening behind the walls. It was important to stay put and also make sure the colored cubes in the corner were in place. I also closed the side doors.
I then opened the middle room and placed one cube each on the left and right on top of the two green piles. I climbed up one cube, jumped over to a stack of two green cubes, and then turned left, jumping over to a stack of two green and one red cubes. From there, I was able to get the fourth red cube. Then I closed the door of the middle room so as not to leave any marks.
After leaving the room, I had all four red cubes. I opened the door to the right room and placed one red cube on the empty space and the other on top of the green cube. I jumped from one cube to two and jumped over a wall of green cubes into a new room. There, I used the drone to push the three red buttons. The other two buttons were inactive. I placed one cube on the left and one on the green cube on the right. Jumping up from the lone left cube, I activated a hidden panel in the alcove. This allowed me to activate another red button with the drone. I repeated this process with the alcove in the upper right corner, but this time I had to jump from a stack of two dice, which turned out to be a bit more difficult. In case of failure, I could always return to the table, remove the red cubes in front of the door and close the door. When I managed to activate all five buttons, a niche opened up. I retrieved the green keycard, returned to the main room, and used the End Training panel.
Then I moved back along with the white monster. My companion left in the elevator, but I stayed in the complex. If the funicular was not available, I could reset the game, for example by jumping into a hole. I took the funicular to the Progressive Sector.
How to get through the Progressive Sector
Arriving in the Progressive Sector, I looked around and noticed the door on the left. I walked up to it and used the panel to open it. While avoiding the pink chick, I took a closer look at the main room, where there were many terminals and various images. The glazed room caught my attention and I noticed a clue. According to her, the blue egg had the value "1", the green bird - "2", and the pink bird - "4".
I started activating the terminals according to the prompt and the equations next to them. First, I activated the terminals to the left of the glazed room, top row in order: "1", "2", "5", "3". Then I went to the right wall and activated the terminals from top to bottom: "4", "1", "3", "4". If everything is done correctly, the nearest door will open.
Moving on, I saw a niche with a hanger. To move the hanger, I had to first "dress" it. I opened a few doors on the left until I got into the boss room.
In front of me was a huge creature capable of attacking with its long tongue or throwing large balls. To avoid the tongue attack, I had to jump onto the platform on the left or right. The monster's tongue could only attack the central platform. As long as I was off the center platform, the monster could throw balls at me. Not to risk it, I returned to the central platform, waited for the enemy to swing his tongue, and jumped to the side.
A few seconds later, I pressed the right mouse button (RMB) to summon my drone. A red button lit up over one of the three platforms. I hit her with a drone and fireworks flew out of her. I picked up the fireworks, returned to the central platform and jumped to the side when the monster tried to attack with its tongue again. Then I threw fireworks on his tongue and repeated this action several more times, damaging the enemy.
When I defeated the boss, I jumped to where this opponent was and took the two cones that fell after he was defeated.
Then I went back to the hanger and installed both cones on it. Then I moved the hanger forward until I was next to the pink chick. I activated the terminal to scare off the chick and caught it. Then I climbed up the hill on the right.
A few seconds later, a large bird burst into the room. I jumped on top of her and interacted with her in succession to mount her. Without delay, I pressed the interaction key to successfully mount the bird, otherwise I would have to return for the cones. Having overcome a considerable way, I coped with this test.
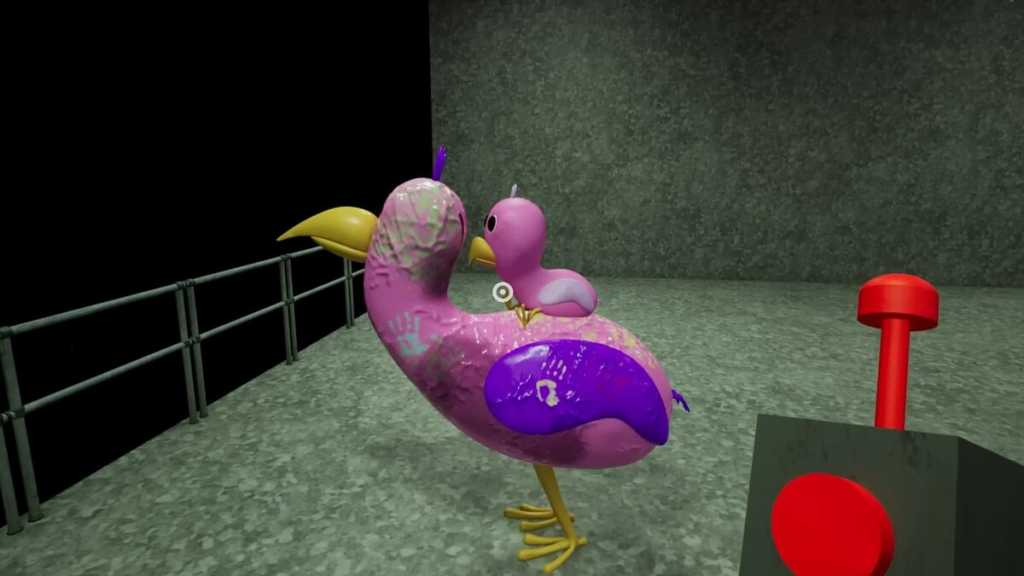
When I saddled the bird, we were outside. I placed a pink chick on a nearby purple bird and interacted with the terminal. After that, I made contact with the monster again. Having completed the conversation, I had to run along a long section with doors. Doors could be lit in green or purple. If the door was green, I let my bird cross the dotted line first. If the door was purple, I slowed down using the "S" key to get past the purple bird. I alternated these actions until I successfully completed this section.
After the cutscene, I activated the terminal and entered the elevator that was in front. Starting the elevator, I completed the passage of the third chapter in the Progressive Sect
Was the article helpful?


