


Passage of the game Lost Lands 9: Tales of the First Brotherhood 100%. All the secrets, puzzles, mini games, collectibles and achievements in one place...
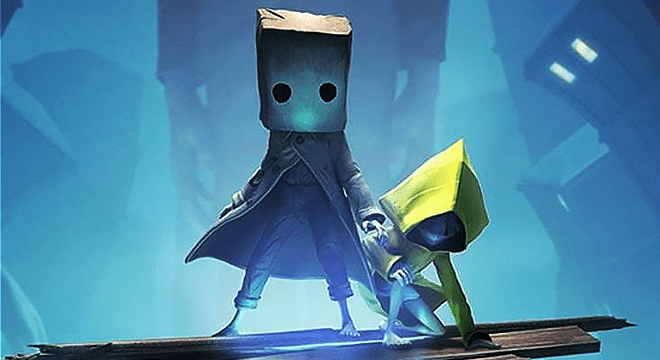
Little Nightmares 2 - 100% Walkthrough Game.
Chapter 1: Passage.
Forest of traps
The beginning of Chapter 1 is essentially a tutorial on the various controls Little Nightmares 2 . When you wake up, go right and jump over the gap. Keep going until you reach a vent and use the right click to open it. Go through a small cave and then run under the bag of hanging bodies. They are allright. I'm sure they're fine, though they attract swarms of flies. Just keep walking until you reach a place with a hanging cage and a trip wire. I don't think I need to tell you what will happen if you touch the rope, so just jump over it.

In the next area, you just need to throw the box over the edge and move it to the other side. This will take you to a cliff where you can sneak under some rocks. When you get out, immediately hold X (Xbox One) Square (PS4) to jump down the hill. If you stop for a second, you will be crushed by a rolling log. Once you are safe, move forward a little and crawl along log under the noose. You will be able to get to the rock and use a hanging rope with a chokehold so that by jumping on it and swinging, you can jump over to the other side. Get to the handle and lower the crate so you can jump on it. Wait until the box rises again before jumping to the broken end of the bridge.
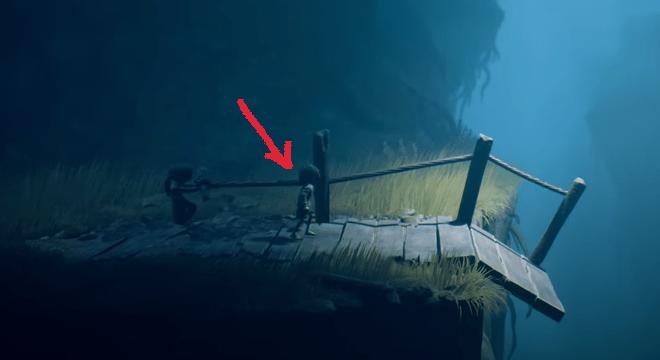
When you reach the next chasm, don't try to jump over to the other side. Hey, I'm serious. You can't do it . Instead, go to the rope on the left, drop down and climb up the boards of the bridge on the right.
Chaotic Remains
When you jump down to the broken bridge, don't jump straight up. Instead, hug the screen and run to the right. You will come across a small tunnel leading to the first chaotic remains.
Jump off the cliff, grab your shoes, and throw them into the pile of leaves on the rise to your right. This will trigger the rope trap intended for Mono. Continue to the right, avoiding the bear traps on the ground. Eventually, you will reach the stick trap blocking your path, so take the stick inserted into it with the right trigger and then hit the trap blocking your path with A (Xbox One) / X (PS4). This will cause the trap to snap shut and allow you to slide down the hollow log.
Chaotic Remains
As soon as you get out of the log, crouch and go left into the cave. You will find the remains of a dead rat stuck in a trap.
Take the stick lying near the stone and hit the ground. This will trigger traps in that area. Move forward and repeat this process. Next, the cones that need to be thrown into the leaves. There are multiple groups of traps, so you can't trigger them all in one throw. Once it's safe, cross the fallen log, jump onto the makeshift ladder, and then make the last jump across the chasm.
House
Run across the field filled with cages to get to the big house. Climb up the porch, climb onto the crate and enter the kitchen through the open window. You will land on a counter, so just jump down and head towards the door on the right. You can also get the achievement "What is in the box?” by opening the refrigerator in the rear right corner. Just jump up and let the Mono hang on the handle until it opens.
Headdress #1
When you enter the corridor, run to the cell and turn left. You will see the first collectible hat in the game, lying in the center of the room on a rug.
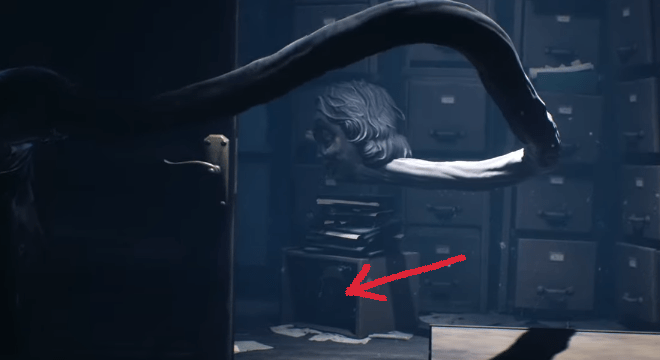
Walk into the corridor and enter the ajar door. Go down the stairs and enter the room on the right. You will see an ax stuck in some tree, so jump up and grab it. Mono will knock out the axe, allowing you to carry it with you. Drag this weapon into the room with the stairs and break open the door on your left, where a little girl is playing with a music box. This is Six, the main character of the original game and your new best friend. The sixth will quickly fly away as soon as she realizes that she is free, so go upstairs, down the corridor and go through the right door.
Just ignore the intimidating table with the remains of the bodies and climb up the closet to the air vent. When you jump down, Six will realize that two little people are better than one and will agree to help you. Work together to go down the attic stairs and upstairs. In the attic, slide the suitcase to the left towards the chest of drawers so you can climb over it. This will take you to a room where the key is hanging on a hook next to a suspended body tied to a winch. However, there is no winch handle, so ask Six to help you over the chest of drawers on the left. You will find a dead "body" in the chair holding a pen, so grab it and pull it out, albeit with a hand.
Bring the lever to the room where the key is and let Six insert it into the right hole. Approach the body and hold onto it as Six lifts you up. Once you're high enough, jump over to the key, grab it, and start swinging it around until it drops. After picking up the key, go to the chest of drawers on the right and open the shelf up.
Headpiece 2 (only available with Nome's Attic DLC)
When you pull out the chest of drawers, a gnome will slip past you. Turn around and follow the gnome back to the room where you have the winch. Follow him through the cabinets and drawers to the crawl space above. You will now need to find the gnome four times before it flies off into the next room.
Here is the order of places in which the gnome will hide:
- Suitcase — take the suitcase and press the control stick to open it.
- box on the shelf — throw the shoe into the box to release it.
- Bedside table — pull on the box.
- Chair — Jump on the pillow until it escapes.
Once the gnome leaves the chair, he will enter the vent under the painting on the right. Follow him into a dark room where the only source of light is the nome. Your goal here is to guide the gnome around the room by running under it. Go under the nome and go to the end of the room. Then go right until your little friend stops on a shelf. Pull the cart to the right so it can sit down before moving it to the right.
After moving to the other side, run to the far right side of the room. This will cause the nome to open the gate for you. Approach the lever on the wall and pull it to turn on the power. Return to the room where you led the nome and go to where he was hanging out. Here you can pick up nome headdress.
Go down the attic stairs and use the key to open the door on the right. This will take you outside where you will start to hear strange noises coming from the barn. Since this is a horror game, go explore the barn with Six.
Chaotic Remains
Before exploring the shed, go to the outbuilding between the house and the shed (toilet, like a sartir). Use Six to lift you up so you can grab the latch and unlock the door. The third collectible is on the toilet.
Hunter
Inside the barn you will find the Hunter. He butchers someone on the table and is very passionate about this process. Just go to the other end of the room behind him to the wooden door, which you can push with Six and fall out into the street. This will trigger a chase scene in which the Hunter breaks out of the hut. Run quickly down the hill, taking cover behind the crates as he reloads the shotgun. If you are not behind the crate when he fires, Mono will get hit and killed. Keep running until you reach a small ledge that you can hide behind.
Wait until the Hunter passes, take Six by the hand and enter the field. Hide in the tall grass and slowly duck down and walk next to the Hunter. When you disturb the crows, stop and wait for the Hunter to continue moving. As long as you are squatting and still, he will not see you in the grass, even if his light is directed at you. Go to the cave entrance and go inside. Quickly run to the right to avoid the next shotgun blast into the hole before continuing.
When you get outside, go to the broken bridge and take the rope that sticks out of the last post. Start pulling her back to raise the left side of the broken bridge so Six can cross over.
When she crosses, let go of the rope and approach the edge of the bridge from your side. Press Triangle Y (Xbox One) (PS4) to summon Six. She will run to her edge, holding out her hand to you. Accelerate and jump across the chasm by grabbing Six's arm with the right trigger. She will take you to the bridge.
Headdress No. 3
Before heading to the right, climb up the wall of cages on the right until you're parallel to the one hanging. Jump on it and start jumping on the roof of the cage. After a few jumps, the cage will fall to the ground and you can pick up the hat inside.
Approach the next cliff and get ready to run. While it is possible to slip past the Hunter here, timing is extremely difficult. Instead, run to the first crate and let it absorb the shotgun blast. When he starts reloading, approach the crate by the stairs and wait until he takes the shot. Now start climbing as fast as you can. The hunter will fire a third shot, so use the hanging TV as cover before reaching the rafters. Run along the rafters and jump back into the water. Hide below deck until the Hunter decides to move on.
Swim to the right until you reach the pier, where a board will block your way. Hold the left trigger to dive Mono and Six, allowing you to slide under it. Continue to the right, avoiding the Hunter's light. If you think you're going to be caught, dive underwater so he doesn't see you. When you arrive at the small island, climb up and lower the tree into the water. This will alert the Hunter, but you can hide from his shots behind the barrel. As soon as he stops shooting, dive under the water and continue to the right. Keep moving in this direction until you get out of the swamp.
Now run straight to the barn, again using the boxes for cover. When you enter the hut, Six will slam the door, allowing you to take the shotgun from the shelf. Work with your new comrade to hit your pursuer in the stomach and kill him. Go outside and push the door into the water. This will trigger a sequence in which you drive quietly towards the Pale City. Once on the beach, get off the makeshift raft and head to the door on the right, finishing the level.
Chaotic Remains
You will find the last remains standing by the TV on the beach. They are quite easy to find as there is only one TV in the middle of the sand.
So you escaped the Hunter and headed into town with Six. Congratulations, the real nightmares are about to begin.
Chapter 2: Passage.
When you gain control of the Mono, go right and climb through the hole in the wall. Cross the street and climb through the broken window in the big bar. Keep walking straight through the bar until you reach a room with several broken TVs stacked on top of each other. You should see an opening on the right, which is above Mono's head. Use Six to go up into the room and then approach the broken TV located behind a rope with a noose hanging from the ceiling.
Jump from the TV onto the rope and swing back and forth to another TV. Instead of jumping on it, keep rocking back and forth so Mono can push the TV with his feet into the hole below. This will lift Mono up several floors where he can jump onto the planks. Now enter the room on the left, push the TV over the edge so that Six goes up to the floor above you, and then go up the stairs. Wait until Six is in position in front of you before running, jumping and grabbing her arm. Remember, she has to squat with her arm outstretched for Mono to cross safely to the other side.
Chaotic Remains
After you reunite with Six, go through the door on the left. This will be the same passage that Six passed through when she drove up to the TV. You will see the first chaotic remnant lying nearby.

Go through the beams into the room with the rotten door. Make your way through the hall, forcing the TV in the center of the room to turn on. This will disorientate Mono, so walk up to the TV and interact with it. You will be prompted to "Set Transfer" using the left joystick. Press the joystick until the screen turns bright white. Repeat this process one more time, finding the sweet spot until the TV turns white to transport the Mono into the long hallway. Run to the door with the eye until Six pulls it away from the TV. Exit the room through the right corner, jump down and pull the dumpster to the left so you can climb through the hole in the fence.
Go to the front right side of the school building to see a long makeshift rope hanging down. Before climbing, remember to grab and chaotic remainsand headdressfound in this area!
Chaotic Remains
You will find the second remains in the school yard. When you get over the fence, go back straight to where the broken tricycle and trash can are.
Headdress
The hat can be found on a dumpster by the steps leading to the main entrance to the school. Climb the steps, climb over the railing and take the hat from the dumpster.
School
Climb this rope to enter the school. Keep moving to the right until you reach a corridor that drops off to the right and in the middle. Pressing the switch on the right will turn off the electricity on that floor and some lights will shine through the photo on the wall. Well, it's interesting, isn't it? Turn on the lights before walking down the long hallway.

Enter the room on the left and take any of the toys on the floor. Run back into the hallway with the switch before throwing the toy at the painting to knock it down, revealing a hole in the wall. Go through the hole to get into a room that is clearly meant to punish children. In the middle, you'll find a loose floorboard that can be moved if Six and Mono jump on it at the same time. Go through the vents until you reach the lower floor of the school. You will be able to catch a glimpse of the teacher, but for now, you don't have to worry about her.
Instead, keep going to the right until you reach another room. Watch out for a raised board on the floor. Stepping on it will cause a bucket to fall on Mono, killing him. Instead, either jump over the board or touch it and run back the way you came. After you get past the locker blockade, you will enter another room with a trap floor. Stumble and take cover behind the table next to the camera. Once both buckets stop swinging, walk down the hallway to see a group of kids. Even if you can go through the door on the right, the child will close the vent. Instead, run down the corridor, but stop before reaching the end. A massive locker will collapse in front of you. Climb this locker and enter the door on the right.
Walk slowly down the corridor. Next to the toy, you will see another raised wooden floorboard. Stand on this board and immediately duck down so that you are not decapitated by the lamp. Climb up the lamp and jump over the table. About halfway down the next hallway, a locker will fall and catch Mono, causing a bunch of dolls to attack Six and drag her away. After a short skirmish, Mono will free himself. Climb over the locker, grab the hammer and use the A (Xbox One) / X (PS4) button to smash the doll in front of you into pieces. Take the hammer to the next room, but don't get close to the doll. Instead, slam it on the floor to call the doll to you, activating a trap that should kill it.
Chaotic Remains
After climbing over the chair into the new corridor, go to the third locker. It will be the one with the stack of books in front of it. Ask Mono to open the locker to reveal a collectible inside.
Class

Walk down the corridor until you reach the classroom. Hold on to the back row of students and hide behind them when the teacher turns. You can predict when she is about to turn as she will start writing at the bottom of the board before hitting her. Take your time when crossing until you reach the filing cabinet. Now start climbing up the bookshelf, but be prepared to jump off it. About halfway through, the shelf will start to fall, so jump down and run out of the way immediately. Hide in the overturned box until the teacher puts his snake neck back into the classroom.
Take the key and go through the vent back to the classroom.
The teacher will now patrol the classroom, disturbing the students with his ruler. All you have to do here is hide under different tables and wait for her to pass by. Keep doing this until you are back through the class you came from. Approach the locked door and use the key to open the elevator. Climb to the next floor, enter the room on the right and attract the attention of the drawing doll in the center. Run to the other side, grab the pipe, and smash the head of that pesky bastard. Now use the pipe to open the door before climbing up the shelf to the vent.
You will crawl out of the classroom and accidentally knock over a bottle. No wonder the teacher explores this sound in the most disturbing way imaginable. Run and hide in the box until she leaves. Now cross the beams until you push the bottle away, making the teacher alert again. Hide in a nearby crate until she leaves before climbing up the rope. Approach the vertical plank in the background and push it forward to make a bridge. The teacher will investigate one last time, so hide in the box in the foreground. You won't be able to cross the bridge in time, so do not try. Once she exits, cross the bridge and enter the large library.
Chase Library
metal hat
When you jump down into the library, you will see a moving staircase in the background. Insert it into the middle shelf and go upstairs. You can take the metal headpiece on the left and add it to your collection!
Now push the ladder all the way to the right and go up it. As you jump and run across the plank towards the camera, Mono knocks the book over. This causes the teacher to give chase, so chase him around the shelves until you reach a small tunnel with books. Exit the tunnel and jump over to the first pillar of books, grabbing onto them to keep from falling. Climb to the opposite side and jump to another column. Mono will knock out a few more books again, which will lure the teacher. Quickly move to the lower right and wait until the teacher's head starts moving to the right. Now go up to the top left corner so you won't be seen.
Wait until she leaves before jumping off the pillar to the ground. Hide behind the books until the teacher passes by. Now run to the shelves and push the box of books towards the door. Jump off the box and grab the door handle to open it. Enter a large room with stairs leading to the center.
Chaotic Remains
Go up the stairs in the center and turn left. You will see the remains of a child sitting under the railing near the bottles.
Chess puzzle and key
Climb up the central stairs and go right to the camera. You will see some giant chess pieces, so take the top of the rook and place it on top of the white piece that is missing the top. Climb onto the Rook, jump and grab the handle of the door that opens the room. In this room you will see a large chessboard with a bunch of topless pieces. A doll is also tied to the center, but it will not attack you. Ignore the parts for now and run towards the poster while looking at it. Grab the bottom piece to reveal the board drawing, including where you need to place the missing tops for each of the white pieces.
- Rook — You can find the top of Rook by the door. Just use the one you jumped on to get to the doorknob.
- Queen — place the rook on the white piece near the table on the left. Climb onto the rook and then onto the table where the queen is.
- Elephant — run past the chessboard on the right, climb onto the table and grab the top of the elephant.
When you have all three pieces, place them in their places to turn on the lamp above the table on the right. Climb onto the Rook and then onto the table. Grab the handle to open the secret door that contains the key. Go back down, open the door on the right and go into the corridor.
Chaotic Remains
Before climbing into the window on the right. Move the food tray away from the door and then open it. You will see the remains in the freezer near the dead body.
Kitchen
Let's get ready for the rumble!!!
When you enter the kitchen, climb over the metal tray and grab the ladle from the floor. It's time to break the skulls of the bots. Smash the first one in the center of the room, and then get ready for something that will lunge at you from behind on the left. Wait for him to stop lunging before hitting him in the head. The next one will be on the left, so once again wait for him to hit before breaking his skull. Your last opponent will come down from the trays. After all four have been defeated, approach the doll's undamaged head and put it on. Now you can slip past a crowded cafeteria of dolls that will kill you if you don't dress like one.
Laboratory
Make your way through the cafeteria and the noisy corridor until you reach another toilet with a locked door. Unfortunately, Mono's fake head will break when you enter. Although you can't open the door, you can throw something at the button! Climb up the shelves and follow the boards until you reach the very top. You will see a brain in a jar along with a meat hook. Drop the jar on the ground and grab the hook. He will go down, which will allow you to avoid the difficult descent down. Take the brain (fu) and throw it at the button to open the lab doors.
The teacher is here, so crouch down and go through the vent under the table she works at. Chat under the table until she walks across the room and then move under the chest of drawers at the back of the room. Eventually, the teacher will enter the room on the right, so open the door and follow her into a large lab.

Climb up to the shelves shown above and then slowly make your way across the table. Be sure to crouch behind each stack of books and cans or you'll get caught. You can't run away from the teacher, she is very fast and has a huge reach. Instead, take your time across the center table before jumping over two tables until you can jump into the next room. Now climb onto the bookshelf to get to the vent.
Liberation of the Six
Let's get back to destroying the stupid dolls. When you exit the vent, take the hammer and don't go near the doll. There is a trap bar, so stay on the mat and hit it with a hammer. This will cause the doll to lunge at you, making it easy to kill. Two more will lunge at you, so wait until they are about to hit and brush them off. Drag the hammer to the next corridor and go down to the chamber. The other puppet will attack from behind, so quickly send it to the other world before the one above you attacks. If you die here, return to the trap room to retrieve the hammer. As soon as you enter the bathroom you will see Six hanging above you with only two dolls standing in your way.
Break the plank with the rope wrapped around it to free an ally.
Go to the table on the right, then open the window and walk across the board. Inside, you will see a piano attached to a winch, which is conveniently located at Mono's height. Grasp the handle and keep lifting the piano until it breaks and falls to the floor. Now climb up with Six until she falls through the floor and gives you access to the lower room.
Music room
Go to the vent on the left and let Six take you upstairs. When you land in the debris, move along the back and wait for Six to get the doll's attention. Take the pipe, smash it to pieces and take the key from the dissected frog. Go through the gate and the locked door. You will enter a room where another doll is painting, however when you go to grab the hammer, Six will beat that doll to death with her bare hands. How? Are you surprised that a fragile girl can handle a stupid toy?
Go to the music room, letting Six help you sit on the shelf. Knock the box down to the ground so Six can climb up and go through the vent. Slowly make your way to the floor where the teacher is playing. Move around the room and stop right before she stops playing. Wait for the teacher to resume work before approaching the winch. This section is all about patience. Only turn the knob while playing, so if you're not sure when it will stop, just hold the knob and watch. After Six crosses the light, push the stool across the floor, stopping again when the teacher stops playing.

Outside
After reaching the shelf, climb up again and run through the lighting to the air vent. The teacher will give chase one last time through the vent, so quickly run away from this monster until you get out. Now go straight across the massive, precariously located bridge. Keep walking until you reach a place with a trash can and a broken TV. Slide the trash can towards the background until the lid closes, then slide it to the right. Now you can jump on the TV and then on the trash can to get to the broken road on the right.
Chaotic Remains
You will find another collectible right after the trash can section. There will be a small hole where a confused child is playing with a paper boat.
Finally, go through the store and exit the window on the right. Go to the TV dumpster for Six to help you up. Run across the roof, jump down and push the wooden plank so Six can climb over the fence. Enter the building on the right to complete the second chapter!
So you think the worst of Little Nightmares 2 is over? Welcome to the Hospital, a terrifying place and the main place in which the third chapter takes place.
Chapter 3: Walkthrough
When you spawn, go straight through the corridors and push through the door at the far end. After Six saves Mono's life, follow her across the beds. Take your time when jumping because leveling the Mono can be a little tricky. After reaching the floor above, remove the fuse from the control panel and run with it to the other side of the hall. Place the fuse on the right control box to open the door to the elevator shaft. After jumping onto the elevator, it will start to break, so quickly hurry to the front right side. You will see an air vent that Six and Mono can open if they work together. Pick it up and quickly enter the vent before the elevator crashes.
You will find yourself in a very dark room, in the center of which lies a flashlight. Take this light source to permanently add to your inventory. The flashlight can be turned on and off by pressing B (Xbox One) Circle (PS4). In addition, you can move to where Mono shines with a flashlight using the right joystick. Go to the next corridor with a long row of hospital beds.
Chaotic Remains
Before heading to the right, run down the corridor with the beds. You will notice that the remains are to the right of the door.
Keep going right until you reach another corridor that splits. Unfortunately, the door on the right is barricaded, so run down the middle corridor and enter the room with the lights on. By the wall, you should see a vending machine with a lever that Mono can grab. Pulling it down will reveal a soda can that can be thrown at the button to open the next area. Here you will have another TV tuning section, so move the left stick until you reach the desired frequency three times. The sixth will save Mono again and you can explore the waiting room.

Waiting room key
Instead of going upstairs, go right and continue past the elevator. You will enter a room with an x-ray machine that can be turned on by pulling the lever on the right. Near the table you will see a picture of a stuffed animal with a key in it, so go to the game room on the right.
Headdress
Inside the playroom, on the right, you will see a large shelf filled with toys. Climb up the shelf to get the hat on top.
Despite what the picture would lead you to believe, the bear is not really the key. Approach the plush rabbit on the right, take it and head to the elevator, which is located between the X-ray and the waiting room. This will take you to the crematorium where you can drop the rabbit and burn it by pressing the switch on the right.
With the key in hand, take the elevator up and go to the waiting room. Climb the stairs and turn right to the locked door. Once you've unlocked it, keep going through the operating room until you reach a long hallway that's completely crammed with mannequin parts.
Chaotic Remains
In a long hallway filled with mannikin body parts, run all the way to the end to see Glitching Remain jump onto the toy duck on the shelf above.
Fuse one
Go to the cell in this corridor until you reach a door with a broken window. The sixth will help you up, so head through the door to the room with the mannequin strapped to the operating table. This is where things get a little tense. Quickly run to the other side of the room and push the box to the side. This will cause the hand to revive and start chasing you. Run across the floor and climb onto the metal shelf in front of you. When you fall to the right, run to the other side of the room and jump over the hand that is thrown at you. Grab the table and climb to a safe place.
See that metal shelf on the right side of the room with the chain side? Run towards it and start climbing. Don't stop as the hand will be in hot pursuit. Enter the vent and follow it to the other end to briefly avoid the angry hand. When you land, go down the corridor and enter the room on your left. You'll hear a hand go through the vent above you, so keep going to the left until it falls in front of Mono. Overwhelm her by moving sideways when she lunges, or by jumping over her. Climb onto the table on the left to make it slide off.
Climb up on the shelf. This time, instead of running to the table, grab a hammer and get ready to pay. When the hand attacks, wait until it lifts two fingers off the ground. If you swing before it, the hand will dodge your attack. With both fingers pulled back, lower the hammer to cut them. Do this two more times to permanently kill the bastard. You can never be safe. With a hammer in hand, push the box to the left of the door, break the glass and take the fuse on the table. You will be reunited with Six, who is playing with a mannequin hand in the next room.
Fuse two
Ready for one of the scariest parts Little Nightmares 2 ? With the fuse in hand, return to the waiting room and run left to the second floor. Insert the fuse into the control panel to open the metal gate. Go inside and go down the corridor to the door with broken glass. The sixth will help you get up again by throwing you into the room with the switch and the tall mannequin. Pulling the switch will turn off the lights in the room, causing the mannequin to come to life and attack. You will need to bring it at least to the middle of the room. This will give you enough room to run from this creature. Do not forget to periodically shine a flashlight on him so that he stops moving. This is a very fast opponent, so don't underestimate his ability to quickly close the gap.

Once you've made it through the bars safely, continue down the spooky corridors until you reach a large room with about half a dozen mannequins. Two of them are enemies, so you will need to juggle light to survive. Run to the one on the left and shoot it down by going around it. You need to get to the bed on the left side, so keep shining on those enemies until you reach this area.
The advice for these enemies is to move with the left stick while aiming manually with the right stick. This allows you to move backward while lighting up enemies. You'll want to practice moving and aiming your flashlight because it's absolutely essential to survival.

The next section is a little more difficult because you will need to control three dummies on a micro level. Move to the middle of the room and run to the left. This will prevent you from being picked up by the mannequin closest to the screen. Another one is on the back left, and the other one will be waiting a little behind the camera on the left. This part is… annoying. You will need to quickly move to the left side of the room and then to the back where the glass in the door is broken. Don't try to just run away from these enemies, they are too fast and will often catch Mono when he is climbing. Instead, do it slowly and always try to shine your light on multiple dummies at the same time.
After you escape these dummies, just follow the path until you reach a long hallway where Mono has to run towards the camera. As you walk down the hallway, the mannequin's arms will explode on both sides, trying to grab Mono.
Chaotic Remains
Before heading into the nightmarish mannequin room. Turn around and go to the big green gate. You will see a hole in the lower right corner that Mono can slip through. Now just enter the room on the left to find the remnant lying by the hole.
Stay close to the center so you don't get caught. Once you reach the end, the door behind you will swing open and you will be attacked by crawling mannequins. Instead of shining your light on them, save your life. Head straight into the next room, quickly crawl under the bed, and then run across the filing cabinets on the right. Climb them to escape and jump into the shower room. Press the switch against the wall to turn the power back on.
Chaotic Remains
Before you leave the shower room, go to the back left corner and move the soap box away. This will open up a vent that you can crawl through. After going through the vent, you will enter a room with a bathtub and a remnant standing next to it.
Approach the closed door, take a piece of soap and throw it on the button. Now run back to the lever and turn off the power. Upon entering the next room, a wheelchair mannequin will jump out and attack. Shine a light on him as you step back into the shower room. Keep the light on this opponent until you reach the lever. Turn on the power, run past this enemy into the next room and push the wheelchair towards the door.
Proceed into the next room and get ready for the last attack of the creepy dummies. Shine your light on them as you move through the building and never stop. A survival trick is to move around while flashing lights all over the place to briefly stun enemies. You'll be safe if you crawl through the door to the ECT room. Now just pull the switch to pop the fuse, drop it into the container on the door and exit with Six. Return to the waiting room and insert both fuses into the control boxes to activate the elevator.
Morgue
When you arrive at the morgue, follow the dark spooky corridor until you reach a room where the door is boarded up. Oh look, the creepy dismembered arms are back, hooray… Six will quickly run to the locker to keep one from escaping. Pick up the handset and repeat the same hand control method as before. Wait until he's about to hit before hitting him with the pipe. After about two hits, the second arm will burst out of the locker and attack. Try to maneuver so that both hands are next to each other. This ensures that you can hit both at the same time. If that's not possible, just be prepared to take down the second one when he attacks. After both are dead, help Six with the last plank into the next room.

Now you will meet the perverted doctor who created the monsters described above. Make your way through the shelves until you reach a room with an operating table and two drawers. Hide behind the first crate until the doctor turns his back to rummage through the shelves. Quietly walk across the room to another crate and wait until it moves to another set of shelves on the left. If you mess up the time, just wait until he returns to a Hidden Object Scene before moving on. Go through the vent and take cover under one of the beds.
The Doctor will break through the door and crawl into the room. Wait until he heads to the back of the room before heading to the right. You will need to grab one of the toys from behind, so hide under the beds when the doctor is around. Once the doctor exits the back of the room, grab the toy and return to the right side of the room. Throw the toy on the button to open the gate and call the doctor. Quickly hide under the cart until the doctor is completely out of the area. Now just go to the cabinets on the right, climb up and go through the vent.

mortuary key
When you enter this part of the morgue, you will be instructed to find the key. Go to the locker next to the open one and pull it out. Climb into the box so that Six will push you to the other side. Now pull out the locker in the right back corner before moving on to the other side of the table. Pull out the bottom locker, climb onto the corpse and grab the locker above you. Now just climb over the elongated bodies to get to the upper left shelf. Now you can take the key to open the door in the next room.
Headdress
The last hat in chapter 3 is in the room above. At the long table in the middle, you will see a row of lockers on the floor. Go to the one closest to the table on the left. Pull it up to reveal the bandage.
Mortuary fuse
You didn't think you were done with the doctor, did you? Climb into the vent on the left and hide under the large table in the center until the doctor turns away. Go under the wooden table on the left and relax for a moment. Once the doctor is distracted, run to the raised vent on the left and ask Six to give you a push. You will see how someone is trying to survive in a hospital bed along with a ladder leading to the roof. Climb the ladder to the roof and jump down to the lever on the left. This will cause the patient's line to line up and the doctor to call to you. Hide under a bed or a small table until you can sneak into another room.
Pull out the corpse and use it to climb up the fuse above you in the back right. Bring the fuse to the door and insert it. This will cause the doctor to give chase, so run through the door as soon as it opens. Don't hide under the bed, the doctor will catch you. Instead, just run down the corridor until you reach a place with a massive furnace. Climb into the furnace so that the doctor will chase you. Make your way through the ashes and exit the vent that Six opens. She will slam the door on the doctor, allowing you to hit the switch to cook him alive. Now pull the lever by the elevator to escape the hospital.
Now that you've escaped the horrors of the hospital, it's time to head to the Pale City. While it's easy to trip over monsters in this game, get ready for some clever puzzles and exciting chase sequences.
Chapter 4: Walkthrough
Multi-family houses
After leaving the elevator, go straight through the waiting room of the hospital and go outside.
Chaotic honeycombs
Before continuing, head to the background when you first step outside. You should see a hatch near the back that Mono can climb into. Don't jump, the fall will kill him. Instead, go down the stairs to find your first remains in this location.
Make your way through the abandoned streets until you reach a big road with a bus stop. Ignore the bodies falling from the sky in the background and go into the apartment building on the right. Climb the stairs until you reach a room where another person falls through the floor. Wait for him to leave before following him into the next room. You will find that the man is dead, his head pressed against the TV.
Climb onto the TV and jump onto the windowsill on the right to escape. Now head up the stairs and jump onto the roof of the next building before entering. You will hear other people chirping, so stay in the foreground as you walk. These people appear to be blind, so don't worry about using a flashlight. Go past the two into another room and use Six to get to the doorknob. Don't worry about the person watching TV in the bathroom. Go through the vent and you will find yourself in a large elevator shaft.

Follow Six through the shaft to the other side and then into the elevator. Pull the lever and jump out onto the wood-paneled concrete slab up the right side. Crawl through the hole and climb up the wooden boards to the floor above. You'll need a key to open the elevator gate to reunite with Six, so head down the hall to the office on the left. Open the bottom right drawer to get the key. Open the elevator gate. After Six is out, pull the elevator handle to send him down, but run out of him before he starts down. Now, with the help of Six, pull the lever on the left to raise the elevator so you can jump up.
Chaotic Remains
When you're done taking the elevator to the maintenance shaft, pull the box out of the vent on the left. Follow the vent to the secret room, where you will find the remains on the mattress.
Go right and exit to the roof. Keep going to the left and jump across the gap to another building. You will also get a great view of the sinister tower in the distance.
Chaotic Remains
Before you start climbing the fence to the next floor, go around it and jump through the window. Inside you will see the remains and a bunch of rats in cages.
Climb to the next rooftop and approach the raised concrete block. Have Six help you up and grab the lever. Keep spinning it until Six can grab the hanger before moving the rope back to the fire escape. After she jumps off, Six will extend her hand, signifying that it's time to take another leap of faith. Sprint to jump over the gap and grab her hand. Now climb up the fire escape, ask Six to throw you up to the stairs and climb into the next building. Walk to the right and start running as soon as the roof starts to sag. When you get to the door, push it and keep running. The roof around you will collapse, but you will hardly do it.
TV Madness
Once you've regained control of Mono, help Six get out of the rubble. Unfortunately, you lost your flashlight in this chaos. In the next corridor on the right you will find a nursery, but ignore it for now. Walk down the corridor and enter the living room. Mono will interact with the TV again, so tune in to the desired station. However, this time something will come out of the TV as soon as Six pulls it away. This is a Tall Man, and he is intimidating. Once you regain control of Mono, run . Return to the corridor and dive under the bed in the nursery. Before disappearing, Tall Man will turn Six into chaotic remains.
Return to the living room and work twice with the TV. The second time we see Mono is pulled into the TV and taken to another area of the city. Now climb onto the shelves behind you and interact with the TV on the left. This will bring Six to the outside. Approach the lever near the TV and turn it until the TV is hanging over another roof. Now go back to the TV inside and climb through it to the roof. Climb to the next floor and drop out. Here you'll find a remote control that lets you turn the TVs on and off if you're close enough.
Turn on the TV next to you, interact with it to go upstairs, and drop down into the trash below. Before you go through the vent on the right, turn on the TV above you!
Headdress
In the stack of letters, you will see an air vent hidden behind a crate. Crawl through the vent to find another hat you can grab.
Go through the right hole until you reach a new room. Slide the trolley back to the left towards the center of both broken sections. Now turn the TV to the right and use it to turn the TV back towards the vents. Jump across the abyss to get to the other side. Keep going to the right until you reach the place where the cart and the TV are. Use the moved cart as a platform to help you get across the gap.
Grab the hanger and ride it to the next set of apartments.
Chaotic Remains
When you land in the apartment, turn around and climb out the window. Run along the tent to the window in the background. Go through it and look for an object next to the statue of a man that may seem very familiar fans of the original.
You can also drop the figurine on the floor to unlock a trophy/achievement!
When you arrive, ignore the man at the TV for now. Don't worry, when they watch TV like that, they won't see you. Instead, go to the kitchen and climb onto the sink. Use the remote to turn on the TV outside before returning to the living room. Hide by a chair and turn off the TV that fascinates the person. This will make them run to whatever is in the kitchen. Now turn the TV back on and use it to warp on the outside.
Climb to the next roof and turn on the TV across the gap. Like the previous person, turn off the TV so they chase after it and fall to their deaths. Everything is fine. I mean we already killed the doctor, what else? Go through the gap through the TV and take the hanger to the next area. Ignore the people falling to their deaths and jump through the hole in the roof. Before you turn on the TV, climb up the fire escape through the window and leave the monitor off. Now turn on the TV in the room and use it to warp.
In the next room you will see a pool of water with a lever next to it. Go right and tear off both bottom boards. Once that's done, turn around and run for the lever. You should have enough time to electrocute the water, killing the person chasing you.
In the next room, turn on the TV next to the elevator and then jump through the hole in the wall to get to the lower floor. After leaving the room full of trash, take the bag with the red logo and place it under the elevator. Pull the handle to open the elevator doors, enter the elevator, turn on the TV, and then pull the lever in the elevator. This will take you back to the top floor.
Pull the elevator handle a second time to lower it. Quickly use the TV in the elevator to fly over to the top floor and jump onto the top of the elevator. Jump out through the opening into the corridor between the two areas where the elevator stops. Get outside and go downstairs. Ignore the crowd of people, climb into Toy Story and grab the grocery cart in the back right corner.
Headdress
You will find the second hat on the shelf by the window you climbed through. Use the shopping cart to get to the shelf to get the hat.
In the toy store, go right and take the cart. We roll down the ramp into the electrified water and climb onto the shelf. Take time to get a seat before jumping on the cart and then on to the next shelf. Jump down (don't worry, it's safe) and go to the next room. Climb up the table and shelves to reach the vent and pull the lever to turn off the power. Return to the cart and place it between the middle shelf and the TV shelf. Since the power is off, I recommend you practice jumping. After making sure that you will succeed, return to the lever, turn on the power and go to the TV.
When you go through it, you will find yourself next to a large group of hypnotized people. Turn on the TV in the store on the right and then turn off the other one. This will distract the two closest to you and allow you to sneak into the store. The moment you enter the store, the TV will break, so save your life through the department store. Eventually, you'll come across a TV that Mono can navigate through, saving you from a mob of angry people.
From the room you ended up in, go right and inspect the TV when Six appears. Unfortunately, she is captured by the Thin Man before she can escape. When this happens, the ax stuck in the wall will fall. Immediately take the ax and start working on the rotting boards on the right. Once you break through, go to the bathroom and climb up the wall into the crawler. Walk across the beam, stopping whenever the Thin Man looks through the holes. Stepping out into the corridor, quickly grab the stool and press it against the window sill. Climb up, remove the board and run away before he grabs you.
Continue moving through the carriages to trigger a new chase scene. It's pretty simple, just make sure you don't get caught on luggage or seats while you run. After you have broken the train car, follow the Sixth projection to the beginning of the street. The Thin Man will try to kill Mono, but this time you can counterattack! When he reaches out, imitate his movements with Mono to interrupt his attack. Think of it like setting up a TV, only this time you're following the pattern of the Thin Man, not the TV. After 3-4 such attacks, Mono will defeat this person and be transported to the Tower.
This is the last step in Little Nightmares 2 . Keep in mind that we will be spoiling some important story points throughout the playthrough, so remember to only read as you progress through the level. However, I will omit the final ending so that you experience it for yourself.
Chapter 5: Walkthrough
Musical puzzles on the door
When you enter the tower, you will hear music coming from the door in front of you. Approaching the door, it will close in front of Mono in front of the face, which will open the door to your right.

Go through this door and up the stairs to the next door. You will now enter a room with two doors, one of which will play music louder than the other. This is the door to go through.
For the first puzzle, the door order is 1, 1, 2, 2.
Upon exiting the last door in this sequence, Mono will spit out into a long hallway with three doors in a row. Choose the one in the center where the door itself folds inward. This will place Mono in a room where the two doors on the right are closed and only the one he came out of is open. Head back through the door you just came out of to get to another set of stairs. Climb up the stairs to get to the next area.

Before starting this puzzle, I recommend opening door 2 so that you have access to it and door 3.
Once this is done, the correct door order is 2, 3, 4.
Mono will re-enter another ladder that you must climb to another musical puzzle.

The puzzle next door can be a little tricky as you have seven doors to keep an eye on. Four of them are on the left and three on the right. Three of them are at the back of the room and can only be entered by using a wooden plank. Before you start the puzzle, go to the wooden plank in the center of the room and push it through the gap. This will allow you to access both sides without dying.
The correct door order is 7, 2, 3.
Oh, look, another ladder. Climb up the third flight of stairs and approach the door on the left.
Final Boss
When you enter the room, you will see a large music box on the floor, so run towards it to trigger a brief interaction with Mono and the now deformed Six. Back up and summon her with the Y Triangle (Xbox One) (PS4) to summon her. Move to front and allow again. Go to the left side of the room, take the hammer and break the music box. When you regain control, run from the six to the nearest door, which will spit you out further down the corridor. Continue up the ramp to the vent. When you land, slip under the table and hide.
Wait for Six to leave the room and follow her into the hall. Take the ax in the wall and use it to break open the door before going inside. When you arrive, you will see Six guarding the music box, so grab an ax and call her. This will force Six to attack to quickly retreat through the door on the left with an axe. If you call through the door, you will have enough time to get to the other side of the room and hit the box with a hammer before she returns.

Mono will move to another room. Keep running back to the right until you come across another door with an ax in it. Hack this to enter another room with Six. Take the ax and walk along the front of the room to another door. Call a former ally to attack before entering the door, taking you to the left side of the room. Climb up the ramp and stand at the back left door. Call Six again for her to attack, enter the door to get to the other end, where you should hit the music box for sure.
The next room is quite tricky as you need to grab the ax that is in front of the Sixth. For this room. I like calling Six through the front left door and then running to the right. You should have enough time to grab the ax and get to the front right side of the room. Wait for Six to return to the middle before calling and head to the front right room. When you exit, call Six again and go back through the door you just left. Now go to the back right door, call Six, go through the door and quickly hit the music box one last time.
You will enter a room with Six who is protecting the crate, just call her to have Six pull back so you can hit the crate. Do this twice to bring your friend back to normal. Now, to avoid spoilers, all you need to know about the last part is that you need to run for your life. No more puzzles or fights, just keep running until you reach the stairs leading to the exit.
Congratulations you passed Little Nightmares 2 !
Was the article helpful?


