

Passage of the game Lost Lands 9: Tales of the First Brotherhood 100%. All the secrets, puzzles, mini games, collectibles and achievements in one place...
Final Fantasy 7 Remake Walkthrough Guide

Our guide to Final Fantasy 7 Remake contains all the information about the remastered version of the iconic Square Enix title. Here you will find basic information that will help you successfully complete the game and learn the secrets of the planet Gaia. This is a comprehensive guide that will guide you through all the most important aspects of the game.

Final Fantasy 7 Remake consists of 18 chapters that you can complete, lasting around 30-40 hours of gameplay. The story, however, is not complete, and will continue until Cloud Strife's escape from Midgard.
Chapter 1 - The Destruction of Mako Reactor
Brief action plan:
- Promote a hero and eliminate 2 security officers
- Shelter and fight with 2 more security officers
- Keep going until you get to the cutscene
- Continue on and defeat the guards and guard dog
- Ride the elevator, take care of the enemy patrol
- Pull the lever and meet the team. Join them and master Mako Reactor 1
- Fight enemies and ride the elevator, get out and Barret will join your group
- Climb down and carefully go through all the lasers.
- Move on and fight the Sweeper
- Continue your descent and reach the core of the Mako reactor.
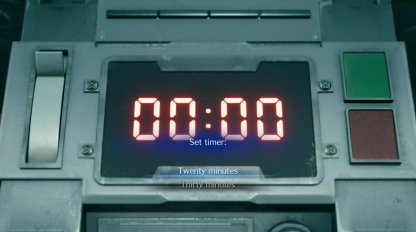
- Plant the bomb and choose between 20 and 30 minutes
- Defeat the boss
- Escape by climbing to the top of the reactor
- Defeat an enemy Sweeper to progress
- Continue to the elevator and eliminate the enemy patrols blocking your path
Enter the reactor area
After the cutscene, you take control of Cloud. Follow Barrett and fight your opponents. These are the basics of wrestling, so you don't have to do anything complicated. The game will slowly teach you the basics of attack, dodge, sparring and explain the ATB mode. The entire initial sequence is nothing more than an extended guide.
Follow others and fight your enemies. You will often see crates with the Shinra logo on your way. Inside you will find medical supplies, etc.
Infiltrate the reactor
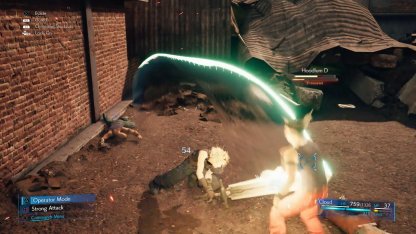
In the end, you will reach the elevator, use it and go upstairs. After fights and cutscenes, open the door and the game will teach you to switch between Punisher and Operator modes. Punisher Mode is perfect for nearby enemies, as it allows Cloud to perform an automatic counterattack after blocking.
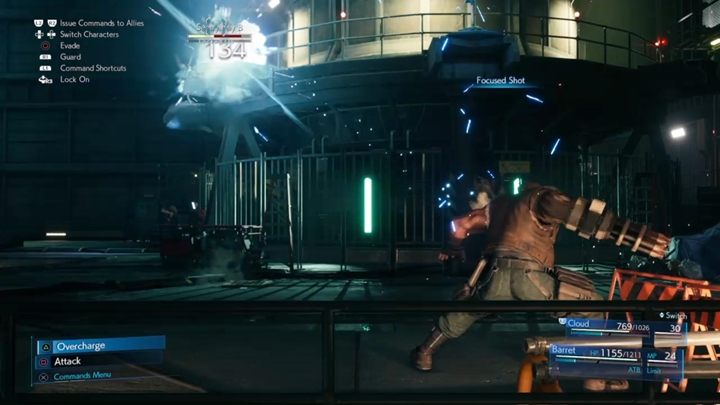
A little further on, you take control of Barrett and he becomes a full member of the team. You can switch between companions - Barrett is very durable and can attack from a distance, so use him to deal with distant targets.
With the help of his machine gun, we will be able to destroy the turrets, which cannot be reached with a sword.
We fire at three turrets at the top, then small droids.
We go down below. There are laser walls on the way, you need to slip past them at the moment when they turn off. We run through 3 such walls. Below the lasers will flash, we wait until they turn off for a long time.
In the hangar we will meet a large robot Swiper. In addition to health, the robot has a second orange bar from the bottom, when it is full, the robot will fall down for a while and will be motionless. We knock him down, and then use strong blows, they will cause more damage.
Descent to the reactor core
Then head down and you can plant the bomb. You can set it to 20 or 30 minutes. It's worth setting it to 30 minutes, although you'll still have plenty of time to escape, so you can do it without too much trouble either way. The choice in this case doesn't really matter in terms of the plot.
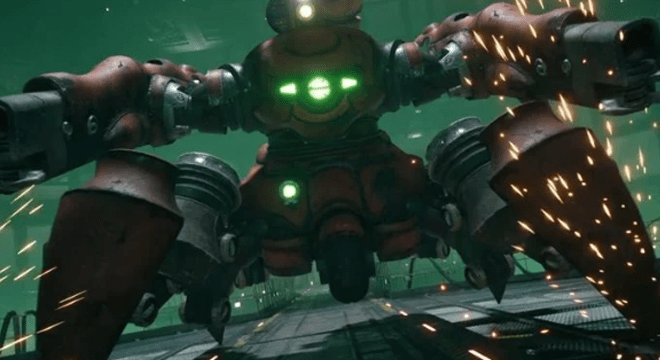
The Scorpion Sentinel boss will now appear. The enemy is very resistant to physical damage, and sword attacks are insignificant. When the Scorpion captures Cloud, switch to Barret and attack with the cannon. The boss's weakness is electrical attacks, so use Thunder to weaken him. At the same time, you must avoid the missiles that the boss launches.
After leaving part of his life, the boss jumps back - approach him and continue to attack with the special abilities of the characters. Watch out for the boss attacks focusing on electrical discharges on the back of the boss, where the field generator is installed. When the boss jumps onto the wall, switch to Barret and shoot him.
When we win, the bomb timer will start by itself. We quickly leave the building. Jessie will press down with a piece of debris, we crawl to her left along the pipe. Then we run after the girl. At the door we fight with the guards. Behind the doors is the Swiper robot. Above we will meet a soldier with electric gloves, hit him with magic. You have plenty of time to fight them, but remember that the goal is to evacuate.
When we get to the elevator, the timer will expire, the reactor will be blown up.
Chapter 2 - Fateful Encounters
Brief action plan:
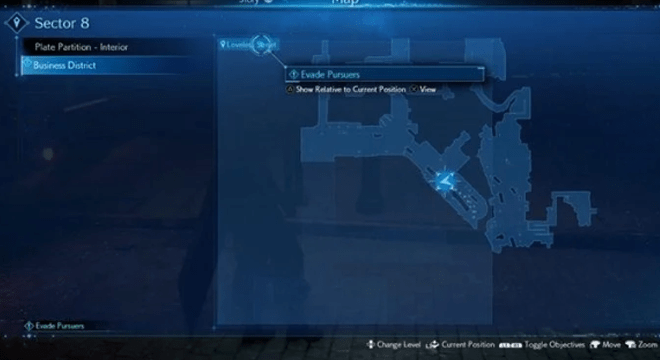
- Continue along the evacuation route to reach the Sector 8 business district.
- Head to Sector B Get the Healing Materia from Jesse. Unlock Equipment Materia
- Follow Jesse to the station.
- Conversation with Sephiroth. Watch the video.
- Make a detour by climbing the stairs of the building.
- Meet the florist
- The defeat of the security forces. Search for Deadly Dodge Materia along the way
- Climb the stairs to escape Sector 8. Pick up the Iron Bracelet along the way.
- Kill the rebels and the Hunter
- Watch a cutscene to jump on the train and escape
Continue along the evacuation route to reach the Sector 8 business district.
You fall into the sewer. Follow Barrett, Jessie, Biggs and Wedge to the exit. Ahead in a dead end is a chest with 2 potions. In the next alley, Jesse will blow up the door. The Shinra Corporation will announce martial law in the sector. We need to leave the dangerous place. Open the boxes found along the way. After a while, Jessie will give you a healing materiel. You unlock a new spell - Cure. The skill is useful in combat - the game will teach you how to use a ball of healing matter. At the crossroads near the central house is a chest, 50 gil. Climbing to the right
stairs to the platform to Jesse, there is also a chest, 3 grenades.
Now you need to go through the destroyed area. Use the stairs to get through the rubble and move towards the station. After a while, Cloud will see a memory of Sephiroth, he will appear in front of us, but immediately disappear in front. We follow the fiery ruins. The ghost will disappear from our blow.

We pass the street with the survivors. In the alley we go up the stairs to the roof. Before the next ladder on the right is a chest. We go down to the next street. You will trigger a cutscene. After that, you will fight with security officers. Attack like Cloud and if necessary use healing materiel to heal.
It's time to leave the city. Before you continue, go to the above location to find Deviation Materia in chests.
Next, we will see a girl with flowers who is attacked by an invisible ghost, this will turn out to be another vision of Sephiroth. The flower seller will give us a yellow flower. When the girl touches, we will see dark ghosts that attack her. The military will intervene in the matter, we are fighting.
We run after the girl into the alley, break the boxes at a dead end, open the chest. We return to the street
At the end of the street there are boxes and a chest. At the fountain we destroy a large detachment of enemies. Shock soldiers will jump out of the helicopter.
From the fountain we go to the stairs on the wall, on the right chest. On the roof we will get out of the blockade. When we go down to the roof below, there will be a chest on the left.
Sector 8 Residential Area
On the street we will meet a soldier with a shield, it is useless to hit him, you need to burn him with magic. At the turn of the street we climb to the hill on the left, there is a chest. Further soldiers with dogs. There is a chest in the alley behind the truck.
The street will be blocked by military jeeps. We fight in a closed space. Among the enemies there is a Hunter with a large shield, we shower him with magic several times. After the victory, new soldiers will surround us. We leave them by jumping onto a passing train.
We will meet our squad in the car. We pass through the wagons with refugees, we can talk with all the members of the detachment. Barret will tell the managers why the rebels blew up the reactor - so that the corporation would stop pumping Mako energy out of the ground. Jesse will show where we're going next.
Chapter 3 - Home Sweet Slum
Brief action plan:
- Once you reach the Sector 7 Undercity Station, head to Seventh Heaven in the Sector 7 Slum
- Talk to Tifaa. Give a yellow flower to Tifa
- Talk to Marlene. Come out of Seventh Heaven and talk to Tifa again
- Follow Tifa to reach Stargazer Heights. Enter Cloud's room. Get 500 gil from Tifa
- Visit the room next to Marco
- Jump to Seventh Heaven Talk to Marle along the way.
- Help Tifa raise money for water filters. Follow Tifa to visit the item shop, owner Marla, and the weapon shop.
- After you've finished collecting money for water filters, meet Tifa and Avalanche's team on the second floor of the weapon shop. Biggs unlocks the weapon upgrade feature.
- Tifa joins your party. Go to Scrap Boulevard and defeat all the monsters. Get Ice Matter along the way.
- After defeating all the monsters, return to the slums and talk to Biggs and Wedge.
- Return to the weapon shop and talk to the weapon seller. Take the iron blade. Buy weapons and accessories if you like.
- Talk to Wymer, the quest giver. The quest function is unlocked.
- Talk to Chadley and get Assess Materia and Combat Analyzer.
- Finish Wymer's work.
- Rescue Johnny from the officers. Return to seventh heaven.
- Tifa will make drinks for you. You can drink or not drink them.
- Kill time by playing darts. Don't forget to purchase the music disc (Tifa's theme) in the jukebox
- Wait for Tifa at the bar. Barret pays you 1050 gil. Get out of seventh heaven
- Talk to the bully outside Seventh Heaven. Follow them
- Defeat the hooligans
- Travel to Starworks Height and meet Jessie. Get Ifrit Materia from her
- (Optional) Visit the Beginners Gym
- Talk to Jesse again and rest in your room.
Time to explore the slums. You can easily move around the city and look at the details of the slum area for example. Your main goal is to go to Tifu, Cloud's childhood friend. Talk to her at the bar, then follow to the apartment. Go to your room and use the bed.
At night you will hear suspicious voices. Go to the next room 203 and see the ghost of Sephiroth. Tifa will stop us, it turns out that Marco lives in the apartment.
After the visions, go downstairs and talk to Marlene. Run to Tifa and talk to her - you will go to the city together. In the item shop you can buy your first music disc: The Prelude. Make sure you buy it if you want to finish collectibles - all music discs.
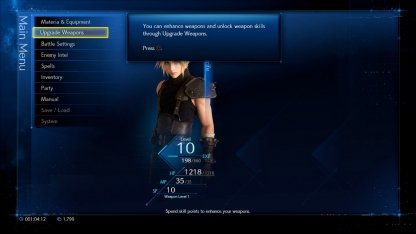
Go to Tifa's diner and talk to the NPC. After a while, Biggs will ask you to help him fight the monsters. Before that, you will learn how to improve your weapons. Using this, you will be able to unlock weapon skills using skill points. Weapon Skills have many positive effects, such as boosting your stats and increasing your Materia slots! Now go to the designated place and fight the monsters. Tifa accompanies you - she fights in close combat and is very fast. Then return to your friends.
Upon entering the next zone, you will be able to collect the Ice Materia, so you don't have to buy it from the shop in advance!
Go to the arms dealer and you will get a new weapon for Cloud - steel blade. The Steel Blade not only has slightly higher stats than the Destroyer Sword, but also allows you to use the weapon's Triple Strike ability. By increasing your Iron Blade weapon skill level to its maximum, you will be able to use the Weapon Ability without having to equip a sword!
A little further on, you will find several characters that will give you Odd Jobs: Jobs are side missions. These are the side jobs you do for the people in the city. The slums have the following missions: Chadley's report, rat problem, trouble at the factory, lost friends, on the hunt, and just flew in from the graveyard. Their descriptions can be found on separate pages of the manual.
Job well done
You will see a group of people in the city center. Follow the captured Johnny. You must save him from the Shinra troops. There are many enemies here.
After the fight, go with Tifa to Seventh Heaven. When others are talking about strategy, you can kill time by playing darts, for example. Use the L stick to aim and the Circle button to throw the dart. The key to this is to release the dart at exactly the right time as the circle approaches its center. Practice timing a few times.
When the others return, you will find that Cloud will not join them on their next mission. Leave the bar.
You meet a bunch of thugs on the street. Talk to them, then go to a more secluded place. As you may have guessed, you have to fight with a bunch of enemies.
You will be surrounded by 4 hooligans and you will have to fight them 4v1. For this fight, it is better to try to get them to line up together and switch to Punisher mode to kill them quickly. Try not to turn your back on some of the Bullies as they have an ability called Full Nelson. If you get hit with this, you will be nailed by one bully while others will kill you however they please. This can be deadly, so it's best to avoid it in the first place.
When you're ready to move on to the next part of the story, talk to Jessie outside your room.
 | Mercenary endeavors: Complete Chapter 3. |
Was the article helpful?


