

Passage of the game Lost Lands 9: Tales of the First Brotherhood 100%. All the secrets, puzzles, mini games, collectibles and achievements in one place...
100% Sekiro Shadows Die Twice Walkthrough
The Sekiro: Shadows Die Twice walkthrough guide covers all enemy encounters, items to collect, secrets to find, and more as you complete your journey as a shinobi known as the Wolf.
Contents:
- Ashina reservoir
- Ashina Outskirts
- castle gate
- Boss: Gyoubu Oniwa
- Hirata Manor.
- Bamboo slope.
- Main hall.
- Ashina Castle
- abandoned dungeon
- Ashina Depths
- Ashina Castle
- Temple of the Great Serpent (Sempo Temple)
- old grave
- Upper tower
- Upper Tower - Kuro's Room
- Sunken valley
- Serpent's Eye Shirafuji
- Riven Cave
- abandoned dungeon
- Hirata Manor (secret)
- Fountainhead Palace
- Fallen Nun (real)
- divine dragon
- The final
- Sekiro Shadows Die Twice Walkthrough Video

Ashina reservoir
20 years after the Ashina clan rose to dominance in a certain region of Japan by staging a coup, the clan is currently on the verge of collapse. At that time, a young orphan on the battlefield known as the Wolf was found and taken in by a Shinobi master known as Owl and trained for the sole purpose of protecting the young Lord Kuro, who until recently was under the patronage of the Ashina clan.
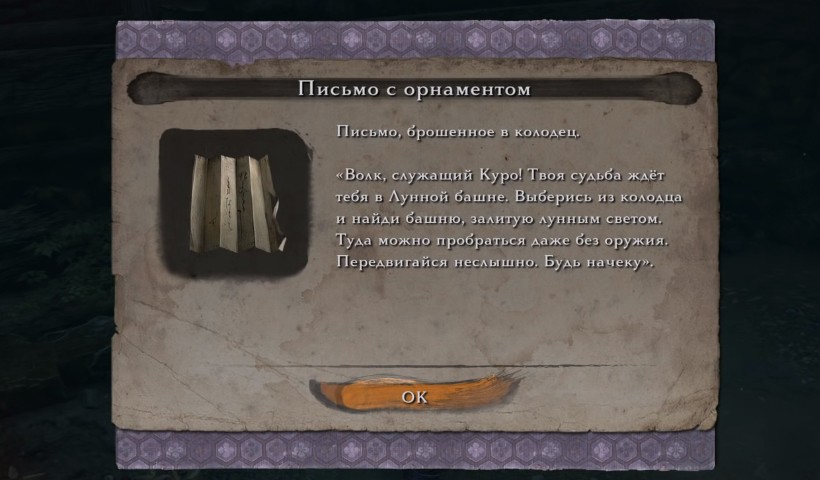
However, in recent years, the shinobi known as Wolf has lost everything - his mentor and his master - and now languishes at the bottom of the well in the Ashina Well. The mysterious woman drops the letter, urging the shinobi to get up again to save their master.
If you don't like the idea of having very little health, you can use the Homeward Idol right now to respawn in a pit with full health - dying anywhere in that area will do the same.
Take the item that the woman threw into the hole - the Ornamented Letter. It invites you to find the nearest Moon Tower and use your skills to stay invisible - no weapons needed. There are two exits: one into a swampy tunnel through which you can swim, it is better not to go there. Take the other passage and start jumping up to climb the ledges.
Climb up the cliff, jumping and pushing off the wall so that a huge inscription with the name of the location appears on the screen. Leaving the old well, you will find yourself in Ashina reservoir. In the distance, you can see the towering Ashina Castle, and behind you there is a path leading to where the woman dropped the note to you - although she is nowhere to be found.
Move forward to get closer to the big canyon, to the left on the wall there is a ledge. To climb over the cliff, press against the wall. Keep pressing into the wall until you cross the problem area. Here you will see two guards talking to a samurai general on the other side of the tall grass.
Crouch to enter a hidden position that will allow you to get through the bushes without alerting the two guards, and stick to the left wall as you get to a small hut behind them. As long as your vision has darkened edges, you will be invisible and out of sight. Crawl out of the bushes to the hole under the hut, there are two more soldiers who can be overheard.
Climb out from the other side of the building, from where you will see the tower that was mentioned, where the Divine Heir is being held captive by Lord Genikiro. Stick to the bushes as you descend. Next, you will need to jump over several cliffs, climb on your hands along the wall and climb up the cliff to the base of the tower, then move to the left to find a hole in the wall that you can climb into.
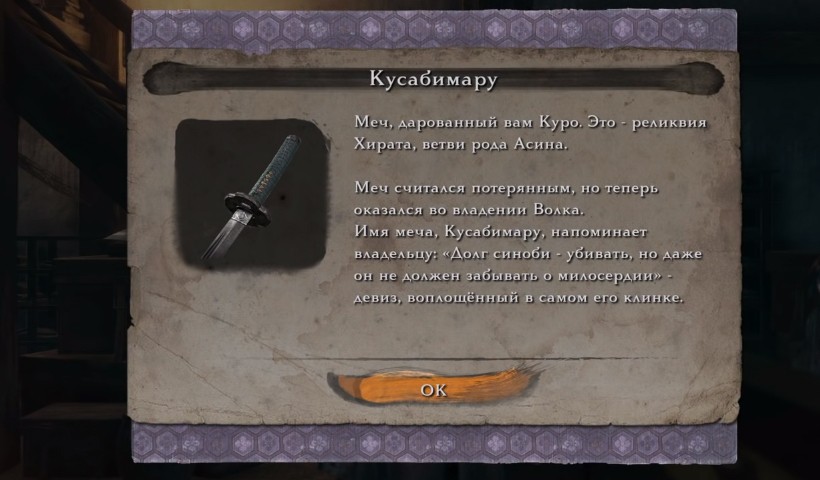
You will finally be reunited with young Lord Kuro, who obviously hasn't seen you for a long time. To celebrate, he will present you with your trusty katana sword, Kusabimaru. With your sword in hand, it's time to find a way out and rescue Lord Kuro from this place.
Talk to him and he will give you something for your wounds - Medicine Flask. This item allows you to quickly replenish a modest amount of health, but after using it you will need to find a resting place to replenish it (or when you wake up after death). He will ask you to find a secret passage under the bridge moat of the castle, and then give a signal with a reed whistle.
Before leaving, be sure to go upstairs to find a healing dragee. This healing item does not replenish your vitality as quickly as a healing gourd, but it will restore some health over time. If necessary, use any healing item, and then open the door leading out of the tower.
Find a secret passage to escape
It's time to start your combat lessons - and there are two guards nearby to practice on, so you can split them up to take them on one at a time. Combat in Sekiro is about two things: vitality and concentration. Deal enough damage to deplete an enemy's health and they will fall. However, by maintaining a constant offensive, breaching their defenses, and fending off incoming attacks at the right time, you can also disrupt their position. If the enemy's position is violated, you can attack again when the red dot appears to perform a brutal death blow.
As you keep fighting, you may find that many enemies' concentration can be broken long before their health is depleted - which is why smart timer blocks are so effective. A characteristic sound during the battle will let you know that you did everything right. In particular, these guards can take multiple attacks to kill you, but one well-timed deflection will instantly disrupt their position.
Another effective method is stealth Mortal Strikes. If the guard closest to you doesn't see you sneaking up on him, you can attack from behind to kill him immediately and make the rest of the fight with the other guards easier.
However, if you take these two guards, go down to the bottom of the stairs to meet them. Remember that holding a block or blocking before an attack won't hurt you, but it can hurt your concentration. If you block too much or at the wrong time, your own balance may be thrown off your feet and you will be knocked off your feet.
In particular, soldiers wearing the signature bamboo hats are often much better defensive than others and will try to parry your attacks before making a move - so try to counter them while trying not to break your concentration. You can also hold down the attack button to charge up a damaging slam attack that can deal damage through enemy block and ratchet up focus - but some stronger enemies can still deflect such an onslaught.
Around the corner, you can watch a large gate with two guards, but you can also return to the path you took through the bushes. If you slip back under the house, you will most likely be able to eliminate the guard in stealth mode. From here you can also jump onto the wall leading to the gate and spy on the two guards as well as the other two on the other side.
When you jump down while over an enemy, you can press attack to perform Death Strike - but make sure you're directly over your enemy (and that they don't see you).
Mini Boss - Commander Shinagori Yamauchi
Ahead is your first mini-boss - Commander Shinegori Yamauchi. He has two Deathblow markers, requiring you to perform a Deathblow twice against him. Beware of his long attacks - they can deal massive damage and kill you in just a few swings. It might be tempting to try and dodge him, but your dodges don't cover that much distance, especially away from his wide swings.
Instead, you'll need to keep a close eye on its hesitation and wait for the blade to drop before swerving at the last moment and unleashing a few attacks of your own.
Don't be too greedy as he will also start blocking your attacks and watch his own, so be ready to go back and block at any moment. As long as you keep the pressure on with deflections and counterattacks, you have nothing to worry about, just look for the right moment to land the killing blow.
If you die, you will be sent back to the tower and have to go through the same path again.
When the Commander falls, he will drop a Healing Pill so you can recover. The door ahead is locked on this side, so move to the right to find a path along the wall where you can find a handful of ash - which can be thrown at close range to temporarily disorient enemies in combat. Cross the broken tree or lean against the wall to get to the other side of the path leading to the bottom of the bridge and climb up. As you move along the ledge, you can eavesdrop on two guards at a secret entrance nearby (they won't actually move to guard it, so don't worry).
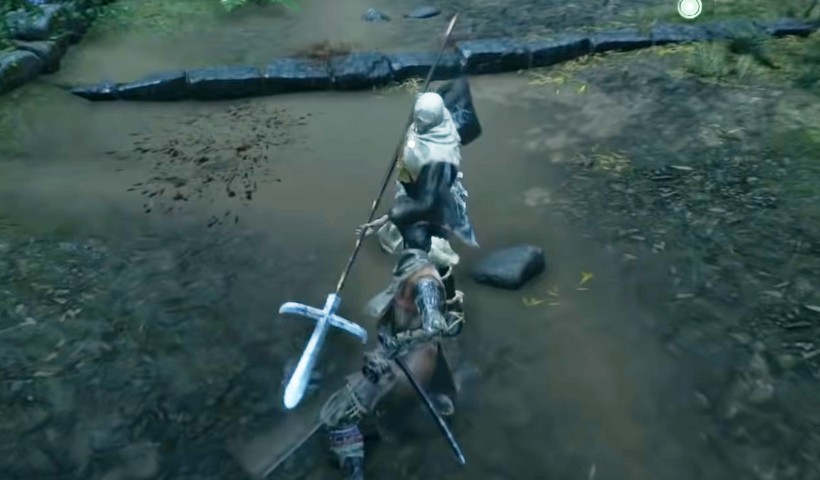
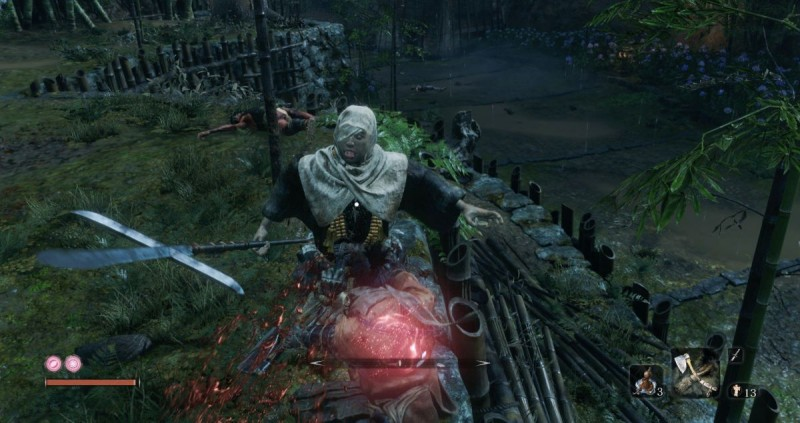
However, as you climb the path under the bridge, you might see a strange little creature wearing a straw hat. Don't be fooled, this little Assassin will become very aggressive as soon as he spots you - he will throw projectiles or drop smoke bombs to try and jump on you for unblocked attacks. Dash quickly towards the creature and hit before it can react to quickly kill it. When you get to the other side of the bridge, hang on the left side and then jump down to find the Pellet and continue down to the bottom of the bridge. Look for the door leading to the escape route and call the young lord with the whistle. If you really want to explore the moat first, you'll find some poisonous crawling geckos - but there's really no reason to oppose them.
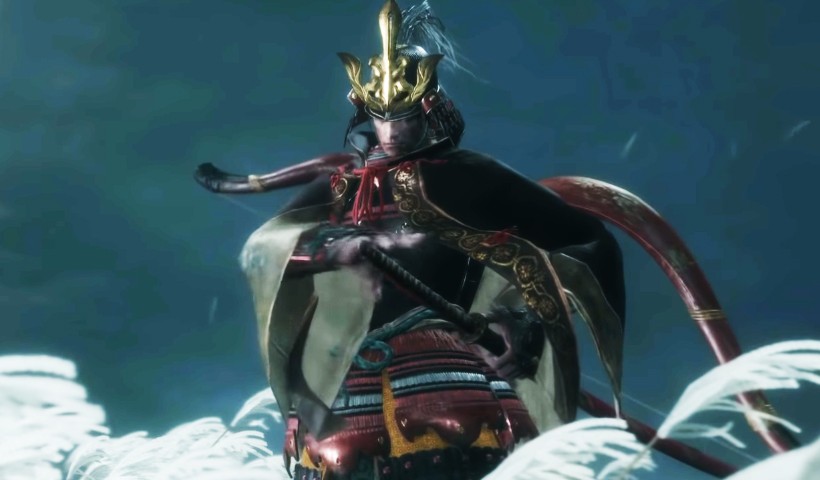
Boss Fight - How to Defeat Genichiro Ashina?
Having reached a large field with the young master, we stumble upon a serious opponent who will try to stop you. This is Genihiro Ashina and he is strong.
The difficulty lies in the fact that trying to resist this guy is not realistic, and he is much more aggressive than the Samurai Leader. He will come at you with multiple combo attacks, unblockable hits, and sweeping rush attacks that you can only jump away from to avoid. It only takes a few mistakes to make things go badly, so don't be upset if you get hit - it's part of the story and the idea behind the game's developmental variant!
Of course, you CAN beat Genihiro in this fight, even if the odds are against you. This requires maximum concentration, you need to be ready to dodge his attacking thrusts and jump on top of him as he goes on a low spin attack. As for his devastating multi-touch combo, you'll have to quickly learn the rhythm of his punches and deflect each one with a single press of the block button to quickly increase his focus damage.
Even if you manage to kill both of the boss's health bars, he can still beat you that day, leaving him without a hand on top of that.
With the Wolf defeated and Lord Kuro recaptured, things will seem bleak, but fate has a different story for this shinobi, and you'll soon wake up in the next region, Ashina Outskirts.
Ashina Outskirts
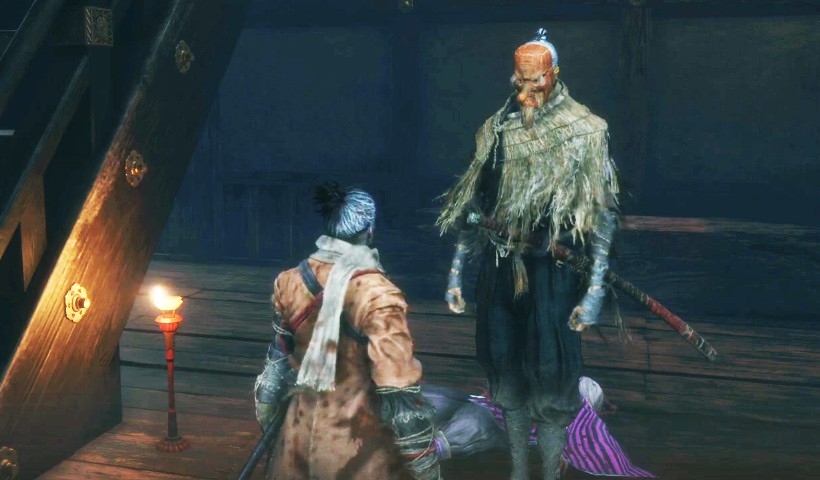
Awakening in a dilapidated temple will reveal that the Wolf is still alive, and instead of his hand, a strange device. The person who found you is a strange, Carver who spends his days creating countless Buddha statues - and apparently the mechanism that has now replaced your hand - the Shinobi Prosthetic. Talk to the Sculptor to find out what happened and that your master is still alive and some interesting details about his bloodline. There is also another Buddha statue in the room, apparently made by a "Real Sculptor", but it can't be interacted with yet. Head outside to find a dragee next to the Sculptor's Idol - a checkpoint that allows you to rest - among other things. Behind the temple is a Light Coin Purse that gives 100 sen when used. However, since some of your currency is lost upon death, it may be better to keep your wallet until you need to buy something. To the left of the Sculptor's Idol is a cave leading to a fake wall that can't be used yet.
While resting in the Idol, you can see a woman next to the temple. This is Emma, the doctor attending to the mysterious master. She can help upgrade your Medicine Flask later if you find the right materials. For now, she will watch over you and your mysterious Dragon Legacy. Further along the way, you will meet a person known as Hanbei the Immortal. He will challenge you to a duel, and then show his true state. Since this person cannot die, he will offer to be your training opponent and help teach you the basics. It's especially worth it to take his suggestion and work on your basics, and come back to him as you learn more techniques. Next to it is an Offering Box that can help you get the items you need in exchange for an offer - but it's currently empty.
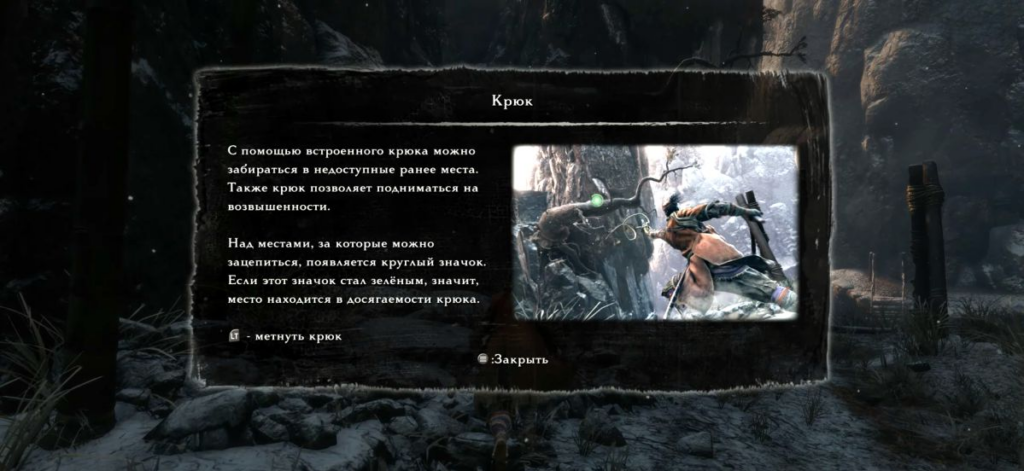
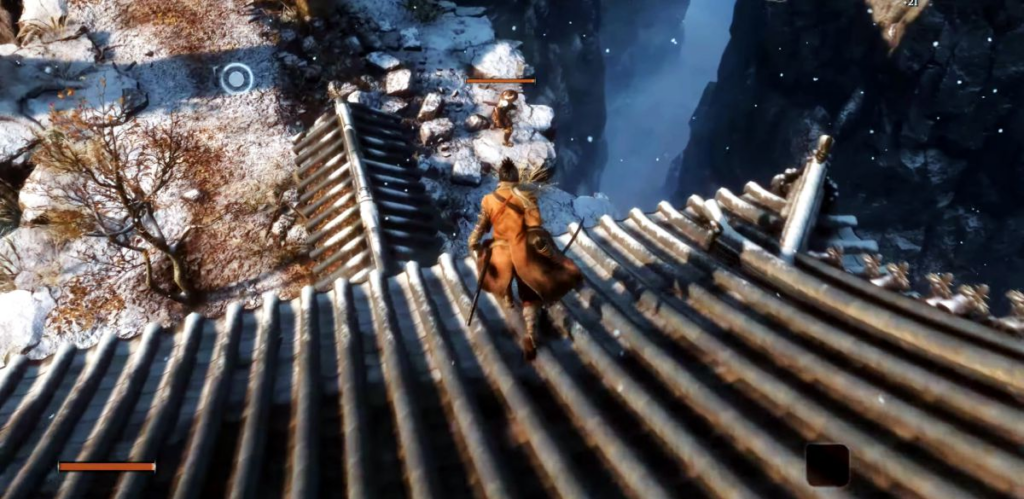
After doing everything else, continue the main path to the broken bridge. Your hero is now equipped with a grappling hook that allows you to move across platforms such as tree branches and roof decorations - look for circles on your radar that turn green when you are in range. Now you can reach up to the tree branches to see the true scope of Ashina Outskirts, and in the distance is Ashina Castle. Keep going until you reach the main platform where you will find the Ashina Outskirts Sculptor's Idol.
You can now rest to heal and refill your Flask - but all enemies killed in the area will respawn (except mini-bosses). You can also use any Sculptor's Idol you find to travel between them and back to the Old Temple.
There are many levels of verticality in this area, so feel free to explore and hike on whatever trails suit you. Directly above the Sculptor's Idol is a higher ledge and a broken wall that hides an item - Ungo's Candy. Treat these candies as temporary buffs - best used when you know you're about to enter a difficult area
Below you, at the end of the broken bridge, you can spot a soldier on guard who can be killed with a Stealth Deathstrike and grab a Dragee next to him. There is a Clay Shard even further away, but another Soldier is waiting around the corner, and another one is at the top of the path at the closed gate. Note that you can make these enemies come to explore your location by blocking them and using a Clay Shard (throwing it near them without doing anything).
Note: In this area, there is a chance that you will fall to your enemies. When this happens, Lord Kuro's voice will reach out to you, transferring the dragon's heritage to you, and allowing you to be resurrected in battle. You have a few moments to do this after death - and you can even get up when your enemies turn to leave and you backstab them. Note that you will have two pink icons above your health, each representing a different resurrection. One can only be replenished by resting in the Sculptor's Idol, while the other will slowly fill up as you defeat enemies and deal death blows to them. Both icons will be temporarily unavailable immediately upon resurrection - and you'll need to defeat enemies to enable the second resurrection, so you won't be able to ascend twice in the same fight.
After you deal with the enemy, find a handful of ashes and a dragee near the fire. As you get close to the next open gate along the main path, you will be attacked by several dogs. Luckily, they are one hit kills, don't let them attack you. Grab a clay shard and use it, or if you want to bypass them, you can follow the high path behind the second house where you'll find... a giant rooster. These creatures are surprisingly aggressive, but as long as you block their flying claws, you can rush and kill them quickly.
On a ledge by the next large gatehouse is the Outskirts Wall. Once you've found it, be sure to check the nearby gatehouse, and also check on the high ledge to the left of the gatehouse to find a Pellet. On the second floor is Shinobi's body and he's holding Shuriken wheel. This item can be built into the Wolf's prosthesis, so be sure to return to the Sculptor and unlock the loaded prosthesis. This device allows you to fire projectiles that do a small amount of damage - but are effective in destruction and deal a lot of damage to airborne enemies.
Mini-Boss - Warlord Naomori Kawarada
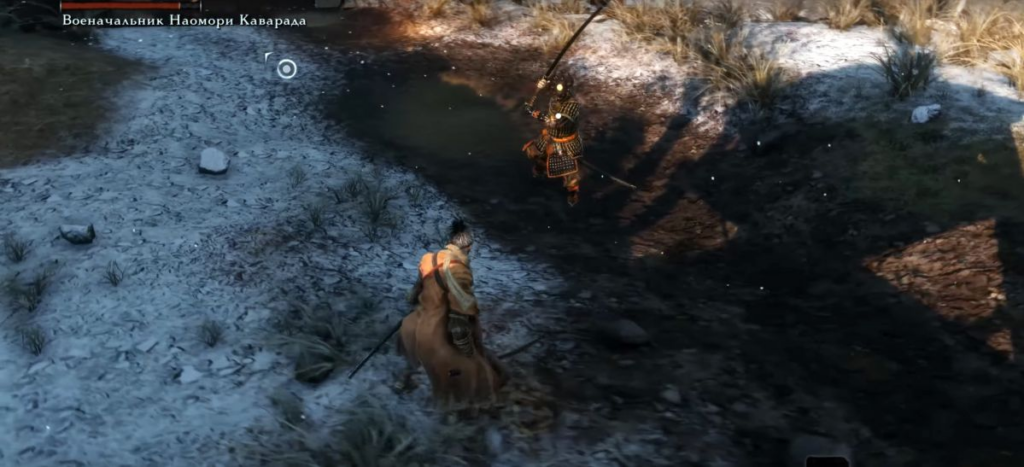
Look around the large area outside the gate and you will see your first mini-boss in this area. Samurai General Naomori Kawarada. Think of him as an even more powerful version of the samurai leader. He can deal tons of damage, and in addition to his huge striking attacks, he will use "dangerous attacks" These attacks foreshadow the appearance of a red danger sign, which means that this enemy will attack in one of several ways: a powerful shock attack that cannot be normally blocked - but can be reflected if calculated correctly. He can pull his sword out of the way and unleash a wide push attack that can't be blocked - but can be jumped over and you can press jump again to hit him in the face for a jump attack. If he manages to break your focus, he may also try to use you to stun you in an attempt to get an unblockable grapple - dodge back quickly to get out of reach. Like a samurai chieftain, you need to watch his moves well and dodge before continuing with your own attacks, but then be ready to evade his dangerous attacks or try to interrupt his throwing or quick lunges.
Remember that he has two Mortal Strike tokens. If you see him back off and start posing with a green aura, press attack quickly or he will heal some of his focus damage. This game can be played by two - you can also use one of the healing items to boost your offense or defense.
If you get in trouble - know that you can sneak up on him from behind to start the fight with the Stealth Deathstrike, effectively only giving him one health bar when the fight actually starts.
Defeating him will give you a rosary bead (four such items increase the main character's health) and a pumpkin seed. You can return the seed Each seed given to Emma increases the number of medicine flasks that you can carry with you.
Returning to where you fought the samurai general, carefully jump to the top of the gate. This next area has a lot of roaming soldiers: two swordsmen roam the main path - one of them climbs the stairs on the right to another soldier standing guard at the tall watchtower. The shooter is waiting on the left behind the wall, and the other one is on the second floor of the broken building in the center of the area. It's best to try and kill a few using Stealth Deathblows. Be sure to search the ruined room the Gunslinger is in for a Clay Shard, then look on the roof for a nest with a small coin purse, and on the bottom floor for a Mibu balloon. When you find Mibu balloons, you can use them as temporary bonuses to get more rewards than usual. As you approach the middle house, three more soldiers will start patrolling the path from the area below - so be careful not to get surrounded by them.
Similarly, if you are above the two soldiers at the watchtower, you can eavesdrop on them talking about the war - and after killing them, there will be another soldier from the Taro Brotherhood wielding large hammers.
This rough tarot is not a mini-boss, but it does boast a lot of vitality and focus. This means that you need to wear him down a bit and then finish him off with counterattacks.
After crossing to the other side of the ruined building that the Gunslinger was in, find a small path that goes past where the other Gunslinger was stationed and follow it to find a gorge with a lower platform allowing you to bypass the main road.
Once you reach the lowest level of this large open area, you will find another broken house and the sound of a bell. There is an old woman inside the house, and when she talks to her, she thinks that you are her son. Play along (or don't play) and she will give you Mr. Kuro's bell - and ask you to offer it to the Buddha. This is a very important point, but more on that later. Nearby, you can find an injured man who turns out to be the woman's son, Inosuke Nogami, who will point you to his mother if you haven't talked to her yet. Don't forget to also check the bottom of the house for bushes that hide some giant roosters, and a hidden passage in the basement that you can break into and get into the holds. Before moving on, you may have heard the crows cawing. In fact, from the top of the first building, you can see many of them gathered on a high plateau nearby. Go around the plateau and find a root to grapple on the opposite side near the ruined house with the old woman and you will find a merchant here.
These can be found anywhere death is present, and they offer items to present to the dead (which means items to buy!). Talk to him and stock up on some jelly beans if you need to - but also look out for one expensive item they sell - Robert's firecrackers. This expensive trinket can be turned into a tool for your prosthesis, so don't forget about it. Also note that they sell light coin wallets for 10 sen more than they give - meaning you can actually cash out if you're afraid of losing money due to death.
The first small gate has a Soldier patrolling it, and three more at the second sealed gate. However, your biggest problem is the man at the top of the gate. This Gunner wields a mortar-like weapon that can be fired from a long distance to deal incredible damage. This is combined with the fact that grabbing his position allows him to hit you with his giant cannon, making your frontal attack very unwise.
Once you pass through the large sealed gatehouse, be sure to check it from the other side to find the merchant sitting there. His name is Anayama the Peddler, and he seems to have known you since "that night." Once a thief, now he is trying to become a merchant, but he asks for some money for a startup. Pay him 50 sen to get started and he will also give you a bit more information about "that night" which was obviously related to Hirata. If you want to hear some other juicy gossip, you can pay him an extra 100 sen - and in return you'll get a fire barrel memo that contains information on where to find a potential prosthesis. On the way forward, you will see two ghostly figures - the remnant of memories between Lord Kuro and Lady Emma. Up on the higher ledges on the right is a Giant Rooster, and you can run and jump from here to the Outskirts of the Wall - Giant Carver Stair Idol. Ahead, take a point at the small gate and look up the stairs in front of you. Two soldiers gossiping downstairs, and upstairs... a very dangerous looking enemy. Eavesdrop on two soldiers to learn that this red-eyed giant is very formidable, but apparently doesn't like fire.
Be sure to take out the two gossiping soldiers first, and then look at the platform above them to find the orb. When you come to the large stairs while the monster is chained, have time to land a few unanswered blows on it. Soon he will break free from his bonds, and a warrior wielding a spear will join him. Try to lure the soldier out and kill him first so you don't have any interference - just be careful, he has a few hard hits - so be sure to parry at the right time or dodge to the side and then kill him and take Mibu's balloon. which he guarded. The fight with the giant is extremely difficult - most of his attacks will either take about half of your health, or large attacks, such as his grabs, can usually kill you if you are not at full health. For this reason, it's recommended that you head to Hirata Manor to find the Flame Vent upgrade for your prosthesis if you're having trouble with this fight. It doesn't guarantee victory, but hitting him with fire attacks will cause him to panic, allowing you to get many free attacks for a short time. Expect the Beast to fight like a real dragon. Be especially wary of his combo side attacks, which end with an elbow attack but leave him open to counterattacks afterwards. You can deflect these moves if you're careful, but even so, you'll hit your focus and be sent staggering backwards. The biggest threat of all is, of course, his grab attacks. It has one short grab, which is quick but can be avoided if you are ready for it all the time. The other grapple is even worse as he will get a charge and then dive into you for a kill and dodging won't save you here. The only way out of this attack is to jump over it - and thankfully, pressing jump twice will allow you to hit him, dealing significant damage to him, as well as lowering his health. It's also worth noting that if you die and resurrect in the middle of a battle, you won't be able to do it again.
If either of the grips connects, it will slam you into the ground and this is usually a fatal blow. If you somehow survive, he will end up leaving you behind. This can be especially deadly if he decides to throw you down the stairs and you only have a moment to use your grappling hook on a nearby branch for a breather.
Once his health starts to drop, it's your tip to start building up your focus damage by jumping over his grappling attacks, or trying to parry some of his hits - otherwise you'll need to completely reset his health for a killing blow.
Things will be easier - but not too easy - with Pitard's help, as the explosion will make him go berserk for a few seconds - allowing you to get a few hits for free without fear of reprisals. For added effect, you can throw Oil at it first to make sure it burns.
Now, when the Giant is defeated, you will receive the passive skill "Shinobi Medicine XNUMXst level". You will also be given another rosary bead. The barrier that was blocking the hole in the tower above the door dissipated. Enter the building. This is where you'll find the Nightjar monocular - allowing you to use it to zoom in on distant targets to help plan your attack from a good vantage point. The path on the right ends with a closed door, so go left to find a room with a Gourd Seed and a Clay Shard. From here, carefully look out the door to see the next courtyard. This courtyard is home to another mini-boss, and this time he has a lot of support. A soldier is standing next to him, but a shooter is also placed above him, and another is hiding behind the barricades on the left path, with a warrior patrolling between them. Another patrol in the outer courtyard - but most importantly - the Watchman, located on the right wall. He has excellent eyesight and will sound the alarm as soon as he sees you, causing everyone else in the area to run. Silence him first by returning to the gatehouse hall and looking for the broken wall overlooking the courtyard and quickly grab right up to the tree branch and jump into the bushes at the top of the wall. The Far Gunner can spot you, but if you jump off the other side, he will eventually lose interest, allowing you to sneak up and kill the Watcher. From here, you can take out all the soldiers above the courtyard and make sure the samurai general doesn't interfere until he's the last man standing. General Tenzen Yamauchi very similar to the last boss you fought. He has several wide combos. He will also use dangerous strikes, and if he jumps into the air, dodge to the side to avoid him sliding down and counterattack. Defeating him will reward you with another bead that will be added to your collection. Don't forget to also check where he sat in the yard for some scrap metal - which can later be used for upgrades.
On the right there is an additional area. There is a passage to a dark cave where you have to fight Headless. You won't be able to defeat him right now, so don't waste your time fighting.
The real goal now is not in Headless, but to stand on the ledge behind him - it leads to a secret small passage that ends at the entrance to Shinobi. This results in an entirely new area, Senpu Temple, Mt. Kongo - but only a small part of this new region. Enter another room to find a weird centipede killer with a claw weapon sticking out of the wall and throw a shuriken to knock him down and finish him off before he starts throwing fire around the room. Grab the black powder here and note the locked door on one side before heading up the stairs to the Demon Bell Temple idol. Nearby is a giant bell of the same name, and the note begs you not to ring it.
If you actually ring the bell, you will get the sinister burden manifested by the bell demon in your inventory. This item will make the game much more difficult by making enemies deal more damage to you, as well as increasing the amount of items and sen you get by killing them. If that seems like a pretty bad compromise, you can just "use" the Bell Demon item to get rid of it, and you can also ring the bell again at any time to get the item back and increase the difficulty.
Return to the place where you fought against Tenzen Yamauchi. At the end of the path there is a destroyed bridge and an abyss. Climb down the ledges to the left to find the Sculptor's Idol. Jump there using the branch below. Jump to the other side to find a huge snake. Jump down when he turns away and hide in the grass. When the snake turns away again, then jump over to the other side and hide in the cave. Inside it, hide in another grass, walk along the cliff along the thin edge and hide in the cart. When the snake approaches her, then attack him on the eye. Take your chance and leave this place by finding another Sculptor's Idol at the gates of Ashina Castle.
Make no mistake - he is not dead, just very angry and disoriented. His body will thrash and can do some serious damage if he hits you, so quickly run past the Palanquin and run forward, looking for some tree branches to grab onto. The next branch will send you into the air as soon as the Great Serpent starts chasing you - quickly grab the last branch at the entrance to the cave and run far, far inside. Once again, the snake will stick its head as far as it can - and still kill you if you don't back away far enough. After a little anger, he will finally back off and will no longer bother you in this part of the valley. Be sure to head back to the empty palanquin clearing to look at the ridge above, where a large plant is carrying an item - Snap Seeds, then return to the cave and keep going.
castle gate
As you make your way through the ravine and climb up to the buildings above, go right to find the Idol of the Carver. Nearby is Gachiina Candy, but if you look around the rocks, you can also find one of the small and ugly Senpu Assassins rummaging around. These enemies are very annoying if you don't understand them. Their wide hats can camouflage their actual attacks, making them hard to block, and they can also throw projectiles or splatter the ground with poison - and can also perform jump attacks and grab you. Kill this creature and you'll get the Herb Catalog Note, an interesting piece of information about the seed you found. Now head down and back along the left side under the wall to find Ako's Candy.
Meanwhile, a large group of soldiers patrol the alley. Two more soldiers stand in the middle of the courtyard and you can eavesdrop to hear them talking about Lord Gyoubu, the Demon.
If you go to the right of the watchtower, you can also find another soldier mourning his dead horse, and you can eavesdrop to hear about how he was struck by the loud gunpowder that results in his death - a key piece of information.
Be sure to keep an eye on the nearest shooter who is following him. To claim this area, go to the Gunslinger near the man mourning his horse and deal with him first. Now jump down to look out of the broken wall into the courtyard below, where the Remaining Memory is to the right of Lord Kuro and Lord Genichiro. From here, you can grab onto the destroyed building and kill the shooter. From here you must also kill the soldiers. Once everyone is dead, look around the ruined building around the back for Ungo's lollipops, and downstairs for a clay shard, a heavy coin purse, and a Mibu balloon. Now it remains only to return to the upper level and grab the walls that open onto a large field in front of the Castle Gate. Get ready for your first real boss
Boss: Gyoubu Oniwa
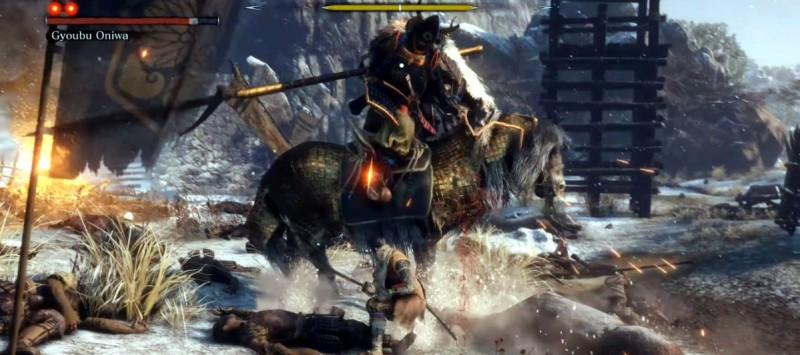
As you fall into the large deserted battlefield, you can pick up a Handful of Ashes, but soon a large towering figure riding a mighty horse will fly out from the nearest gate. This is Gyoubu Masataka Oniwa and he won't let you through. Gyoubu is a formidable opponent, and the large open battlefield gives him plenty of room to maneuver and break down barricades. He will attack with large well-aimed spears or strike from a horse, and they will be difficult to read, especially when you get close. There are two incredibly important things to note about this boss fight: Gyobu's horse, Onikage, is a beast, and like all beasts, dislikes explosions from Shinobi pitards. If you haven't already, be sure to buy Robert's firecrackers from the Crow Memorial Mob on the small plateau at the start of Ashina Outskirts, and install the prosthesis.
During a battle, when Gyoubu is nearby and attacks, wait for an opening between attacks or when he stops to fire a pitard, which will cause his horse to retreat in alarm. Gyoubu will be forced to spend a few minutes without being able to attack and this will allow you to win some free hits. Keep in mind that this cannot be spam - there is a short period before you can startle the horse again, and this only works at close range. Also, there's a good chance that when Gyoubu regains control of his horse, he'll cut his spear down - which is hard to see when he's close, so don't get too greedy.
Second important note: In some cases, Gyobu's helmet can act as a grappling point for you to close the distance. This usually happens when the boss moves far enough away from you - just look at the indicator above his head. He also has this indicator when he attaches his spear to the rope - either throws it at you or starts swinging it around him several times in a big arc. In both cases, fighting him can interrupt him or get under him, but more importantly, if you've already found additional prosthetic limbs in Hirata Manor, you should have received the Prosthetic Esoteric Text and a skill tree that includes grappling. Hook attack. This means that in these cases, you can not only grapple with it, but also deal damage in the process, which is usually impossible to block.
Gyobu has many more attacks that he can use, but luckily almost all of them can be blocked if you're ready. He can attack you by swinging his spear from side to side, or even crouching in a duel that can hit you multiple times if you don't block.
He will also stop to strike his spear several times with various blows before ending with a powerful overhead strike, or grab his spear with both hands for a powerful frontal strike. Blocking all of this can work, and then there is an opportunity to dodge the blow to hit it from the sides or from behind, but be careful. If you see his horse bouncing, watch out for a knife stab from Gyobu followed by a giant horse jump with an even bigger kick.
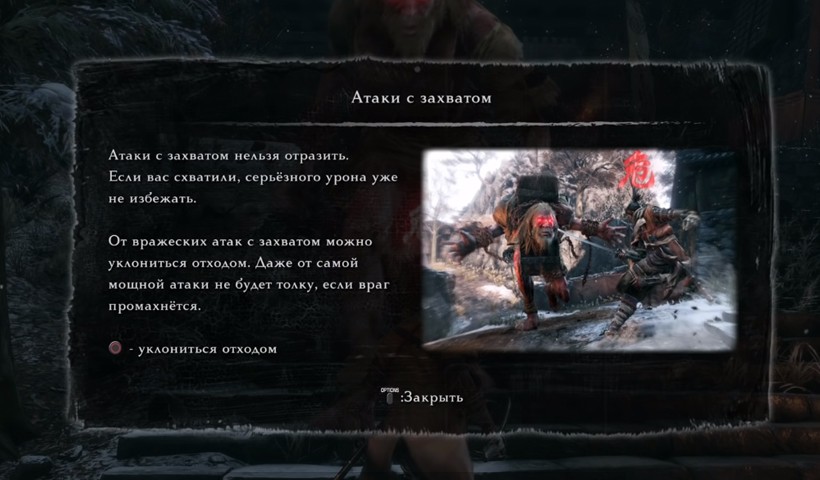
Gyoubu also has a devastating, unblockable "grab" where he throws his spear into the ground before dragging it forward while it's on you, trying to drag you along with it. When he does, be sure to jump out of the way.
As a boss, Gyobu has a lot of health, so instead focus on building up your focus meter gradually because it won't deplete as quickly compared to other enemies. Don't be afraid of his spear swing and deflect it whenever possible to try and break his concentration.
It won't change much after the first killing blow, so there aren't any new surprises until after the second, finishing blow.
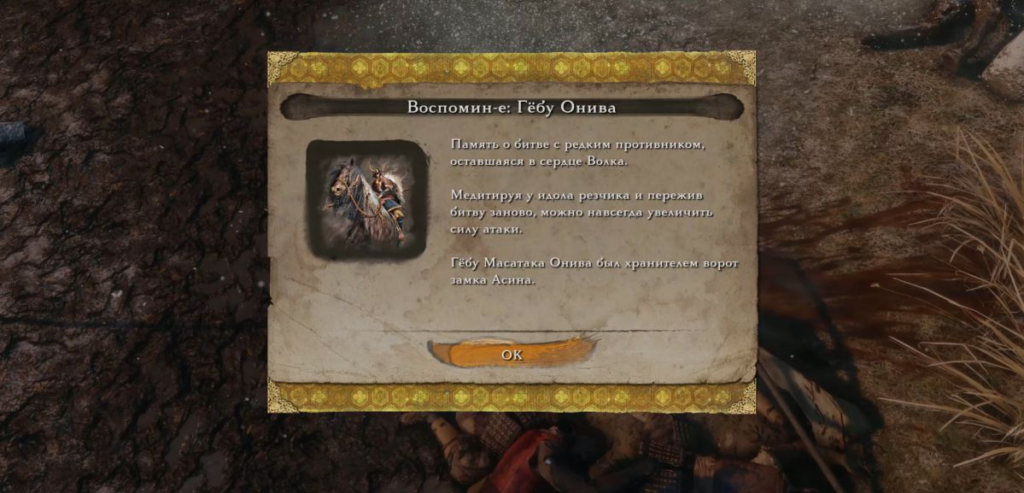
When you finally damage it a second time, you will be able to perform the Shinobi Execution and kill the Gyobu Demon. He will grant you Memory: Gyoubu Oniwa, which will allow you to use it in the Sculptor's Idol, which can increase your overall attack power. He also drops a mechanical barrel - don't forget to give it to the Sculptor so your prosthesis can be equipped with new upgrades for your tools.
When Gyoubu is dead, the Ashina Castle gate opens in front of you, allowing you to walk through to it. If you haven't already, you should also return to the Carver and offer the Young Lord's Bell to the Buddha statue - this will open up a new area, Hirata Estate, which has its share of enemies and treasures.
Hirata Manor.
How to access the Hirata Estate?
In order to gain access to the estate, you need to place the bell, received earlier from the old woman, on the altar in the Dilapidated Temple.
By doing this, you will be transported to a long forgotten night three years ago, at the time when Lord Kuro's Hirata estate was attacked by a group of thieves.
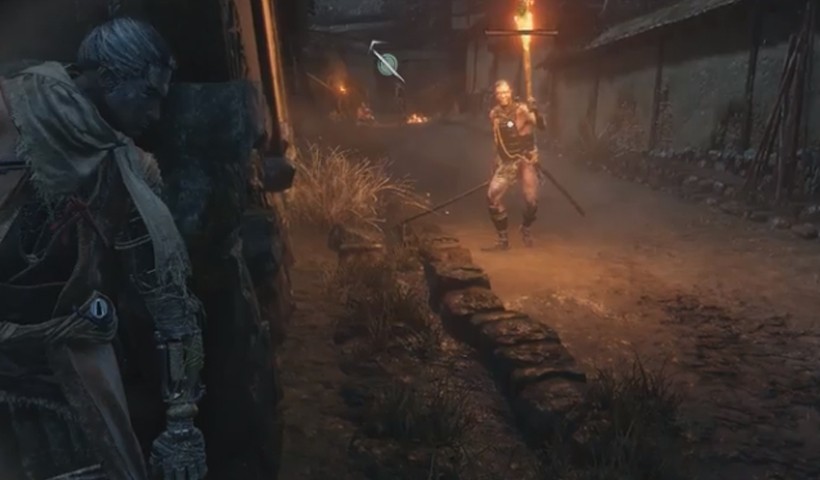
When you wake up in the Well of Dragons above Hirata Manor, be sure to open the nearby idol and then collect the Dragee. Next, you must jump down to the road below and grab onto the branches. At the bottom you will find a handful of ashes next to a dying ninja - you can ask him a few questions about what happened to you. Down on the bridge is a bandit with a torch, he patrols this part and will try to burn you with his torch (and these enemies will also call for help if they detect you). At the end of the bridge, you can find Dousing Powder, which will help you if you get burned, and down along the rocks hiding behind a large mountain, there is a scale. These rare items can only be found by searching and killing a large red carp with treasure - for example, on the right side of the bridge. However, be careful - as they will try to swim away quickly when they are spotted, but you can give chase before he dives.
Before you cross the bridge, go up the right side of the river to find a strip of small islands where another Carp is swimming near the strange pot. This pot is actually a trader - Potted Noble Harunaga, and he wants Carp Scales and will trade rare items for them, including Withered Red Fire Gourd, which works just like your flask, except that it can be recharged to be healed.
If you take a closer look at the waters, you may find two more carps swimming underwater, but you may have to come back later when you can attack the fish at depth. Don't forget to also check out the lightweight coin purse on the rocks. Swimming back to the shore, you will find many dogs along with a bandit hiding among the trees, and there is a Mibu balloon on the boat. Above the shore, another Bandit guards the entrance gate to the estate with another pack of Dogs.
To get to the manor, rise above the main gate and look around the main path. It leads down a long narrow corridor patrolled by several bandits. Jump down and interact with the Idol. On the Way to the Manor, pick up the Clay Shard nearby. Then start on the left side of the wall along the main path where you will find the Spirit Emblem and Ungo's Candy. Be sure to climb the wall next to the candy and you'll see a Bandit Archer waiting behind a small alcove - hoping to ambush you. As you already understood, these bandits fight dirty. Archers use fire arrows along with torch holders - which can have a burning status even if you're blocking. Bandits can also stun you, or try to deliver a dangerous blow.
The gate ahead is indeed locked, but you can grab a handful of ashes near the broken hole in the wall leading to the ransacked house. There are four bandits on patrol in this house (one inside), including an archer and an axe. The ax wielder tends to be a bit more durable than the rest and can deal some serious damage, but is more vulnerable to breaking his focus. Try to ambush them from above or distract them to separate them, then go inside to kill the last bandit who is looting one of the back rooms. Grab a Dragee nearby, then look around the small shacks to find Ako's Candy.
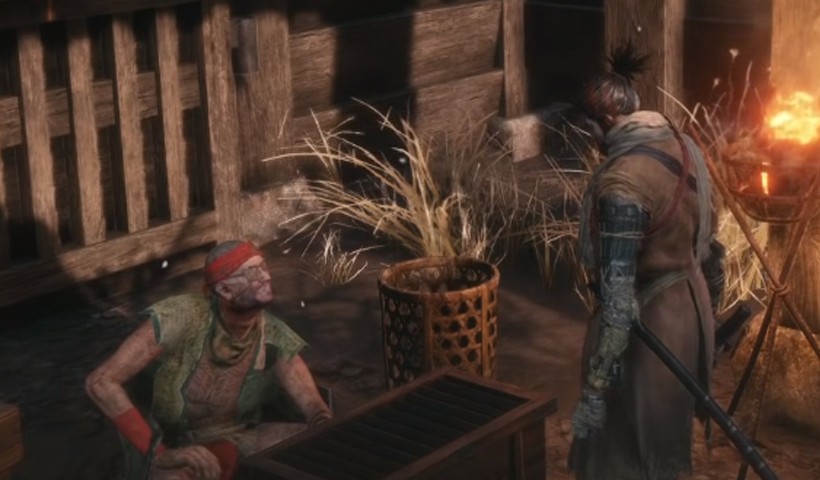
When you reach the courtyard with a long street, where the bandits gathered around the fire, then kill everyone and examine the fire to find new tool for the prosthesis - "Fire Barrel". Go to the next street, in the alley, talk to the wounded man to learn about the axe.
The path behind the fire leads to a narrow path with a lot of bandits and dying people who beg you to take a special ax from a nearby temple before moving on. Turn left first to find and open the main path gate to find Gokan's candy. Nearby there are two small yards. There are some evil Giant Roosters in the house and Ungo's Lollipop in the house, and there is a jelly bean well with another Rooster. Don't forget to also jump on the roof of the house to find a nest with a light coin purse. The opposite courtyard has two Bandits standing next to a small temple containing monkey axwhich you can overhear. Another thief is patrolling the house, which contains a Light Coin Purse that you can get. Down the main path are two more bandits who are trying to force the door, and they too can be eavesdropped on and then taken out from behind in stealth mode. Check the group of houses they were trying to get to to find a few people in the houses to talk to. One person you can overhear talks about a powerful Shinobi Hunter lurking around, while another person asks you to save the young lord and gives you Antidote Powder. There is a man in the last house who will call you a traitor for not being here when you were needed.
Don't forget to also check the opposite area on the main path - where the man is trying to access the building. This person may be familiar to you if you stumbled upon any interesting characters in the Asinskaya outskirts. Keep talking to him and he will tell you about the three-story pagoda on the rock. Before leaving, be sure to look for a small path at the edge of the bamboo grove where you can find the complete Jizo statue. Continue along the main path where the Bandit is waiting for two more people with shields. The Shinobi Monkey Ax you found can be fitted into a prosthetic arm to split their shields in half - and instantly throw them off balance. Although the river looks tempting and can be used as a shortcut, there is something we need ahead. Unfortunately, the area is guarded by several bandits - one archer by the bushes on the left - and a shinobi hunter.
How to defeat shinobi hunter Enshin from Misen Shrine
This mini-boss can be a very difficult opponent - mainly because its nature allows them to hear your approach, making sneak attacks impossible. He can be lured to the bridge with clay shards, after eliminating the archers from the bushes before trying to immediately move against him. Shinobi hunters carry a large spear and will use it for all sorts of attacks. To make matters worse, the Shinobi Hunter has a very long attack that makes him run forward, and if you get caught, he will flip you in the air and strike. However, like his other attacks, he can be preempted at the last moment to deal massive damage to his focus, which is the key to winning this fight. However, he uses more than just pushes (which can include quick strikes) and can also swing the other end of his spear and may even try to tie it into a dangerous throwing attack that you'll have to jump over. For defeating him, you will also receive a rosary bead.
Before moving on to the next area, be sure to look for the jelly beans next to the hut on the upper ridge, as well as Mibu's balloon by the now open gate.
Bamboo slope.
Near the Shinobi Hunter is the Sculptor's Idol. Then you have to go a long way through the bamboo thickets. There is a Bandit with a torch patrolling nearby - and you can stealthily knock him out or just hide in the bushes. On the path ahead, the Archer is watching the road, so instead climb the ridge that opens onto the river and look to the right to find another clearing to jump onto, allowing you to go around it. From here you can jump up and kill the two seated bandits - but be careful if you try to ambush the lone archer watching the road, as more of the same guys are waiting on the ridge above. To deal with them, you can try to grapple directly below them on the ledge with a grappling hook. Once the bandits are dead, jump back to kill the rest of the archers.
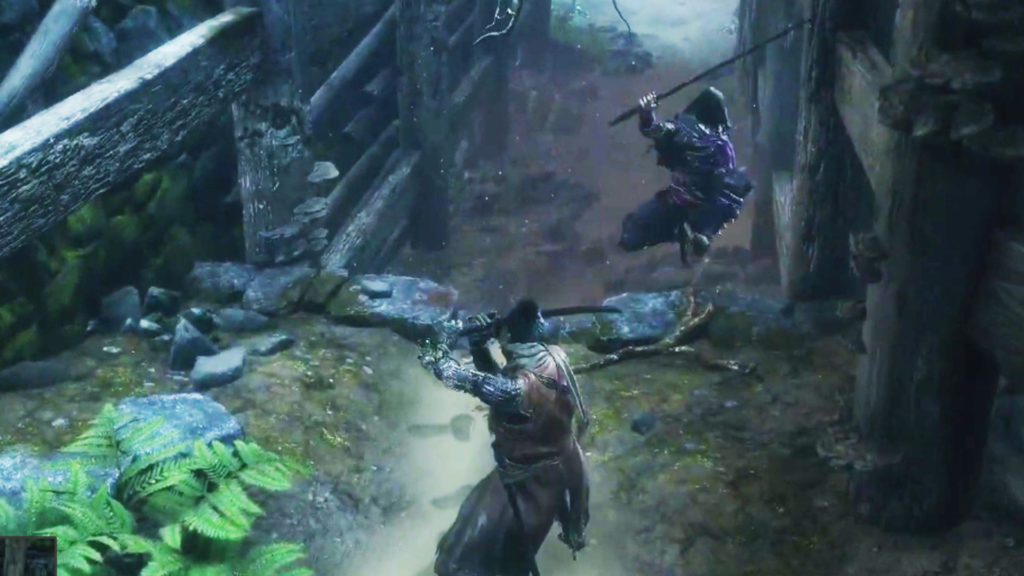
Before heading to the bridge to admire the river below for a moment, you can swim upstream to the waterfall to find a carp to kill for the scales and then jump to the platform above to get healed. Look to the right of the cure and you will see a hidden bamboo door covering the entrance to the cave. The cave leads to a narrow shaft that you can use to jump over the wall to climb a high ridge overlooking the waterfall and bridge. More importantly, this is another route leading to the three-tiered pagoda that the talkative thug was talking about. An enemy ninja in a purple cape is waiting for you on the roof. This enemy is incredibly fast and dangerous - perhaps too dangerous for you at this stage of the game. With so many different punches like him, it's hard to accurately track his movements, so be prepared for some really depressing combo attacks. Be extremely careful if he jumps into the air, as he kicks, releasing a powerful shockwave that can hit you even if you dodge. Fortunately, he only has one health bar, but he will still require a lot more attention than usual.
If his punches get confusing, make a save and fight carefully and don't get caught in his spinning combos that he loves so much.
In fact, if he's too hard for you, you can run around the pagoda to lose sight of him and open the door before he reaches you. The treasure inside is the Mist Raven Feather, a valuable object that can be used in the Prosthetic. With it, you can absorb an incoming attack and teleport in the direction you are in to gain an advantage over your opponent, so be sure to give it a try! Further in front of the stairs there will be a few more bandits. Kill them!
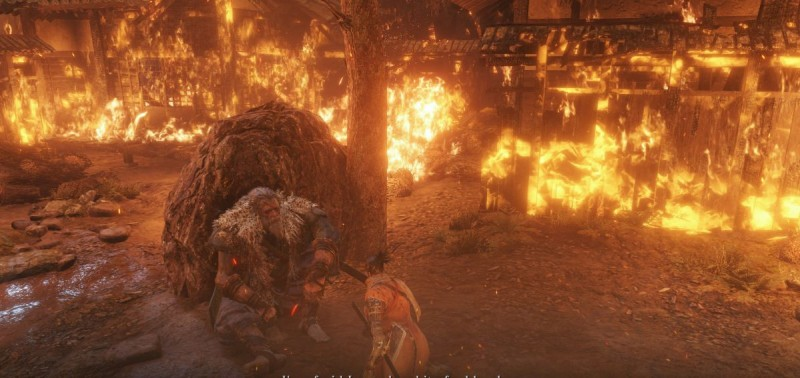
Everything is on fire at the entrance to the estate, and in the middle of the rock lies your mentor and father, Owl. Talk to him and take heed of his dying desire to take the Hidden Key of the Temple where the young Lord Kuro is hiding. The path behind will light up, so you have to grab onto the only tree that is still standing and then move to the top of the tower that is not on fire yet.
The other side of this building leads to a small cemetery and a bamboo grove, where a couple of bandits patrol and look out into the cave. You can eavesdrop on them to find out that this is the only way to the main estate. Be careful, as this couple is guarded by two more bandits - one with a shield along the path to the left, and an archer is standing opposite the grove - press against the left wall to get rid of the archer first, and then lure the others. Before heading into the cave, look out for an alternate path between the bamboos that leads down the slope to two regular shinobi hunters. One will go halfway up the slope and you can backstab him, but the other will have to be faced off.
They are not as durable as the mini-boss and only have one health bar, but they can still use a lot of dangerous attacks, so be extra careful. If you kill the second one, you will get a coin purse, and at the back of the clearing you can find a balloon. On your way back up the slope, find a small hole on the right wall to jump into and pick up some useful loot. This will be an alternative way back to the river. Return to the cemetery, enter the cave and watch out for the hiding bandits on the right side. The path leads to a well, which you can jump over the walls using successive jumps, and leads to a burning estate.
Main hall.
At the top of the well, look back to find some Oil near the building and next to it is the Main Hall Idol. Many of the buildings and walls here are on fire - restricting your path forward, so go around the left wall until you can turn the corner heading towards where the bandit archer is waiting. The burning buildings give way to more bandits that patrol the area, and you can grab onto the roof to advance further. A large pond separates the main hall, but the fire prevents it from being crossed so early. Instead, you'll have to carefully fight two archers, two torch bandits, and one axe. To make matters worse, two more bandits can hear the noise inside the long building and come out to fight.
After clearing this area, go to the pond and find the Clay Shard on the small island
How to defeat Juzo the Drunkard?

This enemy is quite intimidating, not to mention the bandit force that guards it. Due to this, a frontal assault is rather unwise, but you can use some hit and run tactics on his friends, although you need to be careful to make sure that when you finally face Juzo one on one, you have enough health.
If you take the hidden route, head to the far side of the pond and enter the nearest building, noting that you can sneak under the porch if need be. There is also a light coin purse in the room, and another bandit, and another is in the hallway outside, but remember that you can throw a clay shard from behind the wall to lure the enemy towards you. With the two enemies in the wing gone, you can sneak down the hallway to where Drunkard and his minions are waiting, but from here you'll have to use hit and run attacks to quickly kill one or two enemies, then run away while they take you down. will study. You can also try to lure Juzo away from his men to a secluded area, but be careful not to accidentally drag him into battle with his friends. When confronted, you'll find that he has a tendency to take big gulps of poison surge and spit it all over, so you'll want to have an antidote powder on hand for this one. However, he becomes vulnerable the moment he takes a sip or sprays his venom, so take advantage of this to deal some damage to him. He also loves to fight using sumo-style moves, including powerful palm strikes and a drop-leg attack, if he manages to hit you, it won't hurt. He also swings his incredibly long sword powerfully and can use two hands for a powerful downward strike.
Otherwise, he likes to throw long wide blows, including on the bottom, which you will have to jump over. If he throws his hand back, beware of two quick attacks or one giant one, and if he pulls both hands back, he will try to make a very powerful grab. Since almost all of his attacks deal high focus damage due to his size, you'll need to be careful when trading blows - it might be best to get a few hits in between his combos or sip poison, then back off. When he's down to one health bar, that might also be a good time to call your friend nearby if you haven't already. This way, you should only have one enemy that Insuk will fight against, while the Drunkard focuses his attention on him, and you can constantly hit his back, thus ensuring the survival of your companion. When the enemy is defeated, he will drop Unrefined Sake and a Bead. Unfortunately, you will not receive a reward for saving Insouke. Now that Juzo is dead, the entrance to the main building is available to you.
Step carefully inside, there are still bandits hiding in these darkened halls: the archer and other bandits are at the end of the corridor and will start rotating patrols as you get closer. Be sure to check the end of the left hall. Look at the wall at the end of the passage with the painting and go around the wall to open the Shinobi's Secret Revolving Door, which leads to a secret room! Inside there are many untouched trophies. Walk down the hallway to the left to find another room that contains a chest that you can open to get a rosary element! Since this path is a dead end, go through the large rooms on the right behind the bodies and looted chests to find a Meditation Idol, as well as a Balloon in the next room and a crying woman - the Timid Maid. This will eventually give you a bell. She relays a mysterious vision she saw and asks you to help her son and find Lord Kuro deeper in the mansion. As you move down the long outer corridor, an archer will appear at the other end and try to pin you down. You can try to dodge the incoming arrows or just hide behind a wall and let him come explore before surprising him.
Directly behind the Archer is an injured Inosuke Nogami, who warns you that the boss ahead is using illusions that are difficult to overcome. In the auditorium, examine the large tatami mat in the center of the room and push it aside to reveal a passage to the tunnel leading to the Hidden Temple - you must use the Hidden Temple key to enter, so if you don't take it, return to the slope of the bamboo thickets and find the Owl at the entrance to the main hall to get it.
How to defeat Lady Butterfly?
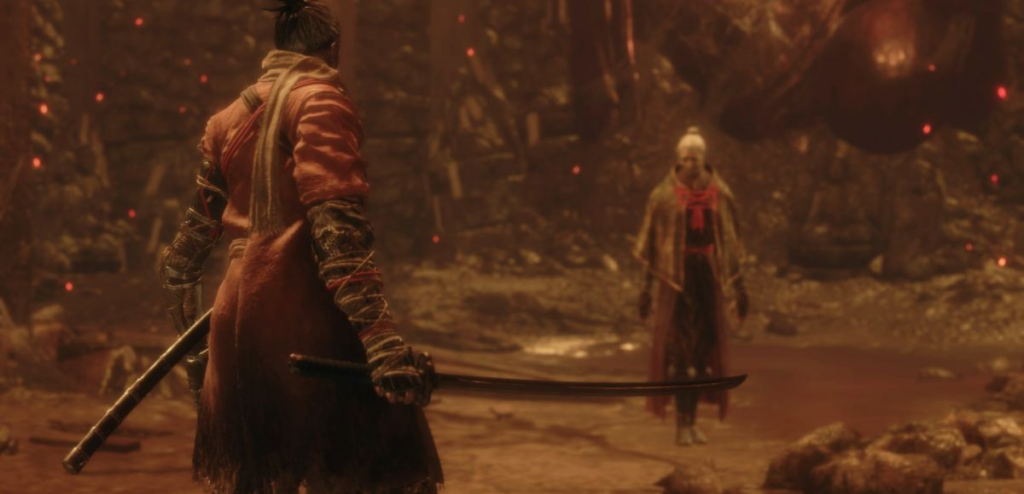
This fight is going to be interesting - as you'll soon find out. Butterfly has only one health bar, but a huge rate of recovery of concentration. Because of this, you'll want to prioritize lowering her health until you see her posture turn red, allowing you to deal damage she doesn't regenerate.
In combat, Lady Butterfly is a slippery opponent, she can drop a kunai salvo at you from a distance in many ways. If she charges, she unleashes several bursts, darting back and forth across the room before getting extremely close for a melee attack.
She will also use invisible wires as platforms to jump between them, often before throwing a kunai or jumping down to attack - including a dangerous overhand kick that will deal a lot of damage. When at close range, she will alternate between knife slashes and multiple slashes, which can end with a powerful downward ax strike that can deal a lot of focus damage (she can also do this from the air). Also beware of a running dangerous attack - but it can be jumped over.
Given her agility in mid-air jumping, you can cancel her flight with well-timed shuriken attacks that deal damage, and if she fails to block them (especially when jumping or preparing a dangerous attack), she'll immediately crash to the ground and become vulnerable. Once her health has dropped to at least half, it's time to build up that damage by using shuriken whenever she takes to the air. Be sure to accurately block her strikes at close range, then land a few of your own and she'll soon land a killing blow. However, this is not the end. As you were warned earlier, she is using illusion techniques and her body will disappear as several small dark creatures appear from all directions with various weapons - including spears that can deal damage. It's not worth bringing them in at this point, so you have two options: run and avoid them at all costs (while also watching her kunai projectiles) or use a special seed to dispel the illusions immediately. Unfortunately, you may not have many of these seeds other than the one given to you earlier. If you've explored Ashina Outskirts, you can find five more in the valley with the Great Serpent.
After a while, the Mistress will snap her fingers and scatter the spirits into butterflies, which will all gather in a bunch and fly at you, so start running around the room to avoid them. After that, you can start recruiting her for the second round. This time, she will summon small groups of flaming butterflies before many of her attacks, which will shoot at you like projectiles, meaning you have a new threat to avoid at all costs while still finding a way to strike. Make sure you dodge the volleys before trying to counterattack. Shuriken attacks still work while she's jumping around, but be careful because she will regularly bring back illusions that will haunt you from time to time. She will also set up a much longer slam combo that can be difficult to block effectively, but can damage your stance if you can't time most of the deflections. This attack always ends with a quick hit, so be ready to jump forward and down on it to deal even more damage. Take your time with this fight, use a lot of shuriken when she tries to jump in the air.
When she finally loses all her concentration for the last time, go for Deathstrike and perform Shinobi Execution to defeat Mistress. This will earn you a drop of Sakura to increase resurrection points, but it looks like only a young lord can use it. After the battle, the memory of that forgotten night at Hirata Manor ends in dramatic twists and another key to the Wolf's power is unlocked. The wolf will wake up again in the Old Temple and you can talk to the Carver to talk about what you just witnessed. Even though the memory is over, you can still return to Hirata Manor at any time to continue searching for items or buy items from the Noble Pot vendor. Remember that you also have Juzo's sake and you can share it with the Carver to get some good history. If you haven't completed Ashina Outskirts yet, now is the time to continue this quest - otherwise Ashina Castle is waiting for us!
Ashina Castle
After defeating the Gyobu Demon, the path through the castle gate is now within reach. However, before you open the Castle Gate next to the Idol, look for a long staircase at the other end of the battlefield. This leads to several dead shinobi and a large tower. Go around the tower to find more stairs around the corner where you can pick up the Clay Shard. The Memorial Mob vendor has different merchandise than its counterpart, including dragon blood drops and pumpkin seeds! Inside the tower you will come across a very deadly character, but he will not attack you. He is an Ashina tengu, and after being impressed by your stoicism, he will ask you to hunt "rats" with him. Be sure to accept his request and you will receive a description of the Rat, which will tell you the enemies you will be hunting for. In fact, these enemies are miniature Senpu assassins that you've seen a few times before, guys with big hats that look like gremlins, and they're around somewhere. There are a few things left to do before leaving. Look at the back of the building to find a dragee, a door to the former courtyard full of enemies, and an old woman with a candle, surprised that you killed Gyouba.
You can also head upstairs to find a light coin purse, but keep looking up into the rafters to find another level to grapple with where the short wall is. Looking up at the ceiling, you can see that it's caved in a bit, so keep moving until you can jump up the wall to the attic. There's a chest here that you can open to get a bead! Now return to the Castle Gate - open the large door and continue your journey along the main path. The shooter is waiting for you on the way to the next gate, but be aware that there is an alternate path on the left.
On top of the locked gate, look down to see two soldiers patrolling the path, but beware of the small alcove on the right where three attacking dogs and their servant are waiting to ambush you - Pitard Shinobi can stun them all.
More importantly, if you look back from the top of the gate, there will be a small field above the path you went down, where a few Senpu assassins have gathered. You can eavesdrop on them to hear them chat about Isshin Ashina's condition as well as the Black Badger mission. They are actually "rats" that tengu Ashina wants to kill. However, delay the attack, because where they are sitting by the tree - there is another senpu assassin watching them from behind a large tree to the left. Remove it first and then focus on the other two. They're a little different from others you've fought: their hats are buffed and will block all your attacks - just like a shield, making them hard to bypass. It's best to use the Shinobi Ax acquired from the Hirata Estate to do the job. Kill the Assassin team and retrieve the Pellet at the foot of the tree before returning to Tengu Ashina. He will reward you for your efforts with an item that allows you to invest skill points into the new Ashina Skill Tree.
Returning to the path to the castle gates, clear out the soldiers and dogs on the way up the stairs and pick up the clay shard at the bottom of the stairs. The shooter will come out to the door to support his friends, and on the other side is a large field where a soldier watches the Taro fighter hit the ground with a hammer. It might be tempting to try and ambush them - but hold off for a moment. Head back down the stairs and look around the side to find a path that goes around the gate to a ledge you can climb up. From here you can reach a tall tower that houses a light coin purse. Look behind you and you can find a jump platform and from this rock you can grab onto a tree on a ledge under the castle wall. Be sure to look carefully from the tree at the objects - there are several crawling geckos on the wall above it, so be careful and use shurikens to remove them from afar. Once they're dead, grab Gachiin's candy and crowbar before heading back to the tower.
The balcony offers an impressive view of the tower. Carefully reach the edge and look straight down. There are several enemies that need to be killed. Nothing else can be found in this area, except for a small ledge under the wall where the entrance gate contains an Ako lollipop, and you can also check behind the furthest building for a handful of ash and scrap metal. Jump onto the gate at the end of the path, where two soldiers are talking at the foot of the stairs leading to a long open corridor. Overhearing, you will learn that everything that lies in this corridor is not friendly and incredibly dangerous. Make sure you're ready before moving inside.
Mini Boss - Raging Bull
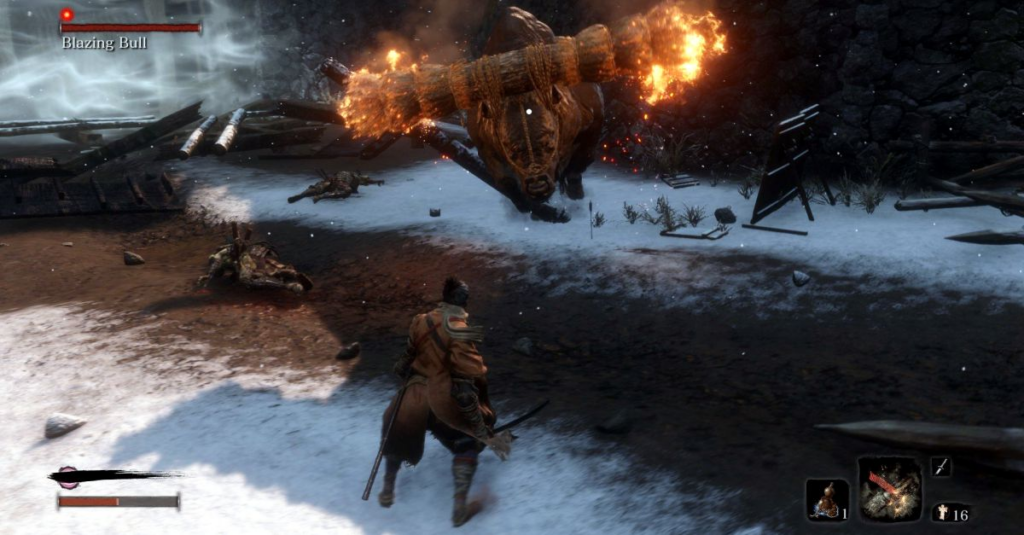
When entering the area, you should pay attention to the high walls and limited space. There are three soldiers here, and after killing the first one and moving forward, a giant bull with a burning log on its head will burst out of its enclosure and kill the two closest guards. As you can imagine, this fight can be wild and unpredictable, and will likely involve a lot of burns. For this reason, it is recommended to use the Withered Red Gourd sold by the vendor along the Hirata Estate River as it can protect and heal burn buildup. Even blocking a fire attack will still cause some burn, so tread carefully - you might be tempted to dodge a lot more, but his attacks have a very long range and your short dodge won't help. On top of everything else, you don't want to get trapped in the corner, so try to stick to the middle. Make sure you use Shinobi's fireballs often to get him excited and let him get some hits. The bull usually alternates between bobbing his head erratically from side to side or making full charge attacks, and slamming his horn into the ground to make a few sharp turns. Note that when it is charging, it will lower its head for a moment and then rush forward with a headbutt. It's a scary move, but deflecting this at the right time can stop his charge for a second, giving you a chance to hit him. Luckily, he is incapable of performing any dangerous attacks, so even his most intimidating moves can be deflected - just remember to back up and run away if you have too much damage.
The good news is that he only has one health bar, and while he regenerates quickly in the beginning, you can start to reliably damage both the bull and his focus using firecrackers. When in poor health, the Ox should eventually rise and fall back, giving you time to finish him off and put the beast out of its misery. For this, you will be rewarded with a bead and the passive skill "Shinobi Healing: Level 2".
Note that after defeating the Bull, the door ahead will open as two soldiers are looking around the area to find the bull that has left while you are still standing. Once you kill them and enter Ashina Castle, the gate will close behind you and you will no longer be able to enter the boss arena. It is important to note that from this point on, several routes pass through the castle, and some even lead to new areas. While you can explore all you want, especially if you're having trouble and want to gain power elsewhere first, we recommend that you complete the entire Ashina Castle before moving to a new region.
abandoned dungeon
As you travel across the large bridge to the idol, you will be familiar with the side path. Be sure to talk to Old Haga on the bridge when she talks about the Senpou Shrine and then jump down to grab the tree branch opposite the bridge. First go to the left to find the entrance to the room where you fought the Bull and take the Bright Coin Purse. Now go to the outer bridge to be above the Ashinsky reservoir, crossing the same bridge under which you once tried to escape. It looks like the same two guards are still gossiping, and you can eavesdrop on the couple on the bridge to find out that the big enemy from the Tarot Troop has been armed with some kind of powerful armor and may need to be taken down. You can jump into the empty moat below where the secret exit was, we'll soon find a better way down. In the meantime, jump onto the sealed gate and look for an enemy holding a bell surrounded by several watchdogs. This is the man in the armor that the two soldiers were talking about. While he doesn't look as good in armor, you might find it difficult to defeat him by normal means. Use pitards to stun the dogs or quickly kill them, because the Citiman Warrior can deal crazy damage.
After defeating him, you will receive a ceremonial blade that turns health into emblems of souls.
You can now go inside the large building and find a heavy purse behind a cart on the right. Next up is the Meditation Idol, as well as the Dungeon Commemorative Coin, which can be used to buy items such as another drop of Dragon Blood, a mysterious mask fragment, and a Bead! Of course, you can head to the Abandoned Dungeon - which leads to the even more mysterious Senpu Temple - but our quest will eventually take us there, so let's get back to the Ashina Castle Sculptor's Idol for now.
Ashina Depths
As you pass through the last gate of the castle, a long staircase leads up to the castle itself - but again, we have a little detour. Before the stairs, there is a path on the left that you can follow to find a small area with a door that you can open. Open the door on the other side to find another area with a tree that contains scrap metal and Mibu's balloon. Back in the building, look for a hole that you can fall into and you'll find a Dragee and a door leading outside. The door opens to the Ashina Reservoir where you fought the Samurai Chief in the prologue - and here something has changed. You will now find the idol here and there are many more options for you to bypass. Right down the stairs are two soldiers you can hear talking about reports of your latest exploits, but be careful when ambushing them as there are guide dogs here too. If you want to go back to the empty moat, you will find that the secret exit door is now locked, but you can go around the sides of the moat to find two Senpou assassins looking around at the blocked door, which contains a heavy coin purse and Scrap Metal, and below, in In the moat itself, there is another senpu assassin guarding the Mibu Spirit Orb. Back at the Sculptor's Idol, jump through the gate and exit into the courtyard below. There are spear-wielding soldiers and three Riflemen on the upper levels roaming around, and the Watcher is watching the Shooter to the left of the house. Remember that house you walked under at the beginning of the game? This is the Gatehouse where they keep the Broken Horn of Gebu. Either grab along the outer branches to climb up there, or fight your way through - but it's recommended to kill the shooters first. You can also find Dragee on a cart. Open the door with the Gatehouse Key and grab a heavy coin purse in the corner, as well as the contents of the chest - Broken Gyobu Horn, which you can use to craft a Charged Spear tool to pierce enemies from a distance. and rip off their armor (or just drag them towards you)
Mini Boss – Seven Ashina Spears
You can also go back to see the Moon Tower where Lord Kuro was and there are some soldiers leading up to the tower, but be careful. Although he is no longer held captive here, a mighty mini-boss is on guard - Shikibu Toshikatsu Yamauchi, and he is as deadly as his long name. As long as he guards the doorway, and they still haven't repaired that wall, you can actually bypass it using the original method you used to infiltrate the tower, and you'll find Lord Kuro's Memory Remain in you. Head outside carefully and you'll find a scrap metal next to a tree, and you can also go up to the rooftop balcony to find the Jizo statue. If you decide to face the boss, make sure you have the Shinobi Eyes skill to increase the focus damage.
Some of his larger attacks can be deflected to knock him back. He also has some scary overhead attacks, but again, wait until he swerves to fight back and hit him while he's vulnerable. If he's giving you too much trouble, you can also sneak back into the tower like you did the first time and quickly take out one of his health bars with Stealth Deathstrike. Defeating him earns you a bead.
Mini Boss - Lonely Shadow Swordsman
Another attraction of the reservoir is the well from which you started the game. If you head along the cliff towards it, you will find a man looking inside. You can talk to him. His name is Jinzaemon Kumano, and although he is on patrol, he doesn't seem to be interested in killing you. He'll ask if you've ever heard anyone playing the shamisen here - the sound seems to be coming from a well... it sounds creepy. If you dare to go further inside, you will find another person standing there. This Lonely Shadow is apparently looking for the "cowardly wolf" here, but doesn't immediately realize it's you, but will if you talk to him again. Like the ninja atop the pagoda at Hirata Estate, he's incredibly deadly, along with two health bars, and might be too big to deal with if you can't bring down his punching and kicking tactic and tornado kick-jumping tactic. However, there isn't much room to fight in this arena and his aggressive attacks are easily cornered. You can also try to even the odds by jumping on him from the well further down the path and take out one of his health bars with Stealth Deathstrike. But if you decide that you are not suitable for him - do not worry, he will not be able to follow you from the well. If you managed to closely monitor his moves, then you will be able to counter him evenly. Killing him will earn Magnetite and a bead.
Ashina Castle
Now it's finally time to make some progress. Return to the grand staircase using the Sculptor's Idol, and you'll be immediately greeted by a few archer soldiers and a samurai general, Kuranosuke Matsumoto. Creeping up, he can immediately deal a Death Strike, and then quickly remove the Shooters surrounding him while the samurai General recovers from a fatal blow. After killing him, you will receive a bead, and you can get the nearest chest behind the locked front door. Since the front door is locked, you'll have to find your way into the castle, and things can get a little... confusing. The rest of the territory in your area is divided into very narrow alleys full of soldiers, and something more sinister awaits you on the rooftops. You can see for yourself by going straight out of the locked door - the figure on the roof will jump down to the lower tier and notice you. This is the Nightjar Ninjas, a type of shinobi that uses death-curving shuriken that they will fire in volleys from great distances to harass you, and your own shuriken are no match in this area. Since this path ends in a drop anyway (but there is a Balloon around the corner), leave it and jump onto the roof a little further away from this ninja's eyes. Don't go through the passage to the right of the bottom of the stairs, there's another ninja.
About halfway up the stairs is a good entry point, and below you can see two soldiers patrolling with a dog, and then four more soldiers in a small courtyard. One group must be eliminated before the other can come to the rescue. Once they're all dead, look around the courtyard for a Clay Shard, and then continue up the stairs until you're almost under where the first ninja spotted you. Since he can't see you that far down, look for a small staircase to a small alcove where a man is sitting. Tell him you are a shinobi and he will thank you for clearing the path below (or if you don't, he will ask you to kill any soldiers still around). As a reward, he will give you the Nightjar Lighthouse Memo - a very interesting note that can tell you where the enemy shinobi should be and the hidden path to the castle through the roof.
Further in the yard, don't climb up the rooftops to the right of the nest, instead carefully head to the left and around the corner of the building and take another turn to the right - and you'll find another ninja waiting in ambush. You should be able to stealthily kill him without alerting anyone else - but if he sees you, he will go at you with his spinning shuriken blades. They can look and sound scary, especially when he spins them around during an attack for multiple hits - but that also means you can parry his attack multiple times, dealing a lot of damage to his focus, which is very weak on them. Kill him and go out to the rooftop he was watching and you can find the next comrade who went out the door at the bottom of the castle stairs. Grab and kill him from behind - and now no one can prevent you from inspecting the ground below. Assuming you have killed the people patrolling with the dog, only the Riflemen and two more soldiers should be left, which should be easily taken out with sneak attacks.
Then go past where the two soldiers are hunched over to find the tree the Senpu assassin is digging around, stealthily remove it from behind before it can start poisoning you, and then head back to the rooftops.
By now you must have noticed the purple smoke coming from some of the rooftops of the buildings - this is the guide that the Nightjar ninja travel through - they're not on every marked rooftop, and the ones that hide are only on those rooftops.
Note the large kite flying from the other side of the roof. As you get closer, you'll understand why these "ninja snakes" are called that. Proceed slowly as this night ninja kite will spot you from a long distance - scream loudly - and jump off the kite to crash into the ground and try to hit you.
Again, this can seem extremely dangerous, but while you're getting ready to parry his multiple spinning punches, you can quickly break his guard and finish him off, but you can always use Flask if you're having trouble blocking.
When you get to the end of the low roof, if you look carefully, you can spot a patrol around the corner, with another Ninja watching from the roof of a nearby building. Even worse, there's another one on the roof directly above you, so don't kill it just yet. First, find a safe grapple point above you behind the lookout guarding the other two, and stealthily take him out. Then jump down and go through the opposite roof of the building and behind it to the other side. There's another ninja from Nightjar here, but it's hard to surprise him, otherwise, quickly toss him and silence him, then find a nest on the top roof with Ungo's candy.
Don't rush to the item on the corner of the castle's low roof, there's another kite here, which means another dive bomber will make its presence known soon. Not only that, there is another ninja - and he will appear from behind the last corner - be extremely careful to run away from him! The good news is that, if you time it right, the bomber can explode right on the kite ninja's arrival and could kill them both. Now you can take the Clay Shard here. Take a peek into the large courtyard below - it's full of crawling geckos and nothing else, and if you fall into the water you won't be able to come back right now. Instead, look for the open window where the kamikaze ninja was and grapple to finally get into the castle.
Castle tower, hall
Once inside, grab a Fistful of Ashes and open the nearby chest to get a Pumpkin Seed. Please donate this seed. While you're doing this, you can also talk to the guy you saved outside of the castle - Fujioka, the Information Broker. He sells even more information than the guy from Ashina Outskirts, as well as an unlimited supply of many powders, hard candies - and another Gourd Seed.
The three-story pagoda memorial mentions a treasure in Hirata Manor, which is worth picking up if you missed it, and the Sabimaru memo mentions another prosthesis in the castle. Return to the castle, go up the stairs. There you can see Ashina Ashina. These robe-clad samurai don't have the armor of generals, but can quickly deal a lot of damage when hitting Ishimonji in the head. Wait for him to come to the screen door and perform a killing blow from around the corner, then open the far door. It leads to a large room full of footpaths patrolled by two more Aesin elites, as well as an old guard woman who will call for help if she sees you. One elite will leave the room through the far corner door, while the other patrols the square. If you don't know how to get close, you can either sneak past or stay outside the door and throw a clay shard to force the lone warrior back and investigate. After that, you can kill the warrior and slip past the old woman into the door on the right, where another elite is now looking out the window - they are easy to kill, and there is also a Dragee here.
There are two hiding behind a small screen in the next room - you will probably want to try to backstab, but so far the fight has not been successful, as dealing with two of these experienced opponents becomes a problem.
Expect these opponents to land multiple overhead attacks at the same time - meaning you'll have to dodge multiple times in a row before countering with your own attack. They also have a few other quick hits and combo attacks, so keep a close eye on their weapons to see when they fully kick in.
When the area is free, check their room for Scrap Metal as well as Candy. The door at the far end of the main hallway room is locked - although you can peek through the window and see at least three enemies inside. Of course, there is a giant pit in the room leading to the lowest level, but since there is no easy way back, let's find the Sculptor's Idol first. If you're in the mood for a secret, return to the War Room and look for a small portrait between two armor pieces. Go around the wall where the painting hangs and you'll find a secret Shinobi revolving door leading to a small armory. Here you can open the chest to find a bead, and find a Lightweight Coin Purse next to it.
Head back through the revolving door to the war room and look up at the ceiling for a hole you can use. There's Sugar Gachiina in the corner, and you can move around the crawl space until you find a new room behind a locked door - occupied by a female watcher, a soldier, and an Ashina elite.
Two more Elites are around the corner and will no doubt be intrigued by the noise. If things get too risky, you can always go back to the scan space and wait for them to come back. Otherwise, try to keep elite enemies in a row so you can fight them one at a time, or use the ashes to destroy some and focus on others. After killing everyone, go to the room where the couple came from to find the stairs with the Balloon and the hall leading to the Clay Shard and the screen door.
This leads to a secret room with a small passage leading down to a room with three ninjas - and there's no way to sneak up on them. In truth, the only thing they guard is something you will encounter soon enough, don't deal with them unnecessarily. Head up the stairs to the next level and here you'll find another Memory Residue between Emma and Lord Kuro about Ashina's secret weapon. Turn around and find the small stairs to the Candy and the Carver's Idol. Before we go any further, let's go back down.
Temple of the Great Serpent (Sempo Temple)
Back in the main lobby, head down to the beam below where you can spot a large object in the middle of the room and three soldiers facing the Ashina Elite. Clearly, the three soldiers are more desirable than the elite. Start with him and then switch to the soldiers. One end of the room leads to a door that will take you back to the Ashina Castle stairs. Since the stairs in the hall are blocked, go through the opposite doorway to find a lot of treasures: 2 Eel Liver - which can reduce shock damage, Gokan's candy and a chest holding Sabimaru, which can be turned into a new prosthetic tool to unleash a wave of poisonous blows .
The room behind the door leads to a door to another part of the location - above, where you first entered the castle through the windows. Head straight into the large open corridor where a regular Shinobi Hunter is patrolling next to the soldiers. When he dies, he will drop a heavy coin purse and now you will have to choose the routes you can take.
First a left turn leads to the bridge where the Samurai Leader is talking to the Soldier - eavesdrop to hear exactly what the Samurai is in dire need of... Salt! It looks like a certain seller might find this information useful.
If you go back and tell the merchant about it, he'll soon stock more items in his store, including unlimited materials for the basic Shinobi Prosthetic Upgrade at a comparatively cheap price!
Lucky for you, the Samurai leader has been lightened compared to the first one you fought and only has one health bar, meaning you can kill him instantly and then take down the two shooters next to him. Grab a hot air balloon on your way to the exit gate - don't worry, we'll be back pretty quickly.
As you walk along the path through the desert, you may notice that something jumped off the archway and ran down the road - and after that, three attackers appeared: monkeys. Yes, these aggressive little buggers are one-hit kills like the Dogs, but they get even more annoying as they run out of range before jumping on you.
Luckily, Shinobi firecrackers stun them just like other beasts. At the end of the path, you will reach the Temple of the Great Serpent, which includes a room with a Sculptor's Idol and a Balloon. The valley below leads to the Sunken Valley region, but we don't exactly need to go there yet, but we need to jump across the valley to a small small temple to get 3 eel livers. Trust me they are worth it
old grave
Head back up the path to the large tank and be sure to use the gate to climb up to the roof to find a piece of land on the other side of the small building - where you can find the metal. In the water itself, all you can reach are two man-eating fish, but you might accidentally target something below the surface that you can't reach... at least not yet. There is one item that can be found - under the bridge where the Samurai Leader stands, you can get a hot air balloon. Back in the courtyard where the Shinobi Hunter was, exit through the front door to find the Idol.
The grave in question is just outside the door on the left, and there is a drop of dragon's blood left in front of the grave. Looking down, you can see the broken bridge from the outskirts of Ashina. From here you can explore the other side. Head right past the Sculptor's Idol to the area below and look for a Gachiin Candy Nest on the wall. Try not to fall off the wall and go down the stairs. This is because around the corner is the first of two watchtowers manned by the Sunken Valley gunner, and if you come from that direction, the enemy will not see you. Under the tower, two soldiers will talk about a black assassin seen in the area, which is worth noting. Move past them to the watchtower and stab the cannonman in the back, then jump down to take out the soldiers.
As you move and continue down the stairs, another watchtower with a cannon will spot you. It's a bit unfavorable to go against, so instead head back to the area under the Idol and head down to the building below. Look up at the ceiling and you'll meet the rogue killer Senpou and an amazingly friendly guy named Black Hat Badger. Since he's not a friend of the Ashina Boys, he'll offer to sell you some merchandise - which includes a Big Fan that can be built into your Shinobi Prosthesis as a Charged Umbrella to deflect long-range fire and light attacks - and can also be used for slightly more basic deflections. .
After exiting the building, look to the left along the balcony to see a watchtower and a nest containing Ungo's candy, and drop down to the left to step back and grapple with the gunner to destroy it, then kill the gunners below. Return to the stairs you weren't allowed to go down to find the Watcher and land with a few items, including a Clay Shard, Gachiin's Candy, a Light Coin Purse, and a Handful of Ashes. Finally, go down the road to kill the last shooter here and look at the broken bridge to get black powder.
Upper tower
Now it's time to return to the top of the castle. Return from the Old Grave to the Idol, and use it to head to the dilapidated temple if you need to stock up on any items, because it will be more and more difficult for you from now on.
Ashina Elite Fighter - Jinsuke Saze
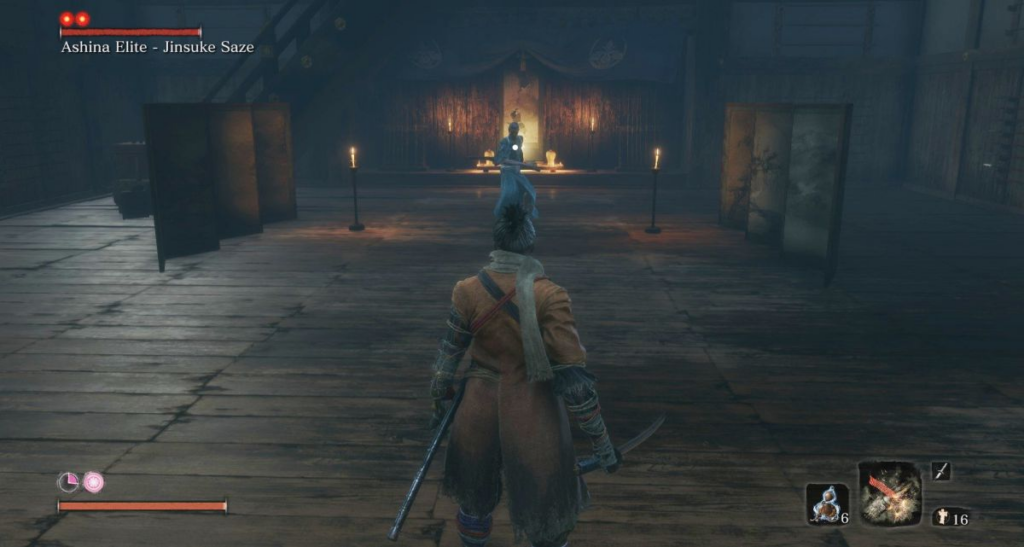
When you open the door to the dojo, you get Ashina's only esina, who happens to have two health bars - and his own fighting style. Jinsuke uses an iaido style that quickly retracts his blade to strike quickly before sheathing it - and he will use it to deal incredible damage at lightning speed. In this fight, don't even try to attack - his attacks are too fast and you get very few options. Instead, focus entirely on parrying his rampant double strike. What you need to look for is a small flash from his blade, which slowly unsheathes before he draws it out for an up and down combo. As long as you are ready to double-tap the block, you will deflect both hits and deal massive damage to it. He might try to land a quick hit - don't even worry about them, as they deal little damage and he's only trying to lure you into attacking, to which he'll either retaliate with a backhand strike or quickly charge into his unstoppable two hit combo.
Because he's in such a bad position, you only have to deflect his attack sequence two or three times in a row to break his position, and then you can repeat the process one more time to finish him off. Defeating him gives the Bead, and behind it you can see the Hanging Scroll of the Old Battle, depicting a battle with ghosts that have the terrible power of lightning. That, plus the liver of three eels below, and an important tale of caution: avoid the ground, strike back with lightning.
The stairs at the back of the room are blocked, so focus on the second room instead, which contains a Scrap Magnetite and a Jelly by the open window, which you can take to get to the castle roof where Lord Kuro is waiting.
Big Boss - Geniteru Ashina
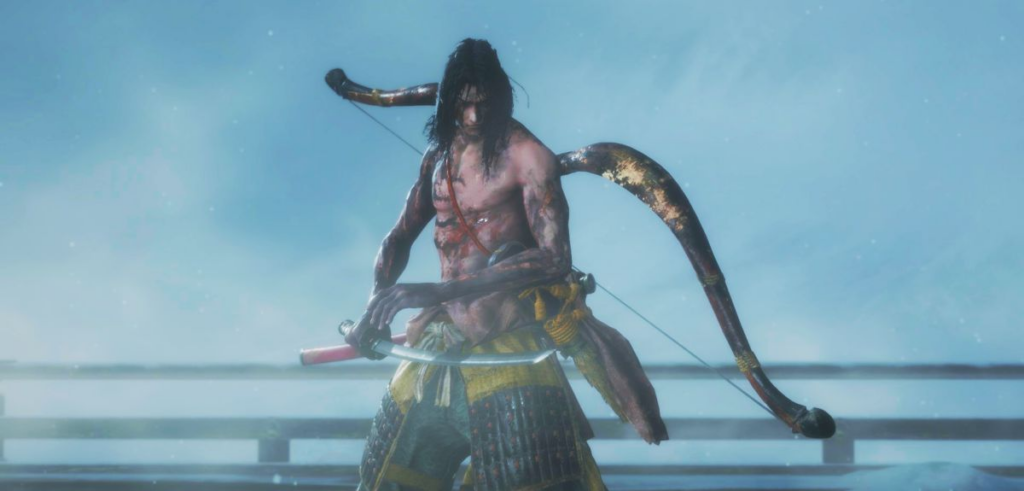
If you managed to fight Geniteru in your first encounter, you'll be happy to know that he uses several of the same moves. If not, then be prepared to scrutinize his move sets and prepare to look for the best opportunities to strike back whenever you can, because he is not an enemy that can be easily passed. In addition to his powerful katana attacks, Ganiteru will regularly take off his bow to give you trouble from afar. This can range from one or two quick shots before he rolls forward to strike with his blade, or he can retract his bowstring for a powerful blast that will make you slide back even with a deflection. He can also jump into the air and unleash a volley of three quick fire strikes followed by another shot before hitting the ground, and he can deal a lot of damage if left unblocked. Possibly his most formidable attack comes when he readies his blade to your left before swinging it with two strikes (or he may try to attack you first) and then perform a slow spin that will unleash a flurry of combo attacks - 7 in total - it ends with an uppercut that makes both of you recoil. This is obviously an extremely dangerous move.
Other intense attacks to look out for include a jumping slash where he plunges his sword into the ground and immediately delivers a dangerous slash in your direction. Try not to be afraid of the second hit and wait for it to recharge.
Sometimes he can just crouch in preparation for the push, but this is not so obvious, since the warm-up is not visible. However, if you see him jump to your left when the Danger Symbol flashes, be sure to jump and dodge as he has a very powerful short range slam ending in massive damage. This fight is a battle of attrition - you can't dominate here, so be prepared to alternate individual attacks and deflections with him and look for gaps after his combo attacks to give you an opportunity to counterattack. Shuriken combined with Chasing Slice allows you to quickly close the distance to him, which is useful when he is trying to load his bow or is about to jump into the air - which you can interrupt if you react quickly.
Make sure when exchanging blows with him, especially with his big attacks, you have some distance whenever possible to keep your defense up and regenerate your focus quickly - if he breaks your stance you won't be able to recover in time to avoid some of his attacks .
When you take off one of your health bars, it will only change things slightly to try and trick you. After his jump kicks, he will now perform a low fire where you have to jump on him to avoid damage - instead of pushing (although he can still do them at random - just not after jumping with punches). He will now also run to the right before rising in a low deployed attack, which can sometimes be hard to distinguish from his grapple (which causes him to run to your left) - when in doubt, just back away to avoid danger.
The second stage - the path of Tomoe
With both health bars removed, the Boss will discard the battered armor and take a more heretical approach, wielding his now lightning-infused blade. If you've been wondering about these blackheads, here's where they come from. He may only have one health bar for this version of the fight, but in addition to all of his existing attacks, he now has even more tricks up his sleeve. You'll probably be tempted to either heal or use the eel's liver early in the fight, but Ganiteru tends to start with an impressive jump shove attack in which he can cross a room very quickly - and it's hard to react to. He may also start running at you while yelling and his free arm is outstretched, which is your signal that he is preparing for a runaway attack that you will need to sprint and dodge to avoid.
However, the worst attack of all comes from his new lightning-infused blade - which happens when he leaps high into the air. The lightning strike will hit his blade, which he uses to either slash down or slash low across, and hit you with it. If it connects while you are on the ground, you will take massive damage and probably die unless you have an active eel liver. If he strikes you in the air, you only have one second to quickly retaliate by pressing the attack button to charge an explosion with your own blade and stab straight at him.
He can also jump into the air and electrify his bow instead, which has a much more accurate shot and can hit a lot more - but still the same rules apply. If you manage to strike back by charging him with electricity, you will take a lot of health from him AND VERY stun him for a few minutes, allowing you to deal a lot of damage without fear of his retaliation, and possibly break his concentration.
As long as you can keep maintaining pressure and deflecting his combo chains by healing yourself, you can defeat him long before his health is depleted, as his focus regenerates quite slowly even after only 25% of his health is taken off. Use the shurikens to put pressure on him as he retreats with his bow and eventually the lord will fall. Defeating him will grant you the vision of Genitiru, as well as a brand new Blood Smoke Technique that allows you to use Spirit Emblem during a backstab (whether or not you've been spotted) to create a large smoke screen to keep killing enemies.
Upper Tower - Kuro's Room
After the battle ended in sinister circumstances, you can speak to Lady Emma, who will reveal her true motives and the person she serves. Even if she fulfills her role, she will still remain there and help you with problems. In the meantime, go down the stairs to activate the Kuro Sculptor's Idol and talk to the young lord.
It turns out he's not ready to run away from Ashina. Instead, he wants to break the bonds of immortality - even yours - and asks you to help him. Although the thought of violating the Iron Code of Shinobi to make Lord Kuro vulnerable prevents Wolf from initially saying yes, Kuro manages to convince Wolf that he must help him.
Talk to Lord Kuro again and he will give you the first clue on how to break the binding bonds. The text about escape from the bondage of immortality that it gives you was written by another Divine Inheritor who has been looking for the same process for a long time, and by finding the Tears of the Sacred Dragon from the Divine Realm, this curse can be lifted. Examine the incense burner that he moves in the room, and you will learn that the Divine Heir used a special scent long ago to find a passage to the Divine Realm.
After talking to Lord Kuro again, he will go in search of new texts that can help you on your new quest. In the meantime, he will ask you to find Isshin Ashina, Ganiteru's still-living grandfather, who may know something about breaking immortal ties.
Follow Lord Kuro to the corner and he will point you in the direction of the watchtower that Isshin is in, which you can fight for using the exit from the nearby window. There is also a light coin purse in the slot under the window on the lower roof. The tower in question is located on the right - follow the purple smoke and you will find an open door on the balcony. Despite his lineage, Isshin is a normal guy and will even treat you with unrefined sake, which you can share with him, Lady Emma, or the Carver if you so choose. Talking to Isshin will tell you a little more about Ganiteru's motives, and when you ask about how to break immortality, you'll learn about the Mortal Blade and how it can kill those who can't be killed, such as some "infected". He also has a premonition that the blade can be found somewhere in the Senpu Temple, but all roads leading there have been closed.
While you're here, you can offer Isshin sake and he'll talk a bit about Genichiru and his unusual tactics, as well as where he got this special electric skill from. As you leave, note that if you go down the stairs, you will find the Pellet, as well as three ninja guarding the hall leading to this watchtower - the same ones you saw earlier in the hidden room. Since they are all looking the other way, you stealthily kill one and then kill two at the door and find the eel's liver there. Return to Lord Kuro's room and speak to Lady Emma and she will make an interesting note about the lord's condition and how her tutor tried to study the effects of the rejuvenating water, but it was all destroyed - but another apprentice may have some of the notes. In the meantime, you will find that Lord Kuro has moved into the library, and after he tells him about the Mortal Blade, he will share some information too.
It seems that Lord Takeru used a certain flower as part of the fragrance required to reach the Divine Realm and will give you the Flower Blooming Note. Obviously, this flower is only the pools where the waters converge - and this place is supposed to be in the Sunken Valley.
The valley in question is located just below the palace, and we have already found our way to it, which gives us our first real challenge. You can now also give Lord Kuro a drop of Sakura that Butterfly had and get an additional Resurrection Node, which is also related to killing enemies, to replenish it (or with the Jizo Statue). Lord Kuro may also ask you to inspect the censer and report how you feel. After telling him that it reminds you of cherry blossoms, he will think of the mystery of the cherry tree that used to be at the back of the castle. Lady Emma will inform you that there was once an Eternal Blossom, a sakura tree from the Divine Realm - however, it no longer exists, as someone stole the branch with the flowers needed for the tree to thrive. As for who stole it, we don't know yet. You can report this to Lord Kuro and travel to the sunken valley. Of course, you can still find your way to the Senpu Temple, but in this walkthrough, you'll deal with the sunken valley first before moving on to the Senpu Temple. Be sure to pick up the item near Lord Kuro as you will need the Fort Sanctuary Key to get deeper into this next region.
Sunken valley

You can find the entrance to the Sunken Valley through the back of Ashina Castle. When you reach the rooftops of the main tower of the castle, find a small bridge and a reservoir guarded by a samurai chief, and a path leading from the castle along a forest path. This leads to the Temple of the Great Serpent and the Idol of the Sculptor, which is located just above the entrance to the valley itself.
Returning to the idol, you will find that Tengu Ashina has gone from killing enemy ninjas in the castle to killing them in the temple, as evidenced by many bodies. Talk to Tengu to learn about his war against the ninjas of the Japanese Ministry of the Interior - and he will ask if you have learned any secret techniques. If you've been gathering skills from the Ashina Skill Tree he's unlocked for you, getting the ultimate technique will impress him enough to give you a whole new Skill Tree. If you haven't gotten it yet, be sure to try and unlock some of the skills in this tree in the next few areas.
Leaving the temple behind, look down into the valley from the small house for an eel liver. There are small ridges and platforms on both sides of the canyon, but you can see the enemy patrolling below. First go right and drop down to the lower branch, and then drop down to unlock the Underground Valley Sculptor's Idol. Then turn around and head back down the path away from the Idol. When you go to the platform, you will encounter an enemy. These are the Sunken Vale Riflemen, and they use their flintlock rifles very effectively to open fire with more damage and have a higher rate of fire than your regular soldier. This is where Loaded Umbrella can help - if it's active, it can't harm you (but it will deal focus damage). Absorb their initial salvos and wait for a break to close the distance and attack. They may also try to throw you away or make a dangerous strike with their bayonets, which you can quickly counter and punish them on the spot. After killing the couple, look up to the left to climb the ledge and get to the end of the ravine to find your way back to the outskirts of Ashina while looking at the broken bridge some distance away.
Below is a row of small stone pyramid shrines, but watch out for the sunken valley shooter along the stone wall on the right, which will emerge from the snow to attack you. Kill him and then loot the area to find a Prayer Bead and a few more items.
Return to the Idol and start down the gorge. Watch out when you reach the Fistful of Ashes on the edge of the cliff - as another valley shooter is watching from the other side to shoot you. Use the grappling hook quickly and head for him before he can fire another shot at you - the Grab Attack skill can help a lot. After killing him, go through the short tunnel to the next area. When you cling to the first branch, there is a ledge on the left to jump to the next one, but wait for the Gunslinger to enter the area to patrol the other side before moving on to attack from behind.
Before you go any further down this canyon, turn around and look for a ledge above where you fought and you'll find a short tunnel to another gorge where there's another warrior on the far ledge and another to the left of the cave exit.
Wait for the far one to turn its back before lunging at the nearest enemy, then quickly move to the second one. After killing him, look around to find a ledge that you can jump on twice and you will find a small hut. Since you probably just killed the villagers, head here for Yellow Powder and Pumpkin Seed before returning to the previous canyon.
By jumping down to the lower ledge in the previous canyon, you can find a clay shard before moving on to the next ledge. Turn the corner and grab the antidote powder here. Then follow the tiny ledge to reach a large area. Looking below, you can spot a branch to grab on to as one Gunslinger patrols back and forth. Be careful when you decide to jump down and ambush him, as another shooter is waiting on the right. Not only that, but the attack will alert another enemy around the campfire. This enemy carries a large two-handed weapon that shoots a projectile at you and can deal a lot of damage at a short distance. He also has a bad habit of using his giant weapon to block you or rolling to the side to launch another volley. The use of the fan in this case is the key to survival - holding off the attack and then lunging at the opponents before they can retaliate.
Luckily, after taking out this trio of opponents, you can find the Sculptor's Idol just above a small hill, and next to it, an injured Senpou Killer with some wise words - a huge weapon ahead, and probably full of weapons ready to tear you apart.
Rest and then grab the Magnetite near the ledge while looking down at some small rocky islands. As soon as you jump down, the incredibly vigilant snipers from the Sunken Valley will spot you from their stronghold and start attacking you even from this distance. Quickly run up and to the left to jump to the next rock and then to the giant Buddha head statue.
Serpent's Eye Shirafuji
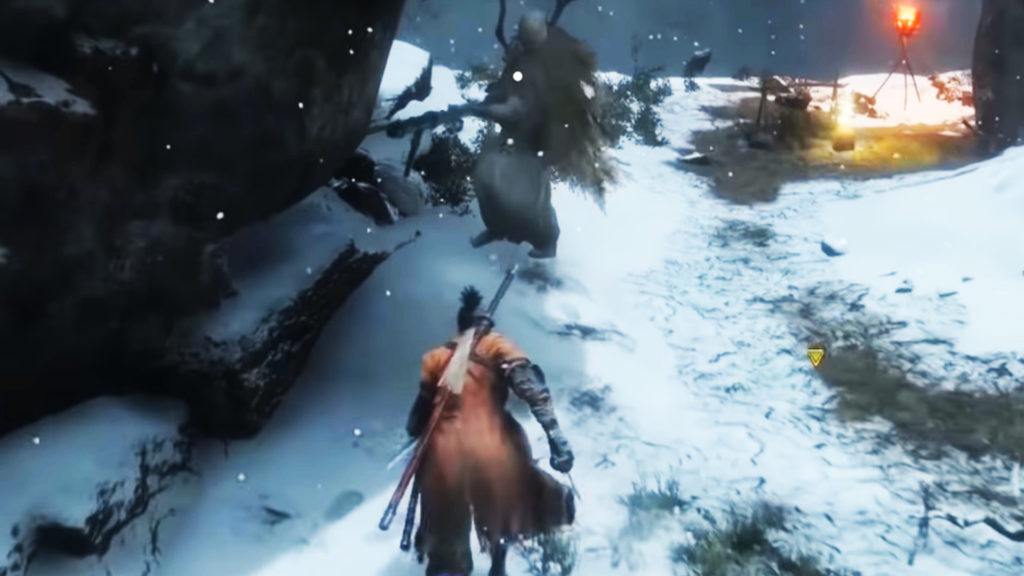
Make no mistake - even at close range, this weaponized elite enemy is nothing to joke about. She can use her weapons just as great at close range - and will swing them with amazing fury at close range to confuse you.
Her worst move is her grapple, which tries to trick you by swinging her weapon behind you, only to pull you in closer, dealing a ton of damage. If you try to run away to heal, she will only snipe to deal you a lot of damage - even when blocking. You'll want to get used to the difference between her quick swings at close range and the quick spin she makes before grabbing. If you see her turn around and ready her gun, dodge quickly to the side, or pull out her fan to deflect a shot, then resume your attack.
Stick to this tactic: hit her once, wait for her response, duck, counter with your own punch, and repeat until she goes head-on. Trying to land a few hits will only end up making you feel worse, so focus on timing those deviations and she'll drop from a loss of concentration long before her health goes down.
When she dies, she will drop a bead and you can find a handful of ash nearby and a Magnetite Scrap at the opposite end of the platform.
Before you're ready to attack the Fort, you may have noticed that there was a gunslinger on the ledge just below where you fought Snake Eyes, and he can sometimes get hurt when trying to advance. He's also in the sniper's line of sight, so carefully go around the wall when you're near the ledge to spot him below, then do a Death Strike and quickly grab the nearest Antidote Powder before you get shot. Once they stop shooting and looking for you, it's time to attack. Look for a ledge on the left side of the Buddha's head and follow the narrow path until you see the Armory Fort. If you look around the corner, a small rope bridge leads to it, but this is also a rather neat death trap. Sprint halfway up the bridge, then take out your fan and stop in front of a gap in the bridge. After a burst of fire, quickly jump down and grab between the branches until you reach the lowest ledge under the gun fort and hug the wall. Luckily, the Sunken Valley snipers aren't very interested in actually investigating your presence - if they can't see you from their sniper nests, they'll quickly lose interest.
Once they do, slide down the path to a ledge that you can jump on. From there, there are two more ledges - hanging on the right ledge to spot the sniper directly above you, and perform a Death Strike without his friend even noticing later on.
Use the same method to kill the next sniper and climb up to find the Spirit Emblem and the Magnetite Scrap. From here, you can also see a tree branch to hook on to - but do it carefully. Around the corner is another sniper on a ledge above. Grab the branch below it and carefully head for another kill. Instead of climbing up, jump back down to the branch, as there is another sniper further down in the fort keeping an eye on this area. Look at the small grapple point to the right and stop. There is another sniper to your right, but more importantly, note the strange thatched mounds along the ground. These are booby traps that hold firecrackers - while they won't hurt you, they will alert other snipers to where you are. Walk around them carefully to stab the nearest sniper and grab the black powder he's guarding. There is another sniper directly above you, so don't approach the ledge, instead make a double turn around the booby trap cluster to go right inside. Instead of moving inside, find a large Buddha statue along the back, next to which you can grapple by placing you right behind the sniper, and grab the Magnetite he was looking at. Looking back, there's another branch that sends you flying over the pressure plates down to the last sniper deep into the fort - don't worry, he can't see you that close. Jump twice to the ledge below it and take it down. Be sure to go downstairs to grab some black powder - and you can also see the road leading up to the cliff.
There is a door here and the ledge is guarded by soldiers, so we didn't try to cross to the far side as he covered the place - but he won't see you stab him in the back. Make sure to go downstairs to get Gokan's lollipop and then explore the passage. There's a woman on patrol here, and further on, where the last sniper was killed, are two more shooters. One with a shotgun also patrols the length of the cave and you can charge at him when he has his back to the tunnel and then put out a fan to block the remaining shotgun and pull him out - he will drop Yellow Gunpowder when he dies. Be sure to pick up some jelly beans, yellow gunpowder, and a heavy coin purse from the rest of the room.
Moving into the dark tunnel, you will find yourself above the bottomless cleft, where you will find the idol of the Sculptor. To the left of the bridge, there is a small ledge that contains some Spiritual Emblems, but you won't find anything else here, so head towards the shrine.
Long-armed Giraffe Centipede
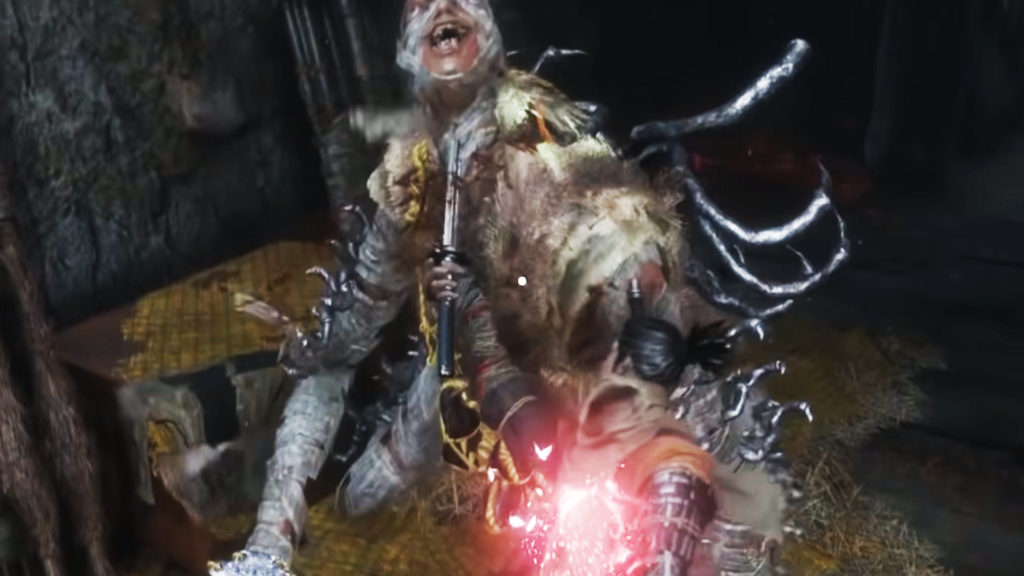
At the end of the temple is a statue with a Big Fan, which is a very interesting item that the Sculptor can build into the Prosthetic. There is also some Magnetite Scrap in the corner of the room.
Before moving on, examine the floor for a broken section that can fall into the crawl space below. Moving to the left leads to Yellow Powder, while moving to the right leads down a narrow tunnel that descends to a lower level. From here, the right leads to a blocked opening when some enemies make noises, while moving to the left leads to an exit into a narrow gap. There are two stone ledges on the right - one on the left leads to a room literally teeming with poisonous crawling geckos all over the walls and ceiling. Don't run in or engage in combat, but instead use your loaded shuriken to shoot them all from afar.
Back in the crevasse, take the right path to find a ledge below which three lesser centipede killers run around, and a few crawling geckos. The good news is that these smaller clawed mummies aren't as aggressive as the big guy, but instead they like to back off and throw fire at the ground. This, combined with the poison from above, can make this room painful. Have the powder and antidotes ready and quickly take out the geckos with shurikens and rush to the centipedes. Then you can help yourself with contact medicine and a prayer bead.
When you enter the passage in the Sunken Valley, be sure to look into the large lake below - something big is gliding across the sky, and it probably hasn't forgotten you. As soon as you start moving across the bridge, a warning symbol will warn you that it's time to run because the Great Serpent has found you. If you're not fast enough to get back across the bridge, the Great Serpent will break the bridge in two and send you falling into the lake below. In any case, you will need to go down, but once you do, he will try to bite you. Keep racing forward and hit the dodge button to break through the water and take a sharp turn whenever you see a dangerous symbol. Keep swimming and try to get through the small hole in the rock ahead to lose the kite for a bit before dashing into the cave at the end. Don't stop until you get to the Idol as it crashes into the cave wall before retreating just like in the other valley. There is little to be found on the surface of the lake - with the exception of two groups of fish-eating fish.
Riven Cave
Behind the new Sculptor's Idol, you can grab the branches and get into a small tunnel that contains an Adamantite Scrap. Climbing up to the next ridge, you will see that the gorge here is lined with large imposing statues - but the Monkey will soon appear in front of you. Wait, is this Monkey holding a sword? Aha! Keep in mind that this is still just a wild animal - and it will die fairly quickly, and even a shuriken will almost certainly kill it - but armed with a sword, it can deal some damage before being killed, so fight carefully. From here, there are several ways to advance - down, straight, or using the statue's arms to grapple higher. If you go up the high road, another Monkey will attack you and start jumping along the statue's other arms before turning to face you. Wait a minute - the Monkey has a gun! He is also surprisingly accurate and strong. The macaque will try to lure you into chasing it so that you don't notice two other monkeys positioned along the right wall, ready to open fire on you. Instead, use the shurikens to take them out from afar, and then ambush the remaining monkeys along the right wall. Be sure to head back to where the first Monkey was to find the Pacifying Agent, and then find the platform under the first statue where another Monkey is guarding the Popping Seed. As for the three giant statues on the left wall, look behind them to find 4 more monkeys waiting with rifles and swords among them and clear them out before grabbing the contact medicine they were guarding.
Further among the statues are some Spiritual Emblems and Ako's Candy at his feet, while the last statue has a ledge dropping down to Contact Medicine - but watch out! Here, you will be ambushed by up to three ninjas (two of them are hiding above) - and things can get very chaotic very quickly, as one of them will light up his weapon. Remember to wait for their spinning knife attacks to be quickly deflected and then retaliate and use moves like the Chase Trap with Shuriken to chase them as they jump. After killing them, jump back to the ledge with the fallen statue to find a Magnetite Scrap behind its head.
By now, you may have noticed that the gorge is indeed very deep and the fall will take you to the poison swamp, but for now we will not explore this place as it will eventually lead to the depths of Ashina.
In the meantime, look from the fallen statue to the nearby grove, where a bunch of monkeys sit - 22 in total, and among them there are several rifles and swords. Obviously, they will not welcome you kindly.
Because of this, you need a plan, and the Loaded Firecracker has the answer - especially the Springload Firecracker, which shoots in a circle. With it, you can head-jump into a group and unleash a series of explosions to stun most of the group at once - and perform either Chasing Slice or Whirlwind Slash to try and catch as many Macaques as possible in as few hits as possible.
When the group starts to regenerate, keep stunning them with firecrackers until their ranks are depleted, then switch places with shurikens and keep using Chasing Slice to hunt them down until you take out the rest of the group. Defeating all of them will reward you with Monkey Drink, which you can share with Carver, Emma, or Isshin Ashina, and you can also find a Pacifying Agent on a lower ledge and Metal against the back wall.
From here, look for another large statue at the end of the ravine wall and hold on to its arms to see a large pool in the distance with something sitting on the far end. Hand jump onto the large white rope around the tree and use it to get close to the far platform where you will find the Idol. Directly under this platform, be sure to look down and you will find the Orb.
Monkey Guardian
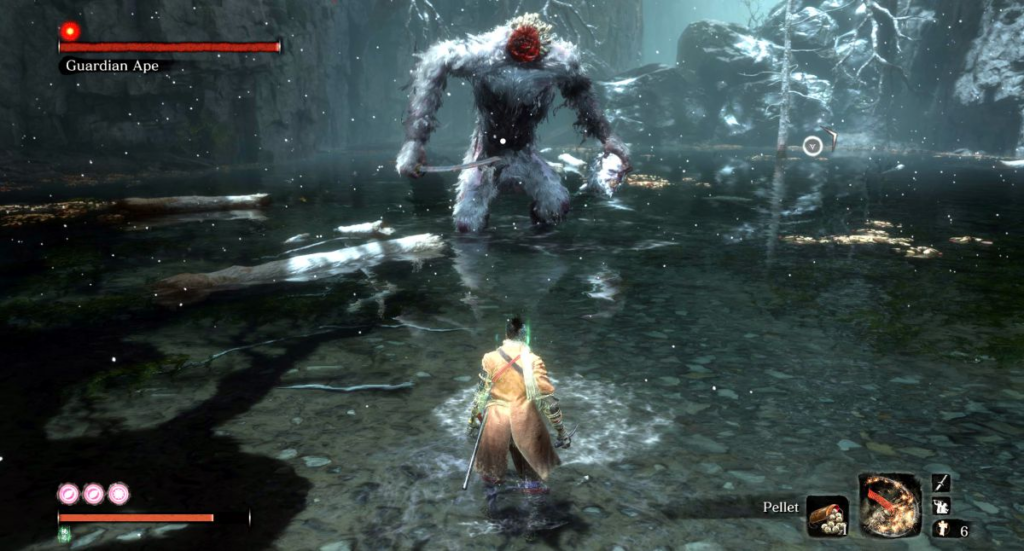
This fight is definitely one of the weirdest fights you will face in Sekiro. And it's not just because you're fighting a giant ape or because the giant ape has a giant sword stuck in its neck. This is only half. No, the guardian monkey can be as weird as it is obnoxious because, as an animal, he is very difficult to read and predict, and will lash out quickly and without warning when you least expect it—and he has several tricks. Usually this giant ape starts the fight by clapping his hand down and dragging it along the water to deliver a powerful upward kick with such force that he falls on his back. This would be fun if it wasn't for the fact that he won't waste time rolling on his back, but will lash out in all directions to hurt you if you try to get close - don't do it! It can also run towards you and stand up on its hind legs before flailing its claws. Again, the force will be so great that it knocks him down
Speaking of stocks, there is a chance that he won't roll over and attack, allowing you to get some good hits on his backside. The problem is that he usually responds by releasing a huge cloud of... Toxic gas. Yeah. Immediately run to the side to get away from this cloud, and be sure to have an antidote powder on hand. Every time he does this, he quickly runs away, grabbing his rear and then turning around, trying to find something. It will then produce a huge amount of feces to try and punch in the face. Again, this would be fun if not for the serious amount of damage it can deal, not to mention the toxicity it brings with it. For this reason, keep sprinting to get away from the impact of the poop - running forward or backward is usually not far enough. It's also a good idea to quickly dash towards him after dodging the shit - as he'll be vulnerable for a few minutes after the deed is done.
Another move you need to be careful with is his massive wide grab attacks - one of which will be for him to try to run his hand through the water to catch you before dragging you across the ground and throwing you aside - but you can use the trees to make a quick retreat. Another, even more dangerous attack involves a massive failed belly jump that ends in an unexpected spinning grab that's hard to avoid unless you're jumping to both sides of the monkey instead of jumping or running backwards. In terms of grappling, the Guardian Ape will sometimes roar - and in doing so, makes the hilt of his built-in sword a prime target for grappling, and when performing a Grappling Attack, you can get a few free hits. It's also worth noting that since he's still a beast, Shinobi's firecrackers can work wonders to stun him. However, it's not without danger - it often reacts to explosions by rearing up on its hind legs and then knocking over its belly - which can hurt you.
The good news is that he only has one health bar, so just try to get a feel for his attack patterns - use him when he's stunned and don't get greedy when you think he's down. You can still dodge most of his hits, they can be hard until you slow down the rhythm of his attacks - but building up the focus damage as his health gets lower is the way to go. Keep up the good work and you will be able to complete the Shinobi finisher and complete the quest started by the sword around his neck...
The second stage
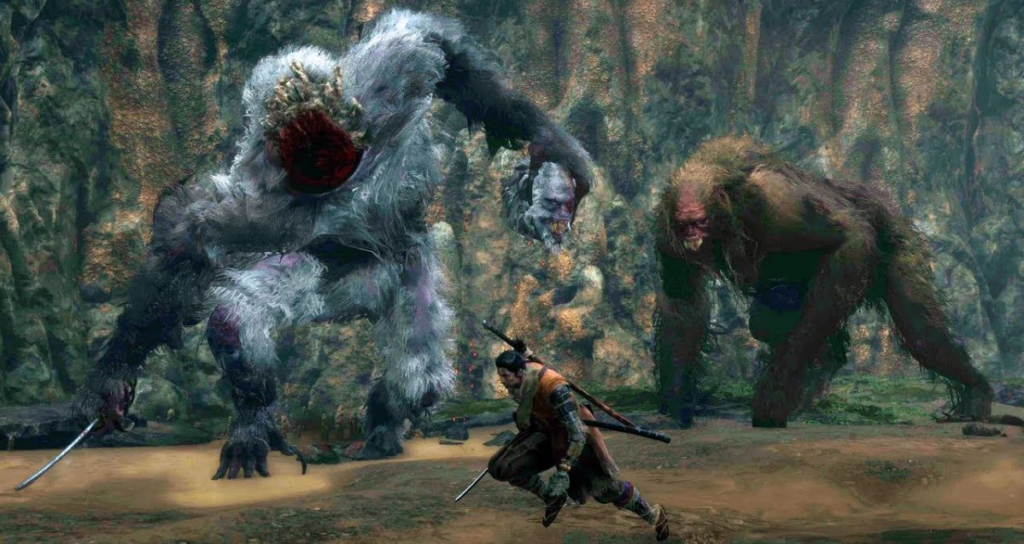
Yes. It's happening and now you know how weird this fight is.
Dissatisfied with the decapitation, the Guardian Monkey will rise to hold its head in one hand and the decapitator's sword in the other, and fly out for the second circle. As you might expect, he doesn't care about Shinobi firecrackers anymore, so don't worry about that. If you thought the first stage was unpredictable, try fighting when all you see is your head in your hand. Because of this, the Guardian Monkey will stagger and his movements will appear almost random and even snake-like as he stumbles left and right. The start of this phase almost always starts out the same way, he rears his head on his shoulders and unleashes a giant scream that will unleash an insane amount of unblockable terror damage that can kill you if the terror bar fills up. Because of this, as soon as you see him raise his head, immediately run away from him until you are in range of the scream and wait for him to stop before attacking again. He will constantly do this during the fight. - this means that you must be ready at any moment to drop everything and run.
The monkey also uses a lot of crazy sword attacks, some of which are harder to predict than others. One combo comes with two sets of curved attacks that are staggered to confuse deflection timing - wait for him to back off before blocking pushes to deflect them all. The other includes a lot of dangerous looking slash attacks - although they can all be deflected once you kill the pattern - but the final attack makes him wait, holding his sword high, before sending him down. It may look devastating - and it is - but if you deflect it, you will be sent back and the force of the deflection will cause the Monkey to stumble and fall, giving you a great opening for multiple hits.
Just be careful as he loves to scream so back off just in case.
Finishing it will give you the Monkey's memories, as well as a Thin Finger, which can be turned into a prosthesis. Now the small cavern outside is finally accessible, and inside you will find the Palace Lotus, the flower you need as part of one of the scents needed to reach the Divine Realm. Return to the Carver to supply your prosthesis.
Along with Divine Abduction, you should now have all possible prosthetic tools, with the exception of upgrades and changes to existing tools.
Then return to Lord Kuro, show him the flower and tell him about your exploits. In turn, Lord Kuro discovered a new problem - you need the blood of the Dragon Legacy to complete the fragrance - but the Divine Heir cannot bleed. However, he found Page's diary from the previous Lord Takeru, which mentions something that could attract blood. Lady Emma knows one such item that can do the job found in the Senpou Temple: Mortal Blade, and she will provide you with the Crowbar of Immortal Rupture as proof. But how to get to Senpou Temple? We've already been told that Isshin has blocked the roads - so we need to find another way - through the Abandoned Dungeon, located across the bridge over the Ashina Reservoir. If you've already found the entrance, you can teleport to the Abandoned Dungeon Entrance Sculptor's Idol to brave the dark depths.
abandoned dungeon
CHOICE OF KURO (BATTLE WITH THE OWL)
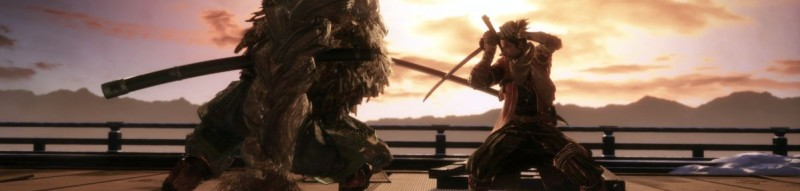
This choice will allow you to see one of three endings, each leading to the Fountainhead Palace. First you need to defeat Owl. Shinobi uses a very diverse set of techniques and acts quite quickly. He needs to demolish two lives, and after the first one the enemy will move faster and will periodically throw smoke bombs.
Try to dodge his shurikens, firecrackers and checkers, which disable the ability to use a healing potion. You can run from the enemy for a long time, attacking only when he throws two shurikens, and then makes a sweeping jump attack - at this moment a “window” will open for a couple of seconds. You can also interrupt enemy attacks by attacking them in advance (does not always work). A simpler option is to memorize techniques and timely parries.
When Owl falls, go down to Kuro. Next, ask Emma about how you can bleed the Heir. In order for the healer to appear, you need to save at the idol.
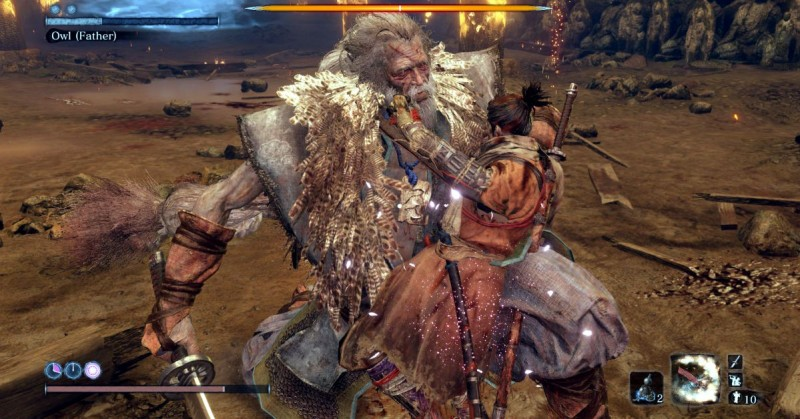
Next, you will learn about the Blade of the Immortals, which the Wolf already owns. Ultimately, you will need to activate the incense burner and perform a ritual by bleeding Kuro.
After that, the master will tell you that now you have the desired fragrance and can visit the Palace of the Origin. Go to the cave, the entrance to which was guarded by the Ghostly Corrupted Nun. It's time to use the tent in the center of the cave - as a result, you will be transported to a new location.

It is important to note that before visiting the Fountainhead Palace, you must collect the necessary items for certain endings. For example, the presence of Dragon Tears, which will fall from the boss, will open a good ending. Everbloom from Owl (full) will open a better ending. The last option is Ice Tears, which gives you access to a better ending.
To get Everbloom from Owl, do not leave after activating the incense burner. Eavesdrop on Kuro and Emma's conversation by standing behind a screen against the wall of the room. Then talk to Emma herself.

Relax, move to the idol near the arena with Owl and talk to her again. Agree, save again and have a second conversation.
Go down the roof, then through the window to the tower above, and from the room in the center - to the very bottom. You will run into an ogre - kill him and go outside. Find the Old Grave idol and save. Emma will appear nearby - talk to her.
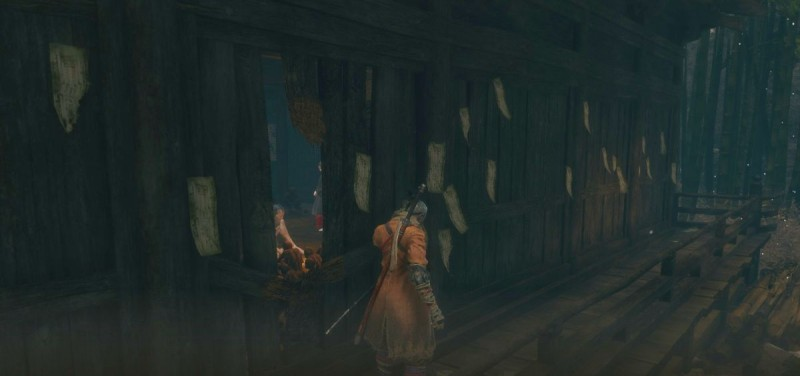
Then visit the Ruined Temple. From the outside of the building, you need to eavesdrop on the conversation between the Carver and Emma. Next, talk to the doctor herself. Say you know everything. As a result, the girl will give you a bell, which will allow you to return to the updated Hirata Estate and defeat Owl there.
Hirata Manor (secret)
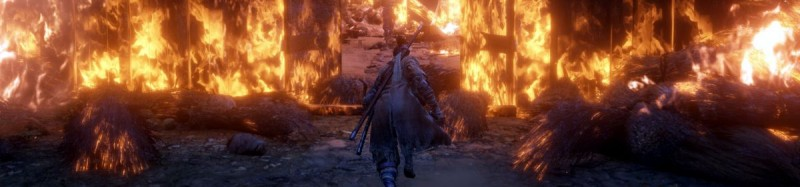
Once in the center of the fire, fight the new mini-boss - Lone Shadow Spearman Masanaga. The enemy will drop a bead. Step forward to the arena where the Lady Butterfly was defeated before. Juzo the Drunkard will meet you at the entrance - you will have to defeat the enemy again, which will give you a new bead.
By the way, before the battle, you can eavesdrop on the conversation of the mini-boss with an ordinary enemy - it turns out that the Ashina clan was able to capture Hirat with the help of Owl.
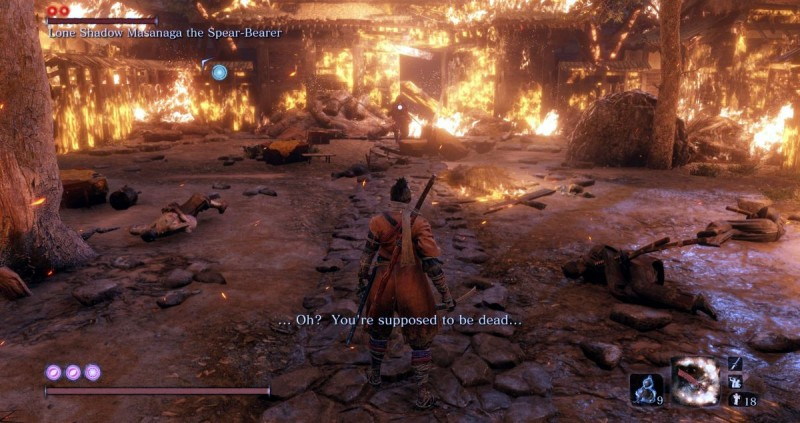
In the basement, which will be engulfed in flames, you will stumble upon Owl himself. The second battle with this boss will be much more difficult than the first.
The enemy will use not only previous techniques, but also new ones. At the same time, his speed, strength and survivability will increase. When you win, get a new memory and an Everbloom. At the end of the game, the last item can be given to Kuro to get a different ending.
Fountainhead Palace
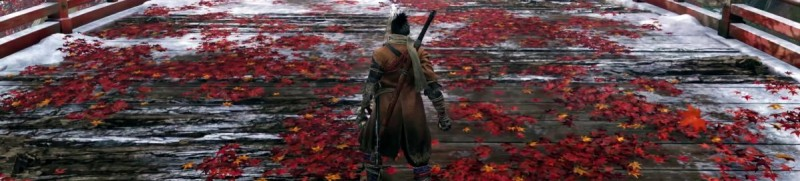
Once in the new area, follow the giant's ropes to the first idol. On the bridge ahead, you will immediately be attacked by the boss - the Corrupted Nun.
The enemy is a full-fledged version of his ghostly copy that you killed in the past. The differences are as follows: this boss already has three lives and several new tricks.
Fallen Nun (real)
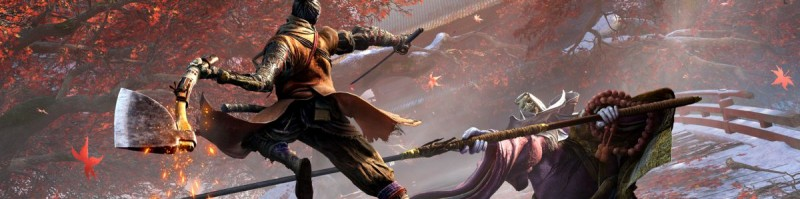
During the battle, try to block the attacks of the Corrupted Nun. One of her tricks is a few spinning turns, which, if you block incorrectly, are guaranteed to throw off all your concentration.
At first, the boss will move quite slowly. When you take one of his lives, the dynamics of the battle will increase. In the end, everything will become even faster. Between these phases, the Nun will sometimes disappear - at this point you need to continuously run from the beginning of the bridge to the end, and also cling to tree branches.
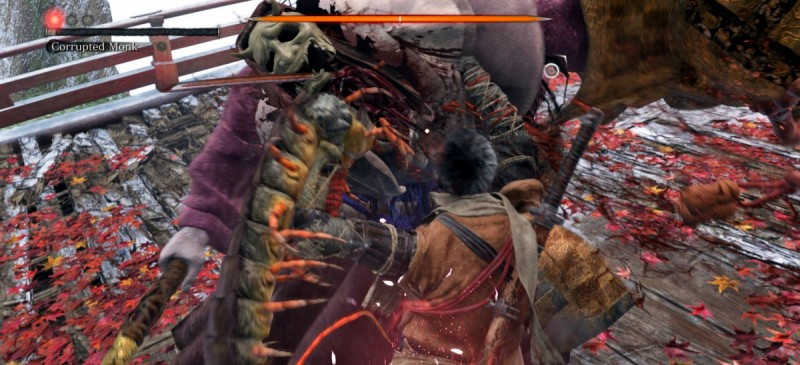
Watch carefully where the next black spirit appears. If you just mindlessly jump on the trees, then the enemy will definitely hook you and take a lot of health.
After the battle, you will receive a memory and a counting board, which will increase the amount of goods sold by merchants. Save at the new idol. In the valley, move to the lower part. You will find a lake and several buildings. Among the buildings themselves, humanoids roam, which are not particularly complex.
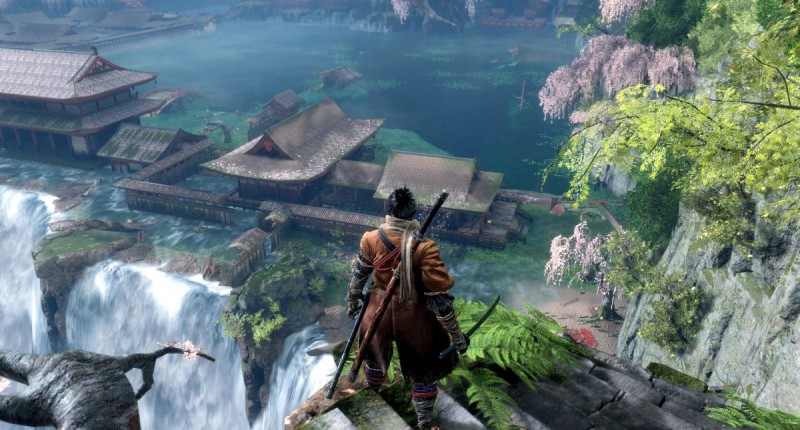
Kill ordinary enemies with weapons and especially quickly eliminate weak humanoids that use magic. Don't jump into the water just yet, as there is a dangerous enemy on the other side of the area that shoots lightning. In any case, he will notice you anywhere in the water and kill you.
You can try to swim to the half-flooded structure at the end of the lake. There will be a grandmother who will tell you about a secret underwater route. From the roof you need to dive and swim to the left.
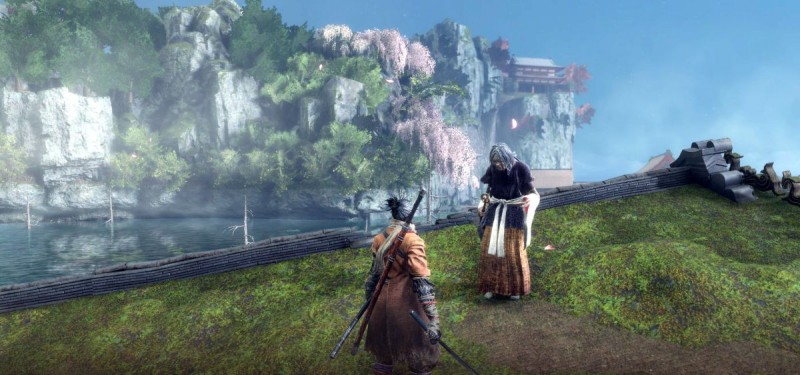
Inside you will find yourself in a cave with a huge carp, which you can’t just defeat. Swim further to the new idol and save. It is also possible not to follow this path and immediately choose the road to the city. One way or another, you will still get into the city - from one of the two sides.
If you chose the underwater path, on land, go to the nearest building and defeat the opponents there. The door on the left will lead you to another part of the area. Deal with a group of enemies below. Save at the idol.
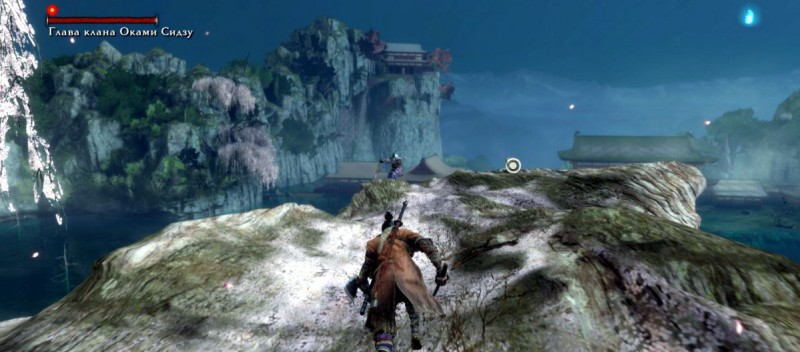
From the tree, get to the platform where the Head of the Okami Shizu Clan is located - the same humanoid that shot lightning at you. When you defeat him, you can dive into the water and get to the bottom. There is a chest with a clear one, as well as the fifth Headless.
Path right through the city. In this case, go past the houses on the left side. Defeat the opponents and save at the nearest idol. A grandmother in one of the corridors will inform you that the local people are cursed. You can go inside the house and deal with the enemies to pick up the grass from the chest. Leave the manor and save at the new idol.
In the estate itself, you can also choose the right path. Dive into a small lake and swim to the opposite room, which contains a chest and scales. Talk to Grandma to find out about her cursed father.
In addition, you can walk around the estate on the left side. Behind the wall you will find a burning bull - a strong opponent that you faced at the beginning of the game. The difference is that now the bull will deal a different type of damage. To deal significant damage to him, you will have to activate the confetti. The tactics are no different from the original battle. By the way, first it is better to deal with the archers on the roofs, and only then proceed to the bull itself.
Step back to the idol, pass the bridge, which will break the Great Carp. On the opposite side, deal with a group of enemies. Step right.
Passing by waterfalls, overcome a pack of wolves. Near the next waterfall, you will be attacked by Warrior Shichimen - the already familiar mini-boss, which is no different from the original. It will drop a material called lapis lazuli, which is needed for top quality upgrades.
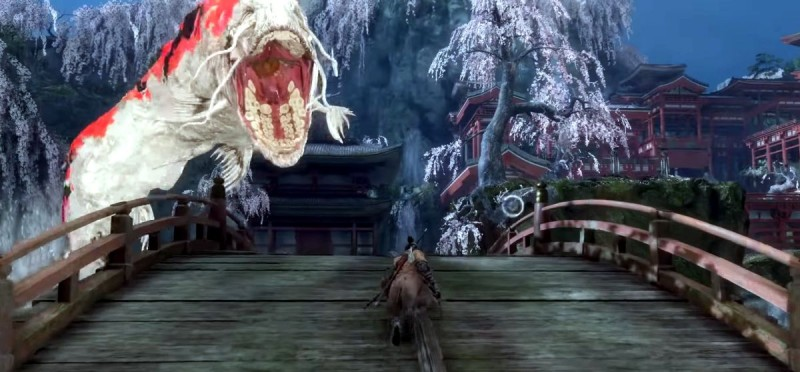
In the end, you still have to jump into the water, swim to the roof with the headstock, and then get to the cave with the carp. Once you've done that, visit the sakura. To the right of it you will find the grandmother's father. After talking to him, teleport to the palace. Inside the building that you have already passed, an old woman will be found - she will kill all opponents. On the right, take the pumpkin seed from the chest.
Behind the door you will need to follow the branches up. Before that, go around the house on the right side and hook onto the roof. From there, reach the mountain on the left by jumping diagonally. From the branch down to the pier where the grandmother's father is. Save at the altar. Chat with the person. Next, activate the bell and give Karp valuable food - you could find it both in this location and in the arena with the Guardian Monkey.
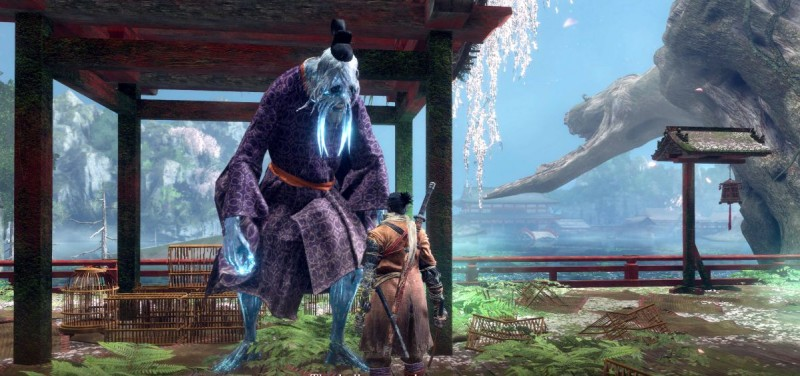
Return to the Dragon Spring idol. From here, go down, then along the water and to the right. In a small hideout, you'll come across a platform that also has a barrel merchant - the same one that can be found in Hirata. He sells items for scales, as well as part of a mask. If you make a purchase, the merchant will give you food - you need to give it to Karp by ringing the bell near the grandmother's father.
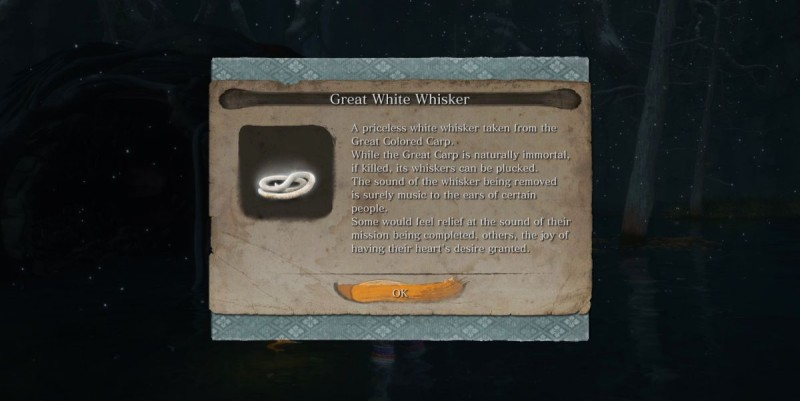
After you need to teleport to the watering hole of the Guardian Monkey. Take a white mustache from the body of the deceased Karp. The resulting item must be handed over to the grandmother's father, after which the curse will subside. As a reward, you will receive grass.
Visit the merchant from the barrel again - it turns out that he himself became a carp. Take the lapis lazuli that lies nearby. After that, you will also be able to buy the left part of the Dragon mask. As a result, all three parts will be collected - the resulting item will allow you to spend skill points to increase the attack of the idol.
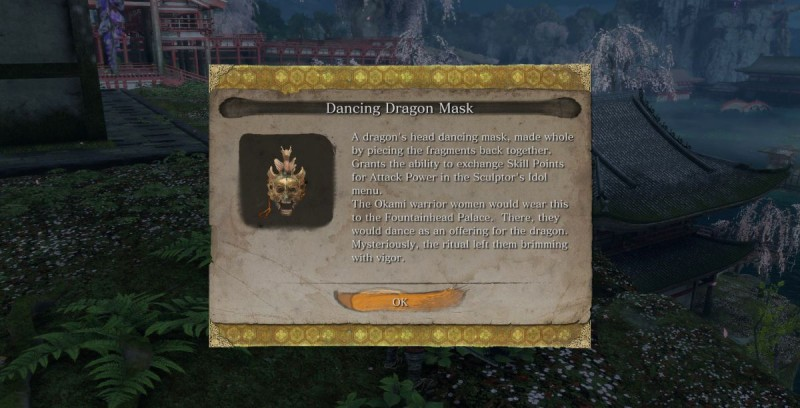
Teleport to the Palace idol. In the house, pass the door on the right, where there is a chest. Climb up the mountain along the branches. Save at the idol. Higher in the cave you will find a praying girl. Pray next to her to teleport to the arena with the new boss - the Divine Dragon.
divine dragon
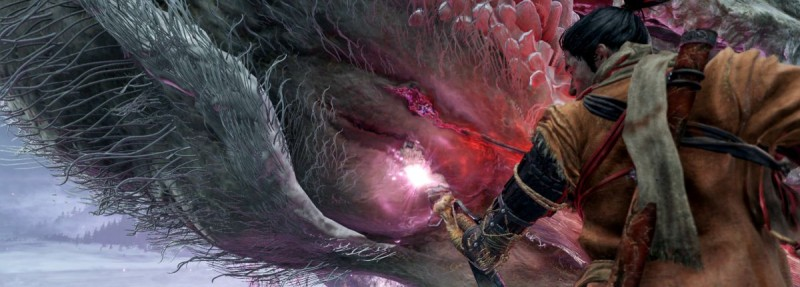
The first phase of the battle is the battle with the Old Dragons of the Tree. Passing it is incredibly simple - you need to kill the white Ancients. Each of them dies from one or two blows. After landing a last hit, you will grab a Treant, and then deal damage in an area - it can hook the remaining Treants.
The second phase is the battle with the Divine Dragon. It is also not particularly difficult. You just need to dodge the wave-like attacks of the enemy, the approach of which is easy to see. In this case, you need to move towards the boss himself.
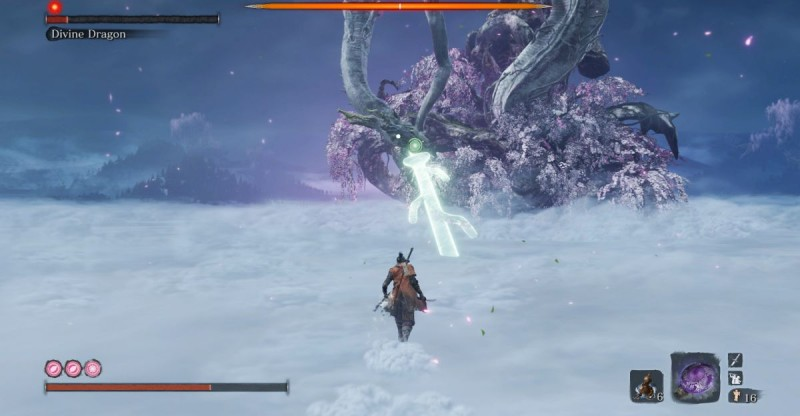
You will find several trees next to it - jump on them. Look at the trees carefully, as lightning will appear on one of them - you need to jump to this tree.
After receiving a bolt of lightning, you will find yourself in the sky - point the camera at the Dragon and press the strike button. After doing this operation several times, you will no longer be able to use the trees. Next, you will have to dodge enemy attacks.
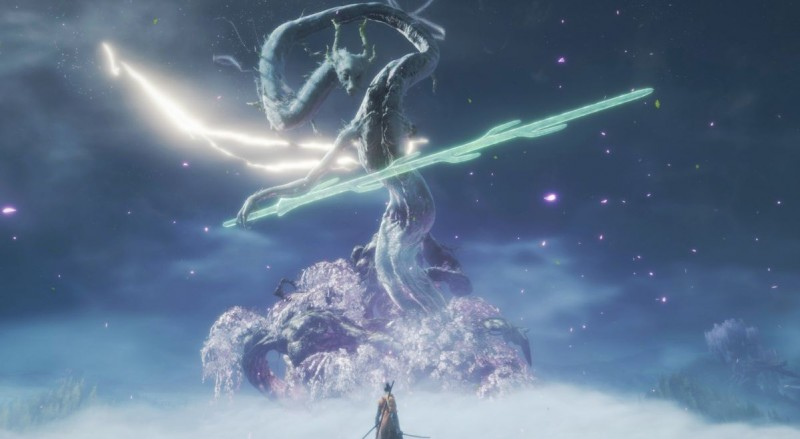
At a certain point, he will strike the ground with his sword - the trees will reappear, so you can use the lightning. As a result, the boss will be stunned - do not waste time and quickly run towards him. Climb up the sword and finish off the Dragon's eye. As a reward for victory, you will receive a memory and dragon tears.
The final
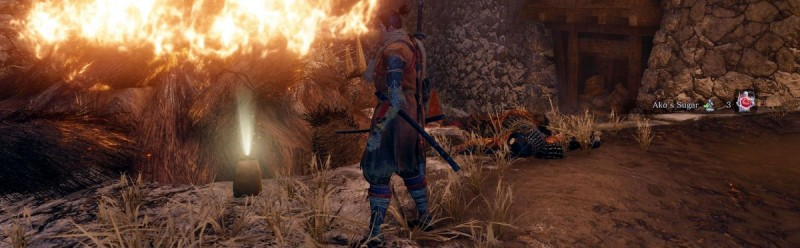
Once in Ashina Castle, talk to Emma. It turns out that Isshin is dead. Kuro left in a secret way, which you went at the very beginning of the game. Get out on the roof and go down to the street. Save at the Ashina Castle Idol.
Next, go to the right, then into the house, and from there - into the crevice. Outside, save at the Ashina Reservoir idol. Go even lower. There you will be attacked by Shume Masaji Oniwa - another mini-boss. The reward for victory is the rosary.
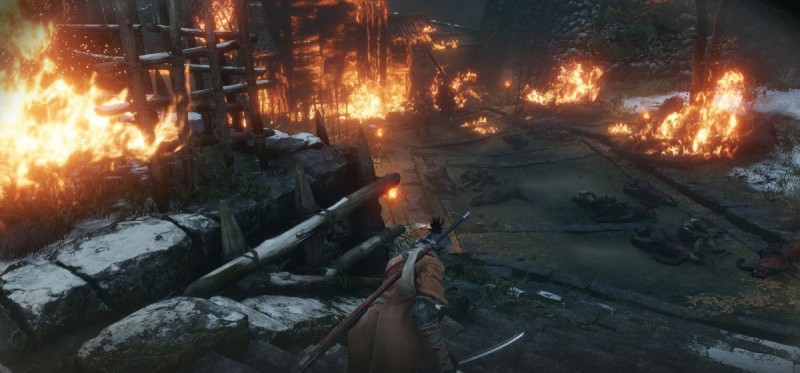
On the left, if you go the initial path, you will find the same passage. Pass the door and go out into the field, where during the prologue Genichiro Ashina chopped off your hand. You are already waiting for the third fight with him.
Genichiro will immediately fight in his new form using Tomoe's lightning school. You will have to kill him only once, after which the second phase will begin with three lives - Genichiro will replace Isshin, the master of the sword.
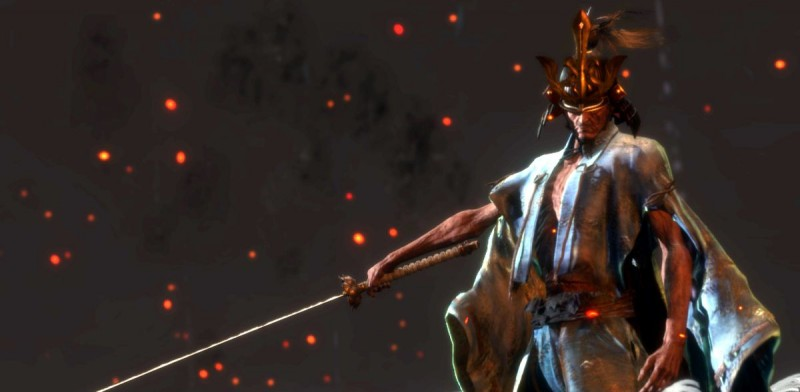
This stage of the battle will be incredibly difficult. After losing two lives, Isshin will start using the spear. During the battle, you will have to block blows - running back and attacking just like that will not work. When an enemy jumps into the air for a lightning attack, simply "shift" straight into it without running back.
Don't be afraid to lose focus - quite often the enemies spare you and don't carry out tricks at this moment. The most important thing is not to let Isshin rest, blocking his attacks in a timely manner and inflicting counterattacks. As a reward for winning, you will receive a memory and a new skill.
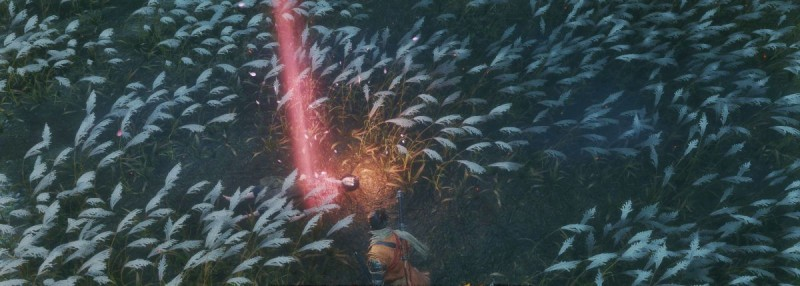
After the battle, talk to Kuro. You can give him dragon tears that you got from the previous boss. One of the final cutscenes will begin.
Sekiro Shadows Die Twice Walkthrough Video
Was the article helpful?


