Passage of the game Lost Lands 9: Tales of the First Brotherhood 100%. All the secrets, puzzles, mini games, collectibles and achievements in one place...
Lost Lands 1: The Dark Lord - Walkthrough 100%
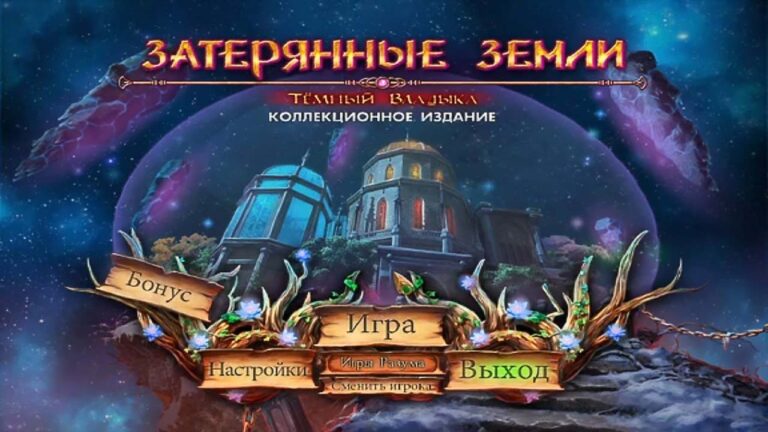
Passage of game Lost Lands 1: Dark Lord 100%. All secrets, puzzles, mini-games, collectibles and achievements in one place.
Games series: Lost Lands
Content
Lost lands. Dark Lord (lost lands 1) - An adventure game with a search for things, various mini-games and puzzles, telling about an unusual story in a fictional world with many unknown corners and mysterious inhabitants.
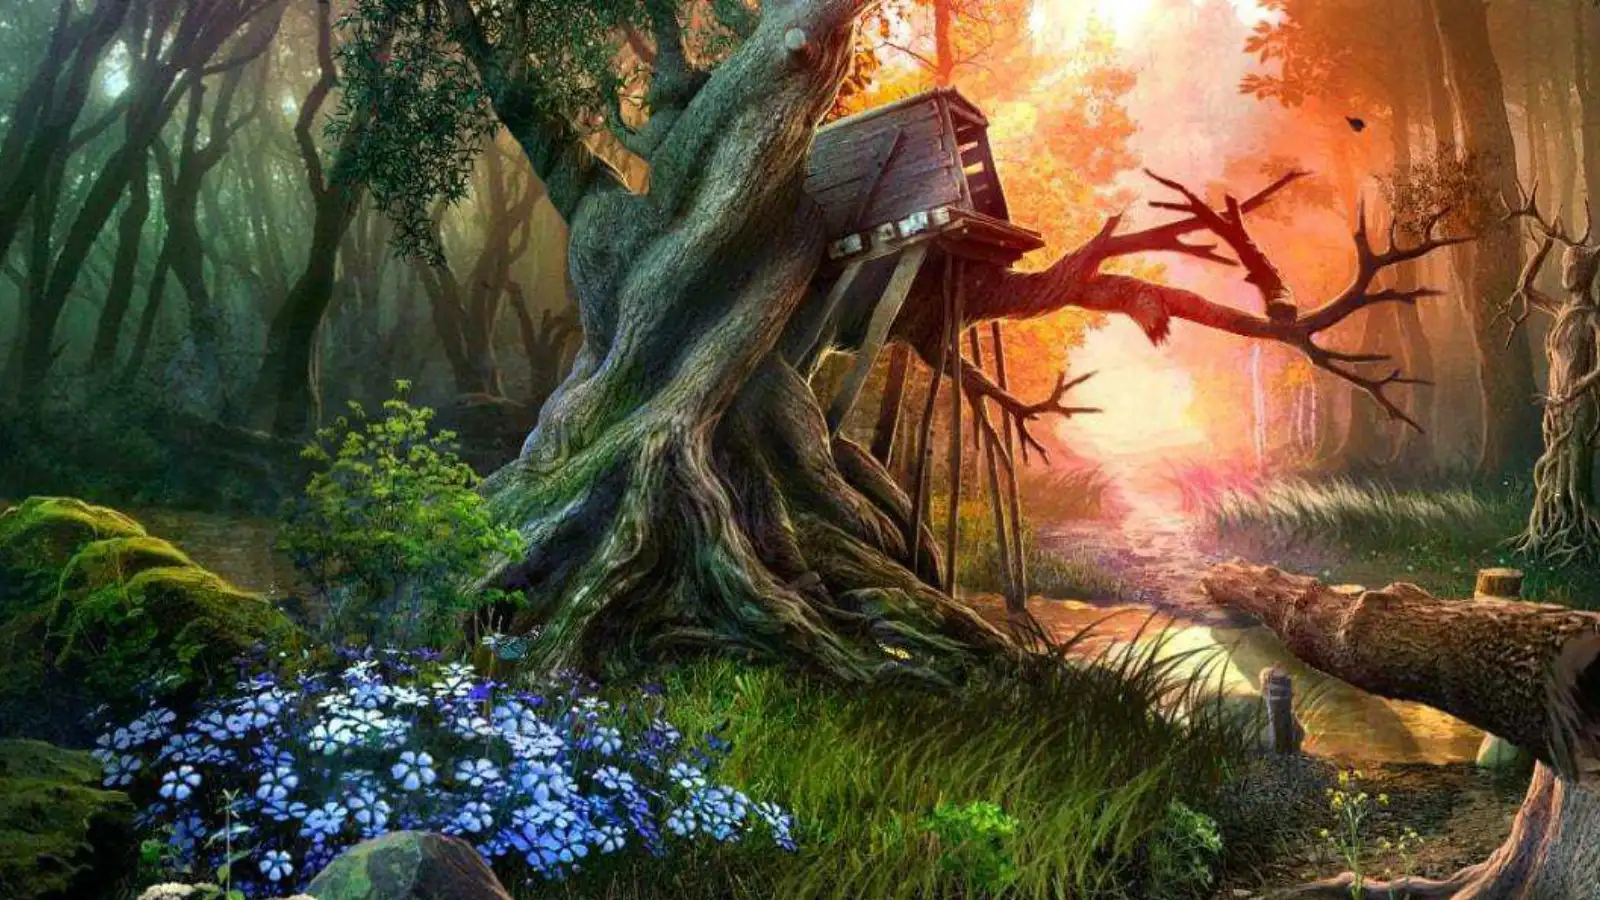
The passage of the game is very exciting and addictive. While you're distracted talking on the phone in the dark of the night while your child is playing with a teddy bear, a soft glowing light and a faint chime from a spooky looking tree beckons little Jimmy to come closer. Being a curious child, as is often the case with children, he approaches the tree, and before you know it or even finish your conversation, poor Jimmy is sucked into some crazy portal inside the tree. Now there is nothing left but to follow him to a strange new world where he has been kidnapped by a mysterious dark force. Can you muster up the courage and make new friends to hunt down Jimmy and save him? Find out in this exciting adventure game Lost Lands. Dark Lord. Solve dozens of puzzles and learn about the history of the Lost Lands, explore more than 50 fabulous locations, show logic in passing levels, and save your son from the world of evil.
If you are stuck in the game Lost Lands 1 and can't complete the level, you can watch the walkthrough on our website. Screenshots of the walkthrough will show what you can do in each corner of the locations.
Chapter 1
Portal - I don't know what exactly happened or where I am. One thing is for sure: this is no longer our forest. Everything is different here. Although this is not the main thing now! My boy, my Jimmy, was at the center of it all, shrouded in strange black smoke. I reached out for him, but this thing broke loose and carried him further, over the bridge. I must follow him.

- Take the SPATULA (A).
- Take the KNIFE (B).
- Cut the rope with the KNIFE; take the ROD (C).
- Place the ROD in the holder; receive the WOODEN DISK (D).
- Walk forward.

- Take the second WOODEN DISC (E).
- Excavate with the SHOVEL; take the third WOODEN DISK (F).
- Remove the wood; insert the 3 WOODEN DISKS into the slots for a mini-game (G).

- Restore the drawing.
- Solution (H).
Chapter 2
Firefly Forest - I found a stone with an inscription engraved on it. So I'm in another world, the world of the Lost Lands? This news shocked me. Another inscription warned travelers about the Great Evil. Horror seized the locals. They were forced to leave their native lands. I feel this evil reaching out to Jimmy. But why, why does he want my boy?

- Click on Jimmy (I).
- Take the DRY TWIG (J).
- Take the DAGGER (K).
- Drive the birds away with the DRY TWIG; get the OWL (L).
- Walk forward (M).

- Use the OWL to get the DOOR KNOCKER (N).
- Take the LOAD (O).
- Go back.
- Place the DOOR KNOCKER; select it (P).
- Get into the tree.

- Talk to Uri (Q).
- Get a map that will be added to your toolbox (R).
- Take the OIL CAN (S) and BUTTERFLY NET (T).
- Lift the carpet; take the RED DISC (U).
- Read the recipe; take the 2nd WEIGHT (V).
- Open the curtains for a HOP (W).

- Play SPP.
- You receive the HEAD (1-9).
- Exit the tree.

- Place the HEAD on the door; select each head twice and enter (X).
- Take the 3rd WEIGHT (Y).
- Go back two times.
- Place the 3 WEIGHTS on the scale (Z); go across the bridge.

- Click on Jimmy (A).
- Take the SWAMP MUD (B).
- Walk forward.
- Click Jimmy.
Chapter 3
Uri - I met a gnome named Uri. He promised to help me find my son. The gnome gave me an old map. Now I know where to go. But first you need to fix the bridge, because my journey begins with it.

- Talk to Uri (D).
- Take the BARK (E).
- Examine the flower; cut the root with the DAGGER and take the FLOWER ROOT (F).
- Catch the FIREFLIES with the NET (G).
- Use the DAGGER on the LILY (H); take it.
- Click on the chest for a mini-game (I).

- Set up figurines.
- Solution: Cx3, B, A, Cx4, B, A, Cx4, B, A, Cx3, B, A, C, B and A.
- Take the second RED DISC (J).
- Go to the Forest.

- Place the FIREFLIES on the lantern (K).
- Click on the debris to access a HOP (L).

- Play SPP.
- Receive the NAIL PULLER (M).
- Go to the Swamp.

- Use the NAIL PULLER to remove the nails and get the OAR (N).
- Go back.
- Knock down the cage with the OAR and open it.
- Take the EMPTY BOTTLE (O) and CONSTELLATION LEAF (P).
- Use the DAGGER and EMPTY BOTTLE to collect the TREE JUICE (Q).
- Use the DAGGER on the MUSHROOMS (R).
- Go to Uri's Cabin.
- Examine the table (S).

- Place the MUSH, BARK, FLOWER ROOT, and MUSHROOMS in the bowl (T) and push with the pestle (U).
- Put the LILY on the holder, pour the contents of the bowl and the TREE JUICE onto it.
- Take the ENCHANTED LILY (V).
- Go to the Swamp.

- Place the ENCHANTED LILY on the leaf (W).
- Talk to the Spirit of the Lake (X).
- Take the ARROW WITH ROPE (Y).
- Place the ARROW WITH ROPE on the crossbow; take the LOADED CROSSBOW (Z).
- Go back.
- Fire the LOADED CROSSBOW at the gangway (A).
- Enter the ship.

- Take the RED OCTAGON (B) and BRUSH.
- Use the OIL CAN on the winch; click on it (D).
- Cut the rope with the DAGGER and open the door; take the MECHANISM PIECE (E).
- Walk forward.

- Examine the book and place the CONSTELLATION LEAF on it for a mini-game (F).
- Open the correct cells.
- Solution (G).
- Take the 3RD RED DISC (H).
- Go to the foot of the tree.

- Place the 3 RED DISKS on the slots on the door to trigger a mini-game (1).
- Put all parts in their proper places.
- Solution: CJ, BF, AD, FA, DN, EF, NE, JD, KB, LC, MN, DM, FL, GK, HJ, ID, NI, JH, CJ, BG, JB and DC.
- Go to the passage.

- Read the note; take the STICK (I).
- Go back.
- Roll the stone with the STICK; find the 1st key (J).
- Go to Deck.
- Clean the moss with the BRUSH for the 2nd key (K).
- Go to the Captain's Cabin.

- Remove the cloth; find the 3rd key (L).
- Take the PURPLE OCTAGON (M).
- Examine the lock and place the MECHANISM PIECE for a mini-game (N).

- Use the keys from your diary to place arrows.
- Solution (O).

- Open the lid; take the PEARL (P).
- Go to the Swamp.
- Give the PEARL to the Spirit of the Lake (Q).
- Go forward.
Chapter 4
Brothers - My first thought was that the gnome next to Jimmy was Uri the gnome. I was wrong, he was his brother. She and Uri are like two peas in a pod. Why does he need my boy? While nothing is clear, we need to move on. Uri said we were on an island. The raft was the only way to get to the other side. There used to be a bridge here, but it was destroyed by the Spirit of the Lake. The dwarf says that this spirit can help us with the crossing. There is a recipe for a potion that will summon the Spirit of the Lake. I will try to cook it.

- Take the STOOL LEG (R).
- Go to the location Near the Water House.
- Take the LONG BOARD (S).
- Select the cart for a HOP (T).

- Play SPP.
- You receive the CRYSTAL (U).
- Come back.

- Place the LONG BOARD over the gap in the bridge (V).
- Go up the steps.
- Talk to Uri (W).
- Use the OWL to get the 1st SAPPHIRE (X).
- Take the BEAR CUB (Y) and the 1st EMERALD (Z).
- Take the TONGS (A) and BREAD PIECES (B).
- Come back.

- Use the BREAD PIECES and NET to catch the FISH.
- Return to the location Near the Water House.
- Give the FISH to the pelican (D); take the KEY (E).
- Open the lock with the KEY (F), open the door.
- Go to the House on the Water.

- Take the 2nd STOOL LEG (G).
- Use the TONGS to get the YELLOW OCTAGON (H).
- Cut the pillow with the DAGGER; take the MOSAIC PIECE (I).
- Take the CLOCK HAND (J) and find the key (K).
- Place the CLOCK HAND on the clock; set it as on the key (L).
- Take the FISH FIGURINE (M).
- Place the FISH FIGURINE on the box; select it for a mini-game (N).

- Put all the fish in the center.
- Solution: A, B, C, D, E, A, C and E.
- Take the BIRD FIGURINE (O).
- Walk back.

- Place both STOOL LEGS on the STOOL (P); take it.
- Enter the house.
- Place the STOOL on the floor (Q).
- Take the PICTURE (R) and the SPEAR CHIP (S). Walk back.
- Place the SPEAR SHAPED on the hook; click on them 3 times to get a HOOK (T).
- Go to Uri's Cabin.

- Place the MOSAIC PIECE on the mosaic for a mini-game (U).
- Swap the pieces several times to make a picture (V).
- Click on the opened middle to get to the HOP.

- Play SPP.
- You have received the 2nd CRYSTAL (1-10).
- Go to the Captain's Cabin.

- Hang the PICTURE on the wall for a mini-game (W).
- Look for similarities.
- Solution (X).
- Take the DEER FIGURINE.

- Go to the foot of the tree.
- Place the 2 CRYSTALS in the slots (Y).
- Pull the lever (Z).
- Go to the Library.
- Take the COIN (A).
- Cut the card with the DAGGER; take the FISH FIGURINE (B).
- Go to the top of the tree.

- Starting from the left, place the BIRD FIGURINE, FISH FIGURINE, and DEER FIGURINE on their pedestals to trigger a mini-game.
- Rotate the sections to complete the pattern.
- Decision.

- Take the GATE KEY (D).
- Go to the Gate.
- Place the GATE KEY on the gate (E).
- Go forward.
Chapter 5
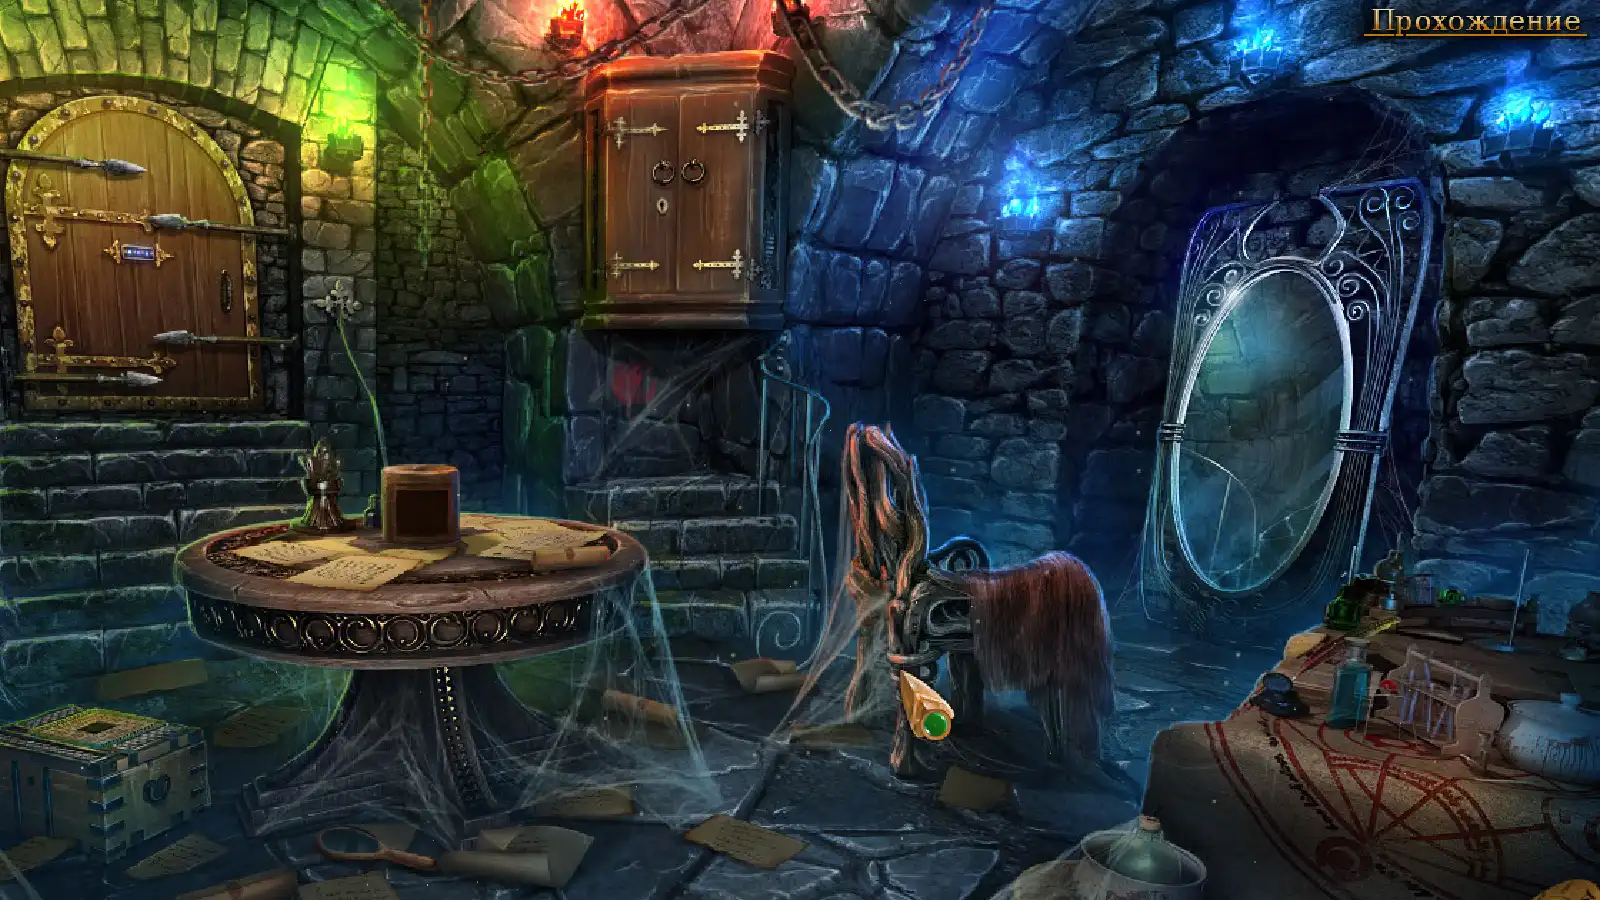
Elevator - There is only one way out of the caves! My Jimmy must be upstairs somewhere right now. To go up there, I need to start the elevator. At the very bottom of the caves, I found a huge golden statue. As soon as I approached her, the same ghostly demon appeared from her! It seems that this statue is something like a house, or, on the contrary, a place of detention for him. Be that as it may, I feel uncomfortable next to this statue, it seems alive and seems to be watching me.

- Open the lid; take the STATUE HEAD (F).
- Click on the torch 3 times to get the TORCH (G).
- Go to the Dungeon Entrance.
- Retrieve the bag with the HOOKER (H), take the LEVER (I) and the SACK (J).
- Go back.
- Place the LEVER in place, push both levers (K) and take the RESIN (L).
- Walk back.

- Place the RESIN in the pot and dip the TORCH into it to get a BURNING TORCH (M).
- Go to the Dungeon Entrance.
- Use the BURNING TORCH on the holder (N).
- Enter the HOP (O).

- Play SPP.
- You receive the DYNAMITE (P).

- Take the SPADE (Q) and 2nd EMERALD (R).
- Go to the Underground Lake.
- Take the HANDLE (S).
- Go to the Demon Statue.

- Remove the broken handle and put the HANDLE in its place, select it 2x to get a PICKAXE (T).
- Excavate the puddles with the SHOVEL; select the tapestry and take the WOODEN GEAR (U).
- Cut the rope with the DAGGER, take the 2ND SAPPHIRE (V) and read the diary.
- Go back.

- Use the PICKAX on the wall; take the 2nd COIN (W).
- Go to the Underground Lake.
- Place the DYNAMITE in the cavity and light it with the BURNING TORCH (X).
- Place the WOODEN GEAR on the winch (Y).
- Go right to the Suspension Bridges.

- Take the CORKSCREW (Z).
- Go to the ship.
- Remove the cork with the CORKSCREW; take the TORN PAGE (A).
- Place the GUNPOWDER in the BAG; take the GUNPOWDER (B).
- Go forward.
- Put the TORN PAGE in the diary to trigger a mini-game.

- Collect the page.
- Solution (D).
- Go to the Suspension Bridges.

- Place the COINS in their places (EF).
- Arrange the statues as on the key in your diary.
- Solution (GH).

- Remove the coverlet; take the 2nd STATUE HEAD (I).
- Move the items to find the KEY (J).
- Click on the niche for a HOP (K).

- Play SPP.
- You receive the 3RD SAPPHIRE (L).
- Go to the Lift.

- Take the BROOM (M), 3rd EMERALD (N), and STONE HORN (O).
- Open the lock with the KEY; enter (P).
- Use the BROOM on the cobwebs; take the SCHEME (Q).
- Go to the Underground Lake.

- Place the STONE HORN on the helmet; take the 4th SAPPHIRE (R).
- Walk forward (S).

- Take the 4th EMERALD (T).
- Place the 4 SAPPHIRES in the slots (U).
- Place the 4 EMERALDS in the slots for a mini-game (V).
- Click on the runes in the correct order: 1-10.

- Read the note; take the GREEN OCTAGON (W).
- Go to Uri's Cabin.
- Remove the cloth, place the RED OCTAGON, PURPLE OCTAGON, YELLOW OCTAGON, and GREEN OCTAGON in the slots for a mini-game (X).

- Arrange the octagons in the appropriate places.
- Solution: B, A, G, A, G, F, D, E, D, C and E.
- Take SOLVENT and CONTINENT FIGURINE.
- Go to the Captain's Cabin.

- Place the CONTINENT FIGURINE on the globe; take the CROSS-SHAPED KEY (Y).
- Go to the library.
- Pour the SOLVENT on the stain; click on the drawing to reveal the key (Z).
- Go to the Beach.
- Use the CROSS-SHAPED KEY on the lock; take the MAGNET (A).
- Go to the Water House.

- Use the MAGNET to take the STAR MEDALLION (B).
- Go to the Lift.
- Click on the pedestal to start a mini game.
- Click on the heads in the correct order: 1-7.
- Go to the library.

- Place the STAR MEDALLION; receive the BALL (D).
- Go to Underwater Lake.
- Put the BALL on the pedestal (E).
- Talk to the Spirit (F).
- Take the GEAR (G).
- Go to the Lift.

- Place the GEAR for a mini-game (H).
- Connect all gears (I).
- Click on the doors, go forward.
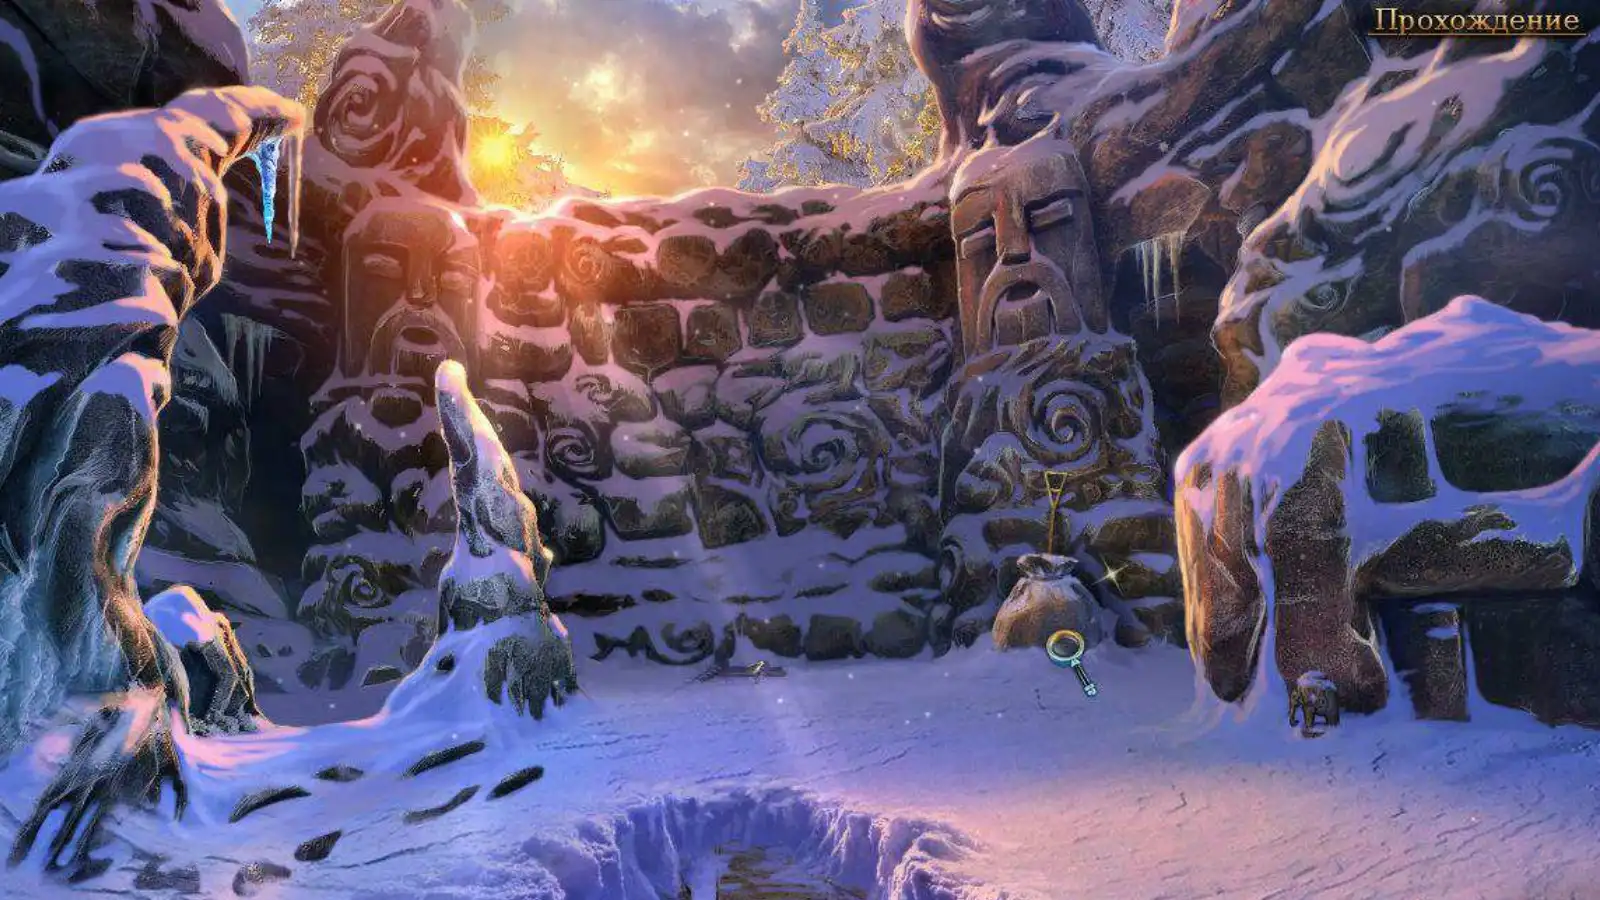
Chapter 6
Dark Lord - Again this smoke, as soon as I opened the gate, this essence flew out at me again. It looks like the ghost of some demon. Isn't this the same Dark Lord I read about in the book on the ship? And is it not the evil that they tried to close in the caves? In any case, I have no other choice, I must go to the caves after my son!

- Take the 1st BAS-RELIEF PIECE (J).
- Walk forward. Take the SNOW SHOVEL (K) and COINS (L).
- Go back.
- Excavate the snow with the SNOW SHOVEL; take the HAMMER (M).
- Place the HAMMER in the statue's hands (N).
- Take the 3rd STATUE HEAD (O).
- Use the OWL to get the VALVE (P).
- Go forward.
- Open the tent and click on the passage to enter the HOP.

- Play SPP.
- You receive a POCKET (Q).
- Go to the Caves.

- Place the 3 STATUE HEADS on the statues for a mini-game (R).
- Restore the statues.
- Solution: B-Dx3, A-Ex2, AB, DE, DA, CD, CA, CB, DB, E-Cx2, DC, and EA.
- Take the MOSAIC PIECES.
- Go to the Demon Statue.

- Place the MOSAIC PIECES on the mosaic for a mini-game (S).
- Swap any 2 pieces to make a picture (T).
- Read the note; take the BUTTONS.
- Go to the Castle Entrance.

- Place the CHART and BUTTONS for a mini-game (U).
- Solution: A, Bx2, Cx3, D, E, F, G, Hx2, F, I and Jx2.
- Go forward.

- Click anywhere, get a KEY.
- Use the OWL to get the 2nd BAS-RELIEF PIECE (V).
- Take the SWORD POCKET (W).
- Take the FIRE SYMBOL (X).
- Open the curtain and go to the Corridors (Y).

- Click on both swords (Z); take the 3rd BAS-RELIEF PIECE (A).
- Open the door with the KEY (B).
- Click on the symbol to remember the key.
- Go to the exit to the Airship.

- Break the ice with the SWORD; take the OBJECT IN ICE (D) and note the key (E).
- Go to the Corridors.
- Click on the door for a mini-game (F).

- Repeat the positions as in the entry in your diary.
- Solution (F1): A, C, B, D, E, D, E, F, G, H, G, H, J, I, J, K, M, L and M.
- Climb up the steps.

- Talk to the Alchemist.
- Cut the cheese with the DAGGER; take the PIECE OF CHEESE (G).
- Move the skin; take the SYMBOL (H).
- Open the door and go through to open a HOP (I).

- Play SPP.
- You receive the PLIERS (J).

- Put the OBJECT IN ICE on the fire, pull it out with the PLIERS and get the DEMON STATUETTE (K).
- Place the DEMON STATUETTE on the bedpost (L), take the PIECES (M) and read the note.
- Go back.
- Place the PIECE OF CHEESE next to the mink; take the RAT (N).
- Go back.
- Place the PIECES on the puzzle for a mini-game (O).

- Swap the pieces to make a picture (P).
- Take PROPELLER BLADE and 2nd SYMBOL.
- Go to the Lookout.

- Take the COAL (Q) and BLANK PAPER (R).
- Go to the Airship. Distract the leopard with the RAT (S).
- Take the AIR SYMBOL (T) and 2ND VALVE (U).
- Remove the BROKEN PROPELLER BLADE and place the whole PROPELLER BLADE (V).
- Click on the airship for a mini-game (W).

- Collect the burner.
- Arrange items on the outlines (X) as numbered (1-9).
- Take the 3rd SYMBOL (Y) and CUPS (Z).
- Go to the Corridors.

- Place the 3 SYMBOLS in the slots (A).
- Click on the niche for a mini-game (B).

- Gather the missing parts of the castle.
- Take the EARTH SYMBOL.
- Go to the Lift.

- Place the BLANK PAPER on the board; draw the CHARCOAL on it to get the CUP DIAGRAM (D).
- Go to the Captain's Cabin.
- Place the CUPS and CUPS LOCATION on the shelves for a mini-game (E).

- Arrange the cups as shown (F).
- Take the BOOK (G).
- Go to the Library.

- Place the BOOK on the shelf for a mini-game (H).
- Collect the picture (I).
- Take the WATER SYMBOL.
- Go to the Lookout.

- Look through the telescope (J).
- Place the FIRE SYMBOL, AIR SYMBOL, EARTH SYMBOL, and WATER SYMBOL in the right places, take the NEEDLE (K) and click on the diagram to memorize the key.
- Place both VALVES on the rods for a mini-game, turn until the sensors are at the target (L).
- Look at the correct position of the sensors (M), pull the lever (N).
- Go to the Airship.

- Sew up the hole with the NEEDLE (O).
- Click on the airship (Q).
- Turn valve (P).
- Click on the airship again.
Chapter 7
Alchemist - Encountering the spirit of an alchemist gave me hope. He said that his castle hovered high in the sky. There he performed various alchemical experiments. It was probably there that he made the stone that turned the demon into a golden statue. The alchemist says that there is everything necessary to destroy the demon forever. But to get to the castle, you first have to fix the airship. In the alchemist's laboratory, I met his spirit again. He told me how I could destroy the demon. The alchemist created the Philosopher's Stone and used it to make a golden statue. But you can create the opposite substance that destroys gold. That way I can destroy both the statue and the demon and free Jimmy from the spell.

- Use the OWL to take the RAM ROD (R).
- Take the CANONBALL (S) and WOODEN HAMMER (T).
- Hit the WHEEL with the WOODEN HAMMER (U); Take it.
- Take the RUNE (V).
- Put the GUNPOWDER, CANNONBALL, and RAM ROD in the cannon (W).
- Put the WHEEL on the axle (X); Nail it with the WOODEN HAMMER.
- Click on the cannon 2 times, go forward.

- Read the note; take the 2nd RUNE (Y) and the 4th BAS-RELIEF PIECE (Z).
- Climb up the stairs.
- Take the 5th BAS-RELIEF PIECE (A) and the 3rd RUNE (B).
- Go to the Lookout.

- Put 3 RUNES on the right places and click to start the mini-game.
- Connect pipes as shown (D).

- Turn the dragon heads towards the owl; take the GLASS OWL (E).
- Go to the Road to the Castle.
- Place the GLASS OWL on the pole; select the runes (F).
- Click on the runes to memorize the key (G).
- Go to Tower Hall.

- Look at the door for a mini-game (H).
- Click on the correct runes (I).
- Go forward.

- Talk to the Alchemist (J).
- Take the 6th BAS-RELIEF PIECE (K).
- Take the RAILS (L) and FLASK (M).
- Read the recipe (M1).
- Click on the niche to access a HOP (N).

- Play SPP.
- You have received DRY WOLF BERRIES (1-8).
- Go to the Dungeon Entrance.

- Remove the cover and put the RAILS in place for a mini-game (O).
- Solution: A, B, C, A, D, G, C, D, E, B, D, F, G, E and F.
- Take 7TH BAS-RELIEF PIECE and ROUND SEGMENT.
- Go to Tower Hall.

- Insert the ROUND SEGMENT into the lock for a mini-game (P).
- Line up all the same pieces (Q).
- Enter the Greenhouse.

- Use the OWL to get the SUN FIGURINE (R).
- Go to the Observatory.
- Place the SUN FIGURINE in the center; take the PLATE PIECE (S).
- Go to the Gnome's Room.
- Place the PLATE PIECE on the plaque for a mini-game (T).

- Click in order on the fleur-de-lis.
- Take the 8th BAS-RELIEF PIECE and GLOVE.
- Go to the Greenhouse.

- Move the leaves; take the GARDEN SHOVEL (U).
- Use the SHOVEL on the ground; use the GLOVE to take the MANDRAKE ROOT (V).
- Take the KEY (W).
- Go to the Alchemist's Lab.

- Use the KEY to open the lock; take the RECIPE (X), PIPETTE (Y), and PYRAMID (Z).
- Go to the Observatory.
- Place the PYRAMID on the pedestal for a mini-game (A).

- Set the planets to the correct places (B).
- Take the CROWN.
- Go to Tower Hall.

- Put the CROWN on the statue (D).
- Enter the Patio.
- Take the LENS (E); take 7 rosebuds.
- Use the FLASK to get the FLASK WITH WATER (F). Take the shell and open it with the DAGGER; take the SHELL (G) and the MOSAIC PIECE (H).
- Take the 9th BAS-RELIEF PIECE (I).
- Enter the gazebo for a HOP (J).

- Play SPP.
- You receive the BOWL (K).
- Go to the Greenhouse.

- PIPETTE PLANT JUICE; receive PREDATORY FLOWER JUICE (L).
- Use the DAGGER to cut the thickets; place the MOSAIC PIECE on the disc for a mini-game (M).

- Click on the following: B, A, C, D and Bx3.
- Take the 10th BAS-RELIEF PIECE and FLUTE.

- Play the FLUTE in front of the snake; take the COPPER POWDER (N) and SNAKE SCALES (O).
- go to the Observatory.
- Put the BOWL on the scale; place the COINS on the scale (P).
- Move the 4 coins from left to right; place the LENS on top (Q).
- Use the FLASK WITH WATER on the beam (R); receive the MOON TEAR.
- Go to the Throne Room.

- Put all the BAS-RELIEF PARTS on the bas-relief in the right places to get the DRAGON BLOOD (S).
- Go to the Alchemist's Lab.
- Take the ACONITE (T).
- Click on the area above the stove.

- Place the DRY WOLF BERRIES in the beaker (U).
- Place the MANDRAKE ROOT on the board; cut it with the DAGGER (V).
- Place the 7 ROSEBUDS and ACONITE in the mortar and (W), select the pestle (X).
- Pour the PREDATORY FLOWER JUICE into the beaker (Y); select the pestle (W).
- Take the POTION OF LIFE (Y).
- Go to the Underground Lake.
Chapter 8
Potion - I found the recipe for the potion of life. It seems that this is exactly the potion that the spirit of the mountains was talking about. I will need this spirit's help to destroy the demon. So you need to collect everything you need to make a potion.

- Give the POTION OF LIFE to the Spirit of the Mountains (Z); receive a LIVING STONE.
- Go to the Alchemist's Lab.
- Look at the table; put the recipe on it (A).

- Put the DRAGON BLOOD and COPPER POWDER into the bowl (B).
- Put the SNAKE SCAL into the mortar, use the pestle (D) to touch it.
- Put the PEARL in the mortar, push it with the pestle and click on it.
- Stir the contents of the bowl with the pestle (B) and place the LIVING STONE and the MOON TEAR in it.
- Use the pestle; take the ANTIPHILOSOPHICAL POWDER (B).
- Go to the Demon Statue.

- Sprinkle the ANTIPHILOSOPHICAL POWDER on the Demon Statue (E).
- MEDVEZHENOK is activated independently.
Bonus Chapter
Lost lands. Dark Lord (lost lands 1) [Bonus Chapter] “You are going after the creature that took your son, which will take you to a strange magical place.

- Use the pruner to cut the thicket; take the HORN (A).
- Walk forward (B).
- Take the FEATHER (C).
- Move the leaves; take the SHELL (D).
- Go to the library.

- Put the HORN on the deer; take the HAMMER (E).
- Go to the forest.
- Read the sign, use the HAMMER on the latch (F) and enter.

- Take the 2nd SHELL (G) and SCISSORS (H).
- Go to the lake.
- Talk to the Spirit of the Lake (I); receive an UNFINISHED POTION.
- Take the CYCADUS (J).
- Take the 3rd SHELL (K).
- Go to the foot of the tree.

- Place the CICADA on the anthill; take the TILE (L).
- Go to the gnome's house.
- Move the rug; place the TILE on the board for a mini-game (M).
- Run a circle through all the tracks.

- Solution (N).
- Take the HOOK.
- Go to the lake.

- Pull up the mesh with the HOOKER and cut with the SCISSORS to reveal the TWEEZERS (O).
- Use the TWEEZERS on the MEDALLION (P).
- Go to the gnome's house.
- Move the pillows, place the MEDALLION on the box and take the WAX (Q).
- Use the WAX on the lock and select it 2x; place the UNFINISHED POTION next to the bag; pour the bottle (R) into the potion. Take the POTION (S).
- Go to the lake.
- Dive (T), swim forward to the palace entrance.

- Talk to Ondine (U); receive a MEDALLION.
- Take the 4th SHELL (V).
- Climb up the stairs.
- Take the 2nd FEATHER (W).
- Swim up.
- Take the MEDALLION (X) and 1st ANIMAL FIGURINE (Y).
- Swim to the cave.

- Take the 5th SHELL (Z).
- Select the shells twice; take the 2nd MEDALLION (A).
- Move to the entrance to the old forest.

- Click on the BENT PIPE 3 times to retrieve it (B).
- Take the 3rd MEDALLION (C).
- Take the STATUE HAND (D).
- Take the 6TH SHELL (E) and CLAM (F).
- Take the OWL PLATE (G).
- Enter the ruins for a puzzle (H).

- Complete the puzzle.
- You receive the DETAIL (I).
- Go back.

- Place the STATUE HAND on the statue; take the large SHELL (J).
- Go to the library.
- Place the GOLD MEDALLION in the slot; take the LOCK PIECE (K); read the book.
- Place the 2 FEATHERS and the OWL PLATE on the owl for a mini-game (L).
- Install the feathers as per the clue plate.

- Solution: (M).
- You receive the 4th MEDALLION and the CRAB TRAP.
- Swim to the cave.

- Put the CRAB TRAP on the sand; put the CLAM inside (N).
- Take the MEDALLION (O).
- Move the boulder with the CURVED PIPE (P).
- Swim to the palace entrance.
- Put the MEDALLION on the lock for a puzzle (Q).

- Complete the puzzle.
- You receive the BOX PIECE (R).
- Swim to the underwater palace.

- Put the BOX PIECE on the box; take the MOSAIC (S) and the 7TH SHELL (T).
- Place the large SHELL with the rest of the shells for a mini-game (U).
- Move the small shells to the right places.

- Solution (V).
- Receive the 5th MEDALLION.
- Go back.

- Place the MOSAIC on the shelf for a mini-game (W).
- Color the picture.
- Solution (X).
- Take the 2nd PIECE OF THE LOCK.
- Go to the entrance to the old forest.

- Place the 5 MEDALLIONS on their respective positions (Y).
- Enter the old forest.

- Take the FISH FIGURINE (Z).
- Swim to the cave.
- Place the FISH FIGURINE on the lock for a mini-game (A).
- Release the blocked brick.

- Solution: 1-10.

- Take the 2nd ANIMAL FIGURINE (B) and PIPE PIECE (C).
- Go to the entrance to the hermit's hut.
- Move the rug, take the 3rd ANIMAL FIGURINE (D) and read the note.
- Open the flashlight door; take the OIL (E).
- Place both LOCK PARTS on the lock for a mini-game (F).
- Turn the dials until the lock opens.

- Solution: Ax5 and Bx6.
- Enter the hermit's hut.

- Take the ANIMAL PLATE (G).
- Open the drawer. Take the BRUSH (H), NUT (I), and SCREWS (J).
- Swim to the palace entrance.
- Use the BRUSH on the dirty glass for a clue (K).
- Swim to the underwater palace.

- Look at the hatch for a mini-game (L).
- Choose the right runes.
- Solution (M).
- Swim to the bathyscaphe.

- Turn the valve; take the HEXAGON (N).
- Swim to the underwater area.
- Place the HEXAGON on the reef for a mini-game (O).
- Find couples.

- Solution: 1-12.
- Take GLASS EYE.
- Move to the hermit's hut.

- Place the GLASS EYE in the hole; take the SCREWDRIVER (Q).
- Go to the entrance to the old forest.
- Give the NUT to the squirrel; take the HOOK (R).
- Swim to the bathyscaphe.
- Remove the bolts with the SCREWDRIVER; take the PIECE OF GLASS (S).
- Go to the old forest.

- Attach the HOOK to the vine; use the PIECE OF GLASS to get the vine WITH HOOK (T).
- Go to the entrance to the old forest.
- SCREEN WITH HOOK; take FISHING NET (U).
- Swim to the bathyscaphe.

- Use the PLANKTON FISHING NET for a PLANKTON NET (V).
- Use the PLANKTON NET on the hole in the bathyscaphe for a puzzle (W).
- Complete the puzzle.

- You receive a VALVE (X).
- Go to the old forest.

- Place all the ANIMAL FIGURINES and the ANIMAL PLATE on the stump for a mini-game (Y).
- Arrange the animals.
- Solution (Z).
- Take the 8th SHELL.
- Go to the hermit's hut.

- Place the VALVE on the mechanism to trigger a mini-game (@).
- Drive the ball into the hole.
- Solution: Bx3 and Ax2.
- Take BRUSH WITH PAINT.
- Go to the library.

- Paint the painting with the PAINT BRUSH; take the 9TH SHELL (C).
- Go to the gnome's house.
- Place the 9 SHELLS in their respective places (D); take the LENS (E).
- Go to the hermit's hut.

- Read the instructions (E1) Place the PIECE PARTS on the table. Attach the LENSES and BOLTS to them; use the SCREWDRIVER (F).
- Put the center piece (G) back in place; add OIL.
- Take the ASSEMBLED PIECE (H).
- Go to the device.

- Place the PIECE OF PIPE on the pipes (I) and the ASSEMBLED PIECE on the device (J).
- Look at the panel for a mini-game (K).
- Spend a beam through all the stones to the exit.

- Solution (L).
Congratulations! You have successfully completed the Lost Lands game. Dark Lord.
Was the article helpful?