In Lost Ark there is a collection of "Souls of the Islands". Collecting "souls" is not just the extraction of some items, but addictive, sometimes long, sometimes ...
Raid on the boss Avrelsud, Lord of Illusions in Lost Ark
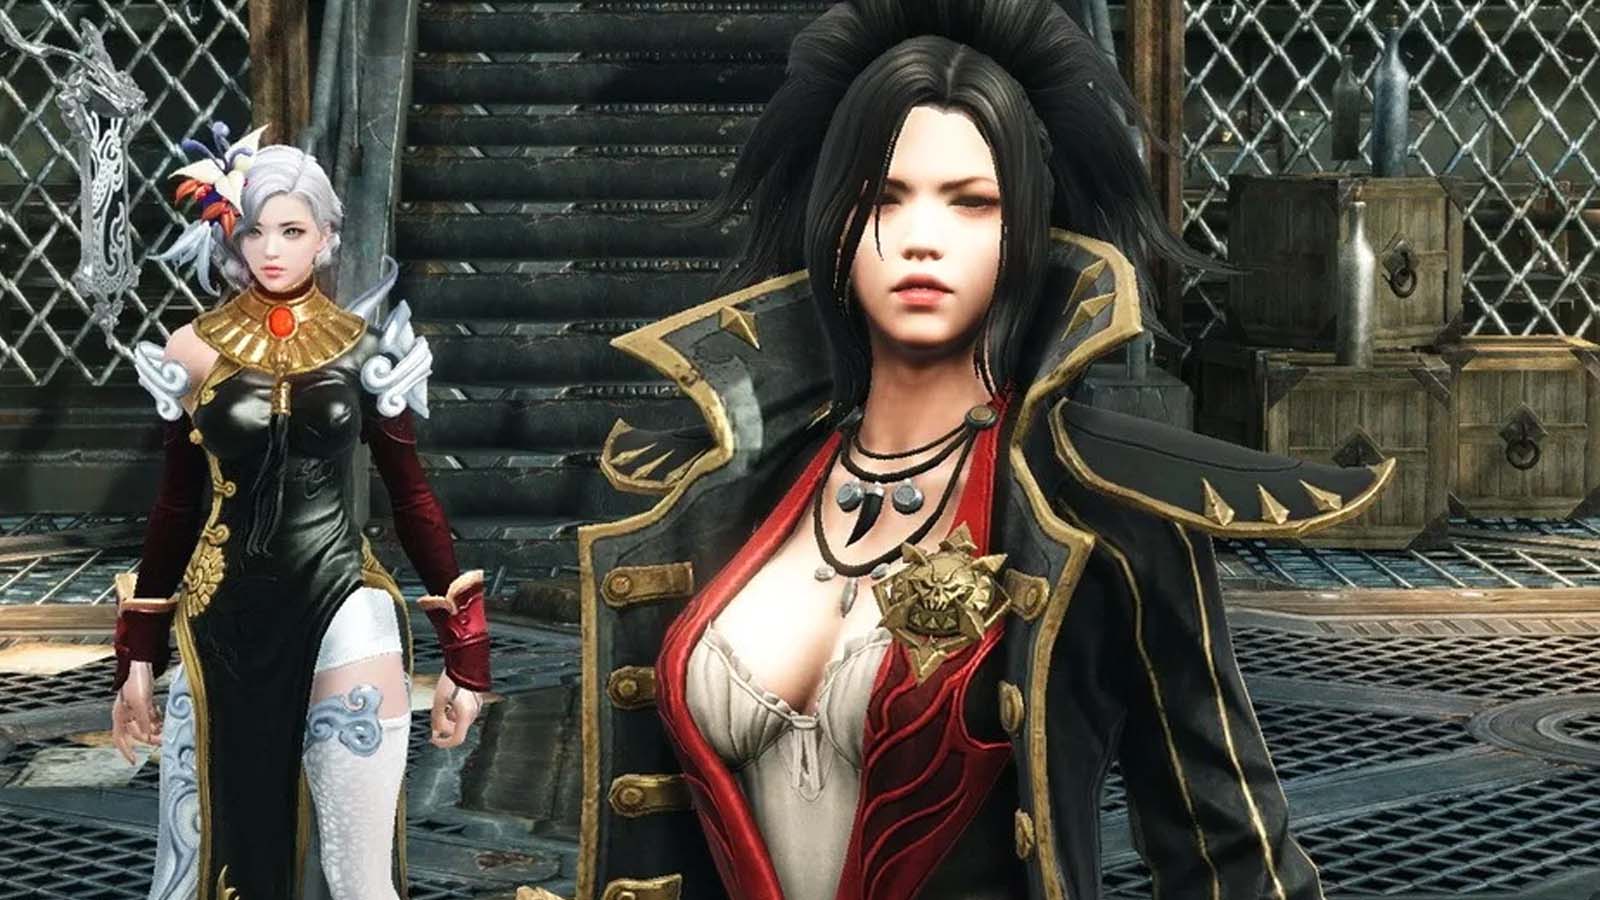
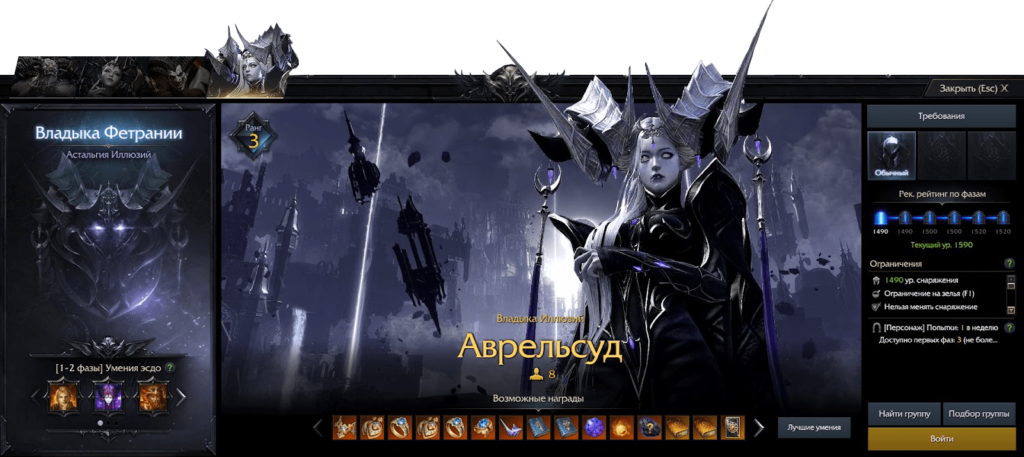
Avrelsud, Lord of Illusion is the fourth of the Fetranian Lords in Lost Ark. A team of 8 people can challenge her, for this, use the “Lord of Fetraniya” stele, which is located in every major city.
The battle with Avrelsud is available in Lost Ark in two modes: normal (phases 1 and 2 - 1490, phases 3 and 4 - 1500, phases 5 and 6 - gear level 1520) and training (from gear level 1430).
"Deja Vu Astalgia" can be completed once a week on Legacy using a separate stele. In this mode, the Harmony effect works, and some mechanics have been changed and removed.
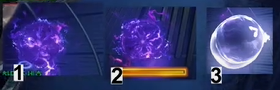
A feature of this raid is the summoning of one of the 3 Esdos to the battlefield. After the scale is completely filled, you can use one of Esdo's skills. Esdo's skills can only be used by the raid leader. Every 2 phases, you will change the esdo for the summon a little. Each Esdo has its own skills:
During the fight with Lord Fetrania, the raid leader can use the help of one of the three esdos - each of them has its own blessing. To apply the skill, you must first fill a special scale.
In phases 1-2, Seekers will be able to count on the following esdos.
- Sillian - The ultimate power of the Shai'Solar. Sillian awakens the power of the Shai'Solar and unleashes a powerful slash with the power of light. The ground shakes - and an explosion occurs, which causes significant damage. The power of the Shai'Solar allows for widespread destruction with holy power.
- Azena - Spear of the Exarchs. Azena calls on the elemental exarchs to borrow their power. Azena alternately summons spears of fire, ice, and earth to powerfully attack the boss, and random spears to damage other enemies.
- Vahantur - Deus Arctus. Vahantur delivers a strong blow to the anvil using the power of the earth. At the same time, the armor of squad members within a radius of 14 m from the anvil becomes stronger for a certain time. Reinforced armor grants immunity to knockback and significantly reduces damage from enemy attacks. In addition, they block some of the skills of the Lords of Chaos.
In phases 3-4, the esdos listed below will come.
- Ninav - Retribution of Parkunas. Ninav fires a shot from Parkunas, aiming at the enemy's weak spots and dealing significant damage to them.
- Master Wei - Awakening of the Beast. Wei summons a Beast that unleashes three powerful attacks that deal debilitating damage to enemies.
- Jonah - Guardian of Elzovin. Iona creates a magical shield with a radius of 14 m. For the duration of its effect, the shield grants immunity to stagger and knockback effects, and partially absorbs damage. At the moment the shield disappears, the target under it restores its health in proportion to its maximum value.
Esdos from this list will help in the final battle in phases 5-6.
- Azena - Spear of the Exarchs. Azena calls on the elemental exarchs to borrow their power. Azena alternately summons spears of fire, ice, and earth to powerfully attack the boss, and random spears to damage other enemies.
- Shandi - Time warp. Shandi uses illusion magic to warp time and space on the battlefield. Shandi's allies get a buff, enemies a debuff. Squad members' skill cooldowns are reset and reduced. Attack and movement speed, as well as mana regeneration, are greatly increased. All enemy actions, including attacks, are significantly slowed down.
- Jonah - Guardian of Elzovin. Iona creates a magical shield with a radius of 14 m. For the duration of its effect, the shield grants immunity to stagger and knockback effects, and partially absorbs damage. At the moment the shield disappears, the target under it restores its health in proportion to its maximum value.
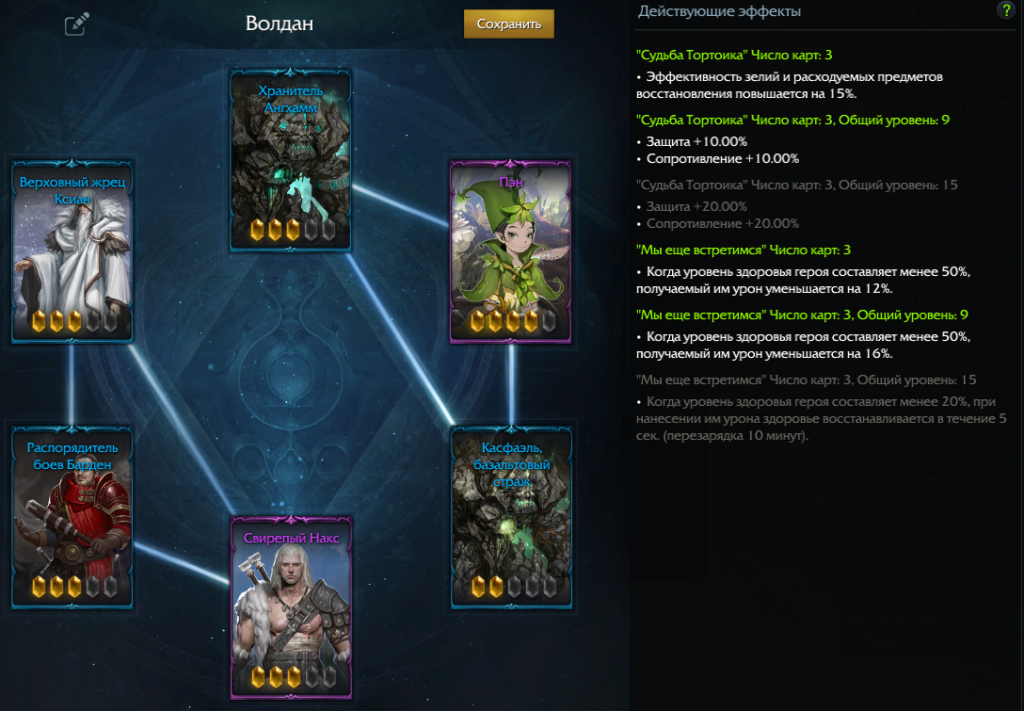
For a comfortable passage, it is recommended to use the Ark Story deck if its overall level is 18 or higher. If the hero lacks survivability, then Tortoik's Fate and We'll Meet Again will come in handy.
The first phase
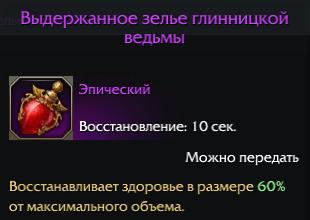
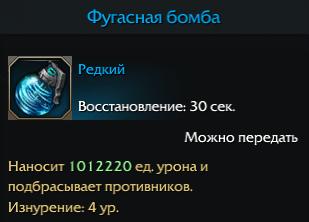
Recommended Consumables: Aged Potion of the Witch of Clay, Respite Potion, Exhaustion Grenades, and Ammunition to remove debuffs (Monastery's Amulet or Prayer Spell Scroll).
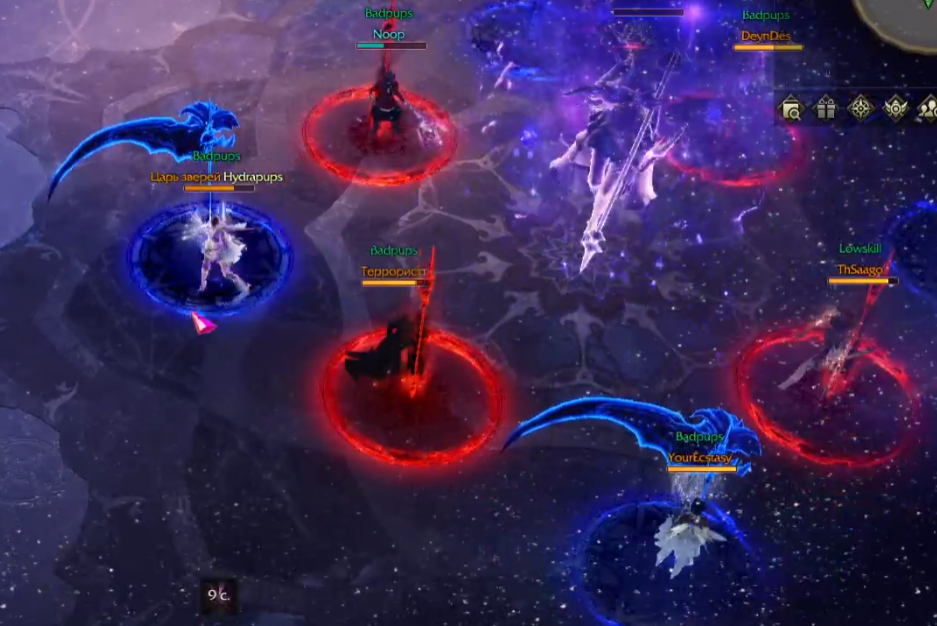
At the beginning of the battle, the raid will be divided into 4 teams of 2 players, pairs are determined randomly. The task of each pair is to kill Avrelsud's henchman in their room. In addition to the miniboss, there will be a statue on the battlefield that imposes certain effects. It cannot be destroyed. There are 4 types of statues: despair and anger (for the first group) and rage and fear (for the second group). Each miniboss is surrounded by a shield that requires various requirements to be met in order to be destroyed.
The first group of
- Statue of despair must be exhausted throughout the fight. If the mechanic fails, players will be afflicted with a fear debuff for a few seconds. To destroy the shield surrounding the miniboss, you need to defeat nearby monsters.
- Statue of Anger periodically releases an orb chasing a random player. When colliding with a character, a massive attack occurs, after which the sphere disappears, but after a while appears again. To destroy the shield surrounding the miniboss, use Destruction skills and ammo.
The second group
- Statue of Rage Places a debuff on the group that increases damage taken against players. To dispel the debuff, you need to debilitate the statue with ammunition and debilitate skills. After successfully completing the mechanics, the shield from the miniboss will fall off.
- Statue of fear Periodically creates fog that reduces vision range. To avoid spreading this cloud, you need to disable the statue using skills or control ammo. After successfully exhausting the miniboss, the shield will disappear.
After defeating all the minibosses, you will be reunited with your party members. Next in line are the next enemies - Helen for the first group and Gelkassia for the second.
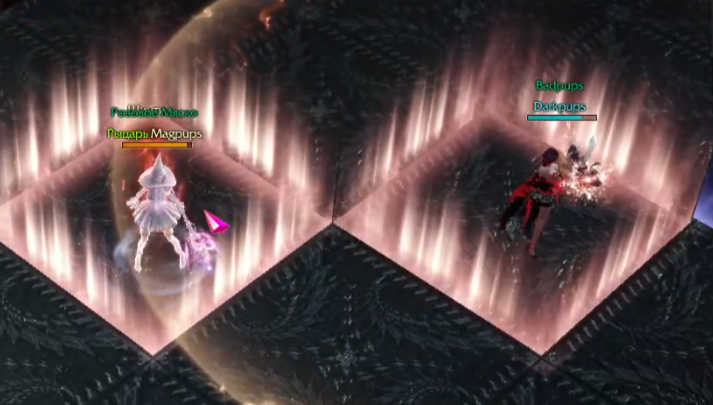
At the beginning of the fight, bring Helen and Helcassia to the wall to use Sillian's Esdo ability to hit both enemies at once, destroying their armor.
Helen and Gelkassia must be defeated at the same time. If one of them is defeated faster than the other, the latter will restore part of the health. Upon successful completion of the mechanics, the bosses are combined into one enemy.
In order to successfully complete the following mechanic, the raid needs to “stand by the clock” in advance, thus choosing its place.
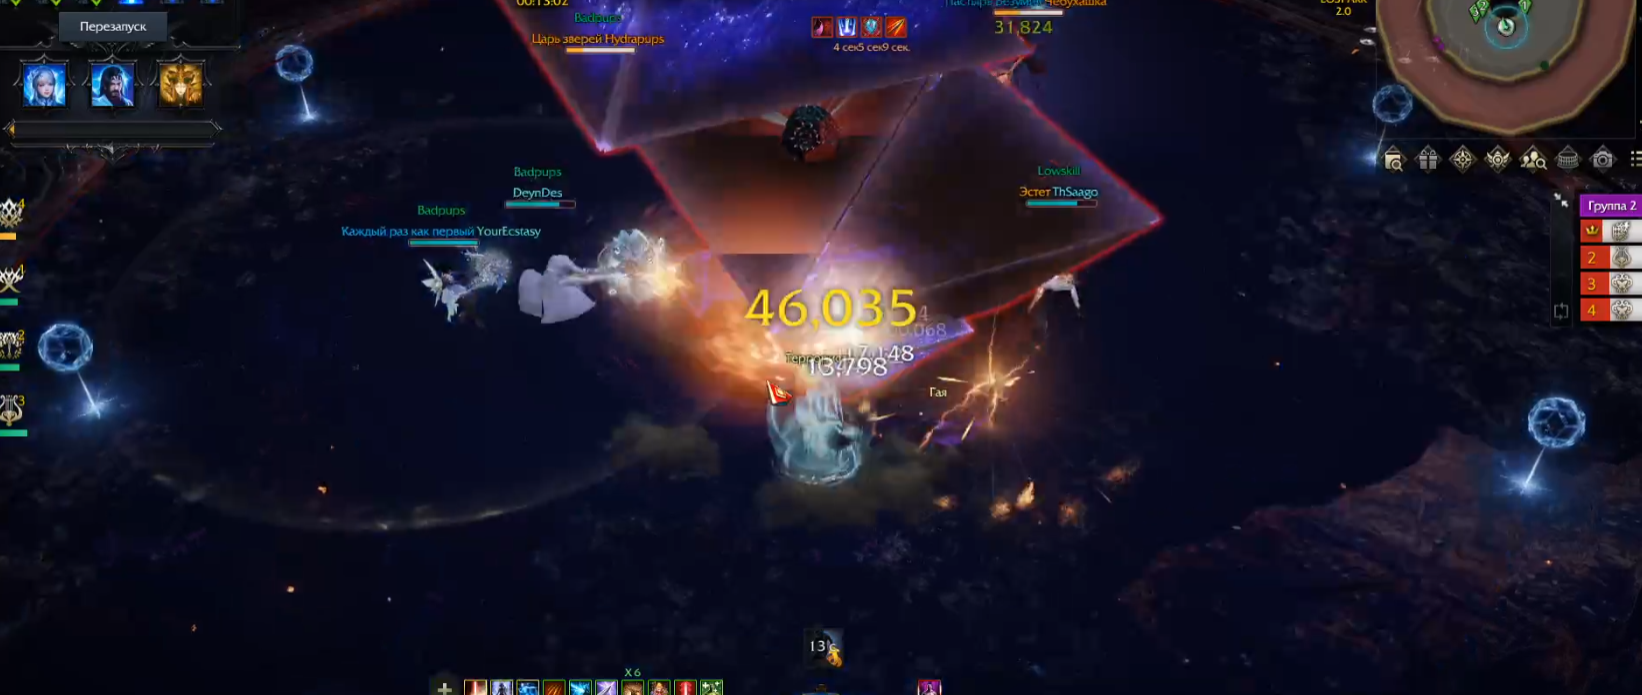
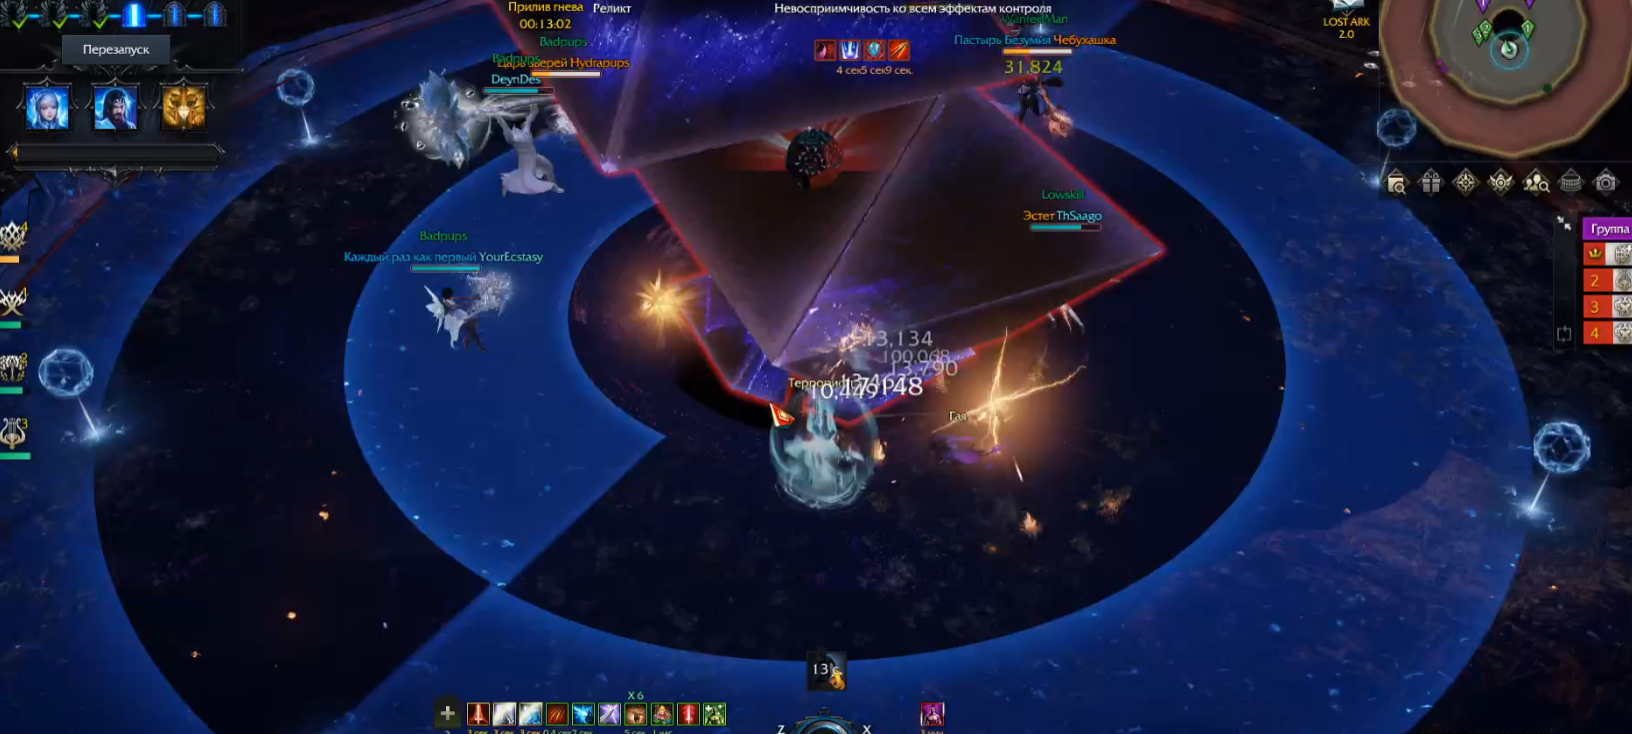
At 85 health bars, the boss teleports to the center of the battlefield and summons 2 golden squares at 11 and 6 o'clock - two raid members need to stand in them. The squares then appear at 9 and 3 o'clock, where the other two players enter. The last squares will appear around 6, 11, 9, 3 hours, at which the remaining heroes get up.

You must act quickly - players who do not complete the mechanics will die.
At 45 health bars, the second mandatory mechanic begins. The goal of the raid is to successfully counterattack the boss 6 times when he raises his hammer. This must first be done when the incarnation of Helen and Helcassia will look at 5 o'clock, then at 11, 3, 5 and 9 o'clock. If you fail the counterattack the first time, you will take massive damage, and the second time, the entire raid will die.
After each successful mechanic, 3 damage areas are summoned around the boss. In addition, 4 copies of Avrelsud appear on the battlefield, which must be destroyed. This can be done using Asena's esdo skill.
Main types of attacks
- Minibosses with shields have 2 attack options: jump at the player and strike in front of them.
- Every 20 seconds a grid appears next to the minibosses - avoid the orange and blue colored squares. It is safe to be in the white zone.
Helen and Helkassia and their combined incarnation have a similar rotation of attacks.
- Gehlen makes 3 hammer blows from left to right.
- Gehlen slams his hammer in front of him, summoning lightning bolts.
- Gehlen makes a 180-degree hammer blow while Helkassia fires arrows. The attack deals massive damage.
- Gehlen raises a spear in his hand and makes a dash forward.
- Gehlen strikes with the hammer in his right hand in front of him. After that, swings the spear in front of him, dealing area damage. Players hit by the attack are knocked up.
- Gehlen jumps to the targeted target and strikes them with the hammer. The hammer sends a shock wave to the target, which explodes twice, after which the boss attacks again.
- Gehlen swings his hammer in front of him, firing lasers diagonally away from him. After that, he jumps, after which he throws a spear at the selected target. Additional explosions appear where the spear falls.
- The united incarnation of demons spins in place, firing a bow from one side and unleashing a shockwave from the other. After completing a spinning attack, strikes with a hammer in front of him.
- Helcassia fires shots into the air that form cross-shaped whirlwinds upon landing, attacking in 4 diagonal directions.
- Helcassia fires arrows towards the portal, which fly out after a while, attacking random targets.
- Periodically, slabs of red and blue colors appear around the boss. The former light up in a diagonal direction and deal massive damage, while the latter explode, dealing damage in a cross-shaped area.
The second phase
Recommended Consumables: Aged Potion of the Witch of Clay, Potion of Respite, Flask of Sleeping Gas, and Exhaustion Grenades.


In the second phase, you have to fight two incarnations of Prokeon - physical and mental. One of the raid members will move to a separate arena to wear down the demon's body, while the rest will confront its twisted mind. For a successful passage, you must first defeat the physical incarnation of Prokeon, and then the mental one.
Each time Prokeon's mind health drops to 1 bar, the damage taken by the demon's body increases.
Keep a close eye on the effects applied to Prokeon's mental manifestation.
- For each kill by the raid of a monster highlighted in red, one level of the effect is applied to the boss. At 25th level, the demon's mind summons an orb to the battlefield where Prokeon's body is located. The player who picks up this orb becomes temporarily invulnerable.

- For each monster alive on the battlefield, one level of effect is applied to the boss. At level 30, the demon's mind makes a wipe attack.
- The next effect is valid for a limited time, after which nearby monsters will begin to be highlighted in red.
- The next effect demonstrates that the demon's body has not yet been defeated.
Periodically, monsters of several types appear on the battlefield.
- An elite foe that imposes shackles.
- A white elite enemy that inflicts charm. A player affected by this effect will start attacking party members. To avoid this mechanic, it is necessary to exhaust the monster.
- A round elite enemy that petrifies players hit by its blue AoE. To avoid it, leave the area or turn your back on the monster.
- The black knight that spawns at 40 health bars of the boss. Imposes invisibility on the body of the demon, so this monster must be defeated as quickly as possible.
The main mechanics take place on the battlefield with the mind of a Prokeon, but after reaching a certain number of health bars of the demon's body.
At the beginning of the battle, Prokeon's mind creates a chain that connects him and a random player - this way you can get to the battlefield with the body of a demon. To break this chain (thus creating a new one), you need to stand between this player and the boss. So you can replace a party member and enter the battlefield yourself with the body of Prokeon.
At 135 health bars, Prokeon's mind summons 3 diamonds (highlighted in red on the minimap) to attack players, and 3 red orbs that apply a curse. Players will need to pick up the orbs (each one) and approach the diamonds, destroying them in this way. Be careful - you cannot pick up an orb if you are already affected by it.
At 110 health bars, Prokeon's mind moves to the center and starts releasing purple orbs. At this time, auras appear around two players - one is blue, the other is red. The rest of the raid members will need to catch an orb (no more than one), after which a red or blue mark will appear above their heads - in order to survive the mechanic, you need to approach a player with an aura of the same color. Aura users need to dodge flying spheres and position themselves so that they do not touch each other.
At 80 health bars, the next mechanic begins, in order for the raid to successfully complete it, it is necessary to exhaust the boss. Prokeon's mind will begin to strike - first in the inner circle (around itself), then in the outer one, after which it will conduct a pizza-like attack clockwise or counter-clockwise. After a successful exhaustion, 4 spheres will appear on the battlefield at 12, 3, 6 and 9 hours. Destroying each sphere requires a different approach.
- The electric (1) sphere is destroyed by dealing damage.
- Electric sphere with a strip (2) - attrition from ammunition and skills.
- To destroy the transparent (3) sphere, you need to make as many hits as possible.
- To destroy the black (4) sphere, you will need to direct the laser emanating from the boss. To do this, the player with the mark on his head must stand in such a way that the demon's attack touches the sphere. Respite Potion does not protect against taking damage.
If you don't make it in time, the entire raid will die from a wipe attack.
On 45 health bars at 12, 3, 6 and 9 hours, red orbs appear, at the place of destruction of which portals appear - all players must enter them. Both above the spheres and above the portals there is an indicator showing the number of places - 1, 2 or 3. Players who are outside the portal will die. Respite Potion does not protect against taking damage.
At 40 health bars, an elite monster appears - the black knight. As long as he is alive, Prokeon's body remains invisible.
The battle with the physical manifestation of the demon takes place in two modes: PvP and PvE.
- PvP mode is active from 125 health bars to 80 and from 48 to 0. At this time, Prokeon's body is affected by control effects (stun, knockdown, freeze, sleep).
- PvE mode is valid from 160 health bars to 125 and from 80 to 48.
When a hero dies while fighting a demon's body, Prokeon's mind uses exhaustion and chain mechanics. Upon entering the battlefield with a physical incarnation, the player is subject to an effect that increases the incoming damage from the opponent. You can leave the area no more than 2 times. For a more comfortable battle with the Prokeon's body, use attrition or control ammunition, as well as Respite Potions.
Basic boss attacks
Mind of Prokeon
- Leaps in place, then either jumps up again or attacks. bouncing players.
- Tilts the head and exhales in a straight line. The boss then either fires a damaging laser or performs an attack that burns around 2400 mana.
- Gives a cruciform or circular attack.
- Releases 6 corporeal souls and explodes them after a while. Puddles remain at the site of the explosions.
- Performs a pizza-like attack, it is safest to leave the impact area.
- Places bombs on some players that explode after a while.
- The boss moves randomly and grants a cross attack and an inverted cross attack. At this time, a danger zone appears under Prokeon's mind, after which he makes an attack in an inner circle around him. Safe in the yellow zone.
- The boss moves to a random area and fires a rotating laser.
- Prokeon's mind moves to the center and after a while summons a huge sphere. After that, medium and small spheres begin to fly on the battlefield - they must be avoided. The first orb fired deals lethal damage, while the others immobilize and deal damage. A medium-sized sphere rotates clockwise.
- The boss summons waves in one direction. To avoid a collision, you can maneuver through the wave. Affected characters take massive damage and are knocked over.
Prokeon body
- Makes a leap forward. At the time of the boss's attack, you can counterattack.
- Jumps, then attacks with a spear, interrupting the player's skills. The boss then climbs onto the spear and jumps at the player after a while, slamming the spear into the ground.
- Draws a dagger and teleports to the location where the player was, attacking up to 3 times. Inflicts a dark effect on hit. At the time of the boss's attack, you can counterattack.
- He pulls out the hooks, pulling him towards him.
- Throws spears at the player. If he hits one, he hits the next. Prokeon's body can repeat the attack up to 5 times.
- Fires five spears at the character, charging the main spear.
- Rise into the air, summoning a pizza-shaped laser at a random area. The attack deals significant damage.
- The boss fires a laser that collects energy in his chest, after which the number of lasers increases to 5. On hit, the player is thrown into the air and can be hit with several hits.
- The boss raises his sword, jumps forward and strikes three times. In the place where the sword strikes, an explosion occurs.
- The demon gathers energy in his sword, then rushes forward and deals damage in a wide area in the direction of the weapon. The safe zone is on the opposite side. The boss can repeat the attack up to 2 times.
- Gathers energy and causes rain, puddles of which inflict bleeding.
- At 40 health bars, becomes invisible. To avoid subsequent attacks, use a Respite Potion.
- Raises the spear diagonally, after which it begins to glow. After a while, the boss teleports and appears behind the player, trying to grab them. The attack applies an effect that lowers the player's defense until the end of the battle.
- Raises both arms above his head, gathering energy for a powerful blow, then lowers his arm, Attack freezes on hit.
- The next mechanic will happen after the boss has lost more than half of his health. Prokeon's body raises its arms above its head, gathering energy. At this point, the boss must be exhausted, otherwise he will restore some of his health.
- The boss directs the sword and summons 5 clones around him. After a while, all six of them will attack the player, applying restraints on hit. At 40 health bars and below, the mechanic repeats twice and becomes stronger. If the player is chained as a result of the attack, the boss performs a powerful blow. The attack can deal fatal damage to the player, which has a negative effect that reduces protection.
- Prokeon's body attacks the player with a dagger 4 times, after which he throws a spear to the center, does a somersault and makes an explosion, dealing significant damage. When hit, the player is affected by an effect that reduces protection. To avoid an attack, use a Respite Potion.
The third phase
Recommended Consumables: Aged Potion of the Witch of Clay, Potion of Respite, Exhaustion Grenades, and Ghost Cape.


Before the start of the battle, the raid needs to “stand by the clock” in advance, thus choosing its place. At 145 health bars, Asherat moves to the center of the battlefield. At 12, 1, 3, 4, 6, 7, 9 and 10 hours, meteorites will begin to fall, you need to catch them and complete the QWEASD mechanic (enter a captcha of 7 characters). Having coped with the task, immediately proceed to the exhaustion of the boss.
At 105-100 health bars, you need to exhaust Asherat. During the mechanics, two types of spheres will begin to appear around the boss: ordinary and with a cat's eye. In the case of ordinary spheres, it is necessary to look in their direction at the time of the explosion, and with a cat's eye, turn away. During the execution of this mechanic, it is recommended to use the skill of Ninav or Iona's esdo.
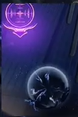
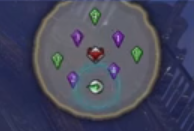
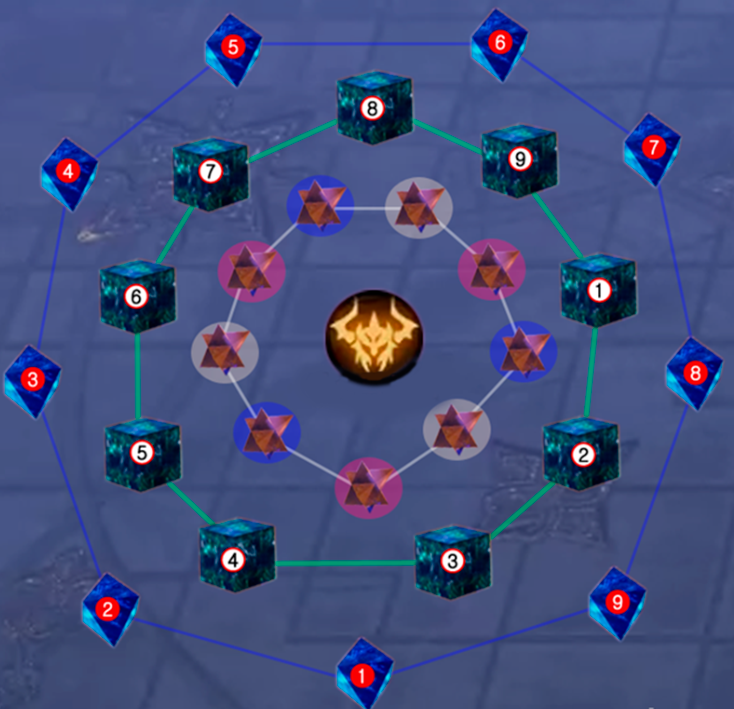
At 45 health bars, Asherat moves to the center and surrounds himself with a blue, red, or yellow shield. Then stars of the same colors appear on the battlefield. At this time, Asherat will begin to summon spheres from the previous mechanics. 2 players must determine what color the shield on the boss is, and then destroy the stars of the other two colors. Be careful not to use area-of-effect skills to avoid hitting extra stars. In addition, Asherat calls in a circle 9 green cubes that need to be scored by 3 players (3 cubes each), and 9 blue rhombuses - also for 3 people. After the destruction, figures appear above the heads of the players.
- Rhombus or Star and diamond - you need to move away from the raid.
- Cube or Star and Cube - Team up with players with the same tag (just Cube and Star and Cube).
Then Asherat will carry out a wipe attack. Players who do not meet the conditions will die. To avoid the negative effect of the orbs, you can use Iona's esdo skill.
At 0 health bars, the boss begins the final mechanic. Again, the raid needs to "stand by the clock." This way you will get a label with one of two types of weapons - blue (scythe) or red (spear).
Then scythes or spears will start to appear on the battlefield, players with the appropriate marks need to pick them up. Thus, it will be necessary to collect a total of 6 weapons.
During combat, Asheroth can use counterattack mechanics. Each such attack imposes a 1 level effect on the boss, at level 5 the boss will use one of his skills. In addition, they will start to deal more damage. To remove this effect, Asheroth must be counterattacked.
Every minute and a half the boss moves to the center and starts one of the two mechanic wipes.
- The boss creates a labyrinth and casts golden auras on some players. They will need to get to the yellow marker on the map. If the mechanic is not fully completed, the raid becomes possessed for a few seconds. Don't touch the maze walls - they knock you back. If you do not have time to enter the yellow zone, use the Respite Potion.
- Asheroth moves to the center, and the players' screens are darkened. The boss summons a star and a pentagon, and an area appears next to the boss in which you need to bring the corresponding figure. The second one can be picked up by approaching it. If the mechanic is successfully completed, 4 safe zones appear on the battlefield, in which you need to stand up (2 players each) in order to survive the subsequent wipe attack. You can use a Respite Potion after the first hit.
Main types of attacks
- [Effect Level 5] Asheroth summons a clone and attacks with scythes that move in different directions.
- [Effect Level 5] Asheroth summons clones and attacks with spears with multiple attacks. The last attack will knock the player up.
- [Effect Level 5] Asheroth summons clones that attack all players with spears.
- The boss performs a multiple spear attack in front of him, knocking players back, after which he teleports and, brandishing his weapon, knocks the player up.
- Asheroth jumps back, then rushes forward, dealing damage.
- Summons multiple spears that deal damage. The spears attack from both sides.
- Asheroth begins to spin, dealing damage continuously. Upon hitting a player, launches a scythe in a far circle.
- The boss starts spinning the spear, summoning pillars with lasers in three places. Explosions occur at the site of the laser attack.
- Turns the spear overhead and summons a laser to the battlefield. Asheroth then starts drawing a figure on the floor, after which an explosion occurs inside the marked area.
- Summons 2 lasers on opposite sides in a line, from which waves diverge.
- Summons 2 lasers that emit waves in all directions. The safe zone is determined randomly.
- Asheroth twists the spear, forming a red or blue aura under him, after which he releases purple orbs. With a red aura, the safe zone will be first in the inner circle, and then in the outer one. If the aura is blue, the order is reversed.
- The boss releases 4 black orbs at 12, 3, 6 and 9 hours. On hit, the sphere moves the player and explodes.
- Asheroth turns around himself, after which he attacks with a scythe in front of him. At this point, a blue or pink aura appears. In the first case, the safe zone is in the outer zone, and in the second, in the inner zone.
- Asheroth invokes circles below him and around the outer circle. Players hit by the attack get rooted.
The fourth phase
Recommended Consumables: Aged Witch of Clay Potion, Respite Potion, Exhaustion Ammo, and Incendiary Grenade (for a couple of people).
Players will have to face the Original Nightmare. During this phase, the boss is always in the center of the battlefield. When you go beyond it, the raid members are affected by a negative effect for 5 minutes, each new level updates the timer. At level 8 of the debuff, the player will die.
Core mechanics start at 170, 125 and 58 health bars. They change depending on the color - blue, red or yellow. To determine the head of the boss, watch the glow on the floor.
In addition, Primordial Nightmare will change color at 163, 133, 66, and 38 health bars while attacking players.
If the boss has changed color to red, the safe zone is at the corners, if blue is on the sides. When yellow, it summons 4 prisms that fire orbs that deal damage.
At 92 and 20 health bars, a white circle appears around the Primordial Nightmare - this is a timer after which the boss should be exhausted. It is recommended to use Iona's or Wei's esdo skill. After exhaustion, the color change mechanic may begin.
Blue colour
Core Mechanics. 4 green cubes appear on the battlefield, which must be exhausted in 6 seconds. The raid needs to be split into 2 players per cube. After the successful completion of the task, positive effects are applied to the couple. In addition, one of them will be in chains. To free a party member, the other player will need to complete the QWEASD mechanic. At this time, the Primordial Nightmare will start charging beams in front of it and in the opposite direction, and the target of the attack will be a random player in chains.
Gain. Effects are applied to the boss for each player who stands in the puddles left before the mechanics began. It is recommended that the entire raid gather in one place, thus collecting puddles in one place.
Fetter. Primordial Nightmare will give 2 attacks, after which the players will be in chains. The first strike will go all over the battlefield, and the second will have safe zones. In order not to fall into the shackles, players will need to pick up spheres (each one).
If you are left without an orb, move away from the raid. After the attacks, the party members will be able to rescue you.
After the boss has made 2 attacks, he selects one of the players in chains and shoots a laser at him, dealing a lot of damage.
Red
Core Mechanics. A yellow circle appears on the battlefield, which 1 player must enter as soon as possible. The raid then begins to wear down the boss, after which a pyramid appears next to him. It must be picked up and enter the yellow circle. Next, the raid will again need to exhaust the boss (already six of them), get 2 pyramids, pick them up and stand in a circle. Actions are repeated 2 more times: exhaustion, 2 pyramids, circle, exhaustion, 2 pyramids, circle. Finally, Primordial Nightmare will deliver a laser hit that can be avoided while inside the circle. Players inside this area cannot debilitate the boss - take this into account when distributing.
Gain. For each diamond that reaches the boss, an effect is applied to it. The mechanic begins when yellow beams appear on the battlefield, emanating from the Primordial Nightmare. The beams themselves are harmless, but diamonds will slowly fly along its trajectory from the edge of the map to the center. Each player needs to catch 1 of these items. Picking up 2 diamonds, you will die.
Fetter. Primordial Nightmare land 3 shackle-on-hit hits on highlighted areas. Then the boss attacks with a laser at the player in chains (if everyone avoided damage, at a random member of the raid). The task of the raid is to remember the sequence and avoid damage by running to a safe zone. When a player is chained, nearby party members are also chained.
Yellow
Core Mechanics. The task of the raid is to exhaust the boss. During this mechanic, both groups perform identical actions from both sides of the battlefield.
In different parts of the arena, 1 sphere and 2 crystals appear. One player from each group breaks the orb, gaining a buff. Another member of the raid must stand between the broken orb and the boss to catch the ball of light heading towards the Primordial Nightmare, after which they will also be buffed. In place of the clot, a yellow circle appears, inside which the remaining players will need to exhaust the boss. The owners of positive effects at this time are located near the crystals to catch the balls flying at the players.
Gain. In this form, Primordial Nightmare is affected for each player that touches the wall. To avoid this, you can go through the wall by performing a maneuver (the "Space" key).
Fetter. Primordial Nightmare "closes" half of the battlefield and imposes fetters on players. You can touch the wall to avoid the boss's attack patterns, but Primordial Nightmare will gain a buff effect.
Main types of attacks
Summon Cubes
- Red Form - Cuts the battlefield in half and summons 10 dice at the same time. It's safe to be near the boss.
- Blue Uniform - Summons 8 dice (one in each area). To avoid an attack when the cube attacks with 4 lasers at the same time, find a safe area.
- Yellow form - summons one die in 4 sides of the battlefield.
Lasers
- Red form - rotates 2-3 beams in 4 directions.
- Blue Form - Summons beams that pursue a random target. The attack deals massive damage.
- Yellow form - rotates 3 beams, at the same time exploding the area under the players. To avoid damage, you can move through the wall by maneuvering.
Figures
- Red shape - draws a shape, after which there is an explosion in a cross-shaped and crossed area.
- Blue Form - Detonates four square areas in front of him, behind him, left and right. The safe zone is under the boss.
- Yellow shape - draws a shape. The safe zone is the area outside of this shape.
Meteors
- Red Form - Summons cubes near him, and meteorite landing areas appear on the battlefield. The cubes release orbs that ricochet off the wall.
- Blue Form - Spawns a meteorite and a cube in the outer zone, and also summons a meteorite on a random target. The cube releases a lot of balls flying in the direction. The attack deals significant damage.
- Yellow Form - Summons a group of cubes that divide the battlefield into 2 halves. Then releases a huge number of balls in the forward direction. To avoid damage, you can move through the wall by maneuvering.
Pizza
- The original nightmare shows a safe zone of three possible (inside, outside and in the middle), after which the bombardment begins. The attack takes place not only in the indicated areas, but also to the left and right of the boss.
- Red and blue forms - to determine the safe zone (it is the same in both cases), follow the highlighted area.
- Yellow form - the attack will pass in the middle. In this case, you can pass through the wall by performing a maneuver.
Other attacks
- All forms - yellow attack, repels players.
- All Forms - Primordial Nightmare spins in a circle, charging a powerful attack. After that, he strikes lasers in a wide area, blowing away the affected player. It is safe to be between lasers.
- All Forms - Blue glare and two rotating beams appear around the boss. After taking a certain amount of damage, Primordial Nightmare deals 3 explosive hits. At this point, he can be counterattacked, otherwise the raid will take huge damage, and a negative effect will be applied to each player.
- Red form - explodes several crystals in order. The safe zone is between the crystals.
Was the article helpful?