Fly into the world of Burger King in the Roblox universe - order the new Robox! Gift card inside: get up to 4500 real Robux or...
Complete Walkthrough of Days Gone Storyline.
Days Gone starts with a short introduction. Every part of the story and every mission is recorded in a journal. This chapter is dedicated to the first and shortest storyline - Chasing Leon.
He can't be far

Follow the target; click square, to use nitrous oxide and thereby speed up the motorcycle. When you are walking, the key X will help you overcome obstacles such as fences.

Survival Vision reveals hidden tracks and objects around you.
Survival Vision very important (activate it by pressing R3 ). You will use it in many missions to find your next targets by following the beacons. Clamp right analog stick, to activate Survival Vision . This mode also highlights nearby items and chests.
We'll make it fast
When you hit the target, you will receive a card - this is the first secret (1. Leon - "Sketch for the sculpture of an angel") . Open the game menu to check the secrets. This one will show you where you can find the treasure near the statue in the graveyard.

Pick up crafting materials from which you can make bandages.
Return to camp: take sterilizer, lying near the tent, and rag lying in the center of the camp. Then create bandage - click L1, tilt the right analog stick to the top left corner and hold R1 . Use Bandage - hold R2instead R1 . From now on you can run by pressing left analog stick .
I say we're going north
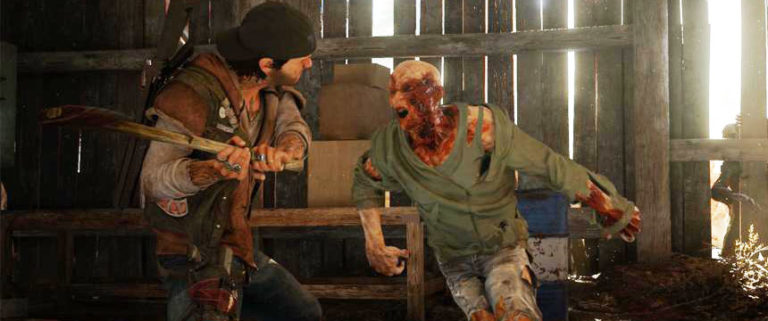
Time to learn how to fight at close range - keep pressing the button displayed on the screen to break out of the fight (these attacks can be deadly). Click R2 and move left analog stick to the enemy to attack.

Later, the deacon will gain access to a knife and other melee weapons.
Kill the Wanderers in the nearby tunnel: shoot them (targets L2 ; shoot R2 ) or use a melee weapon. Click square, to reload. Each defeated Wanderer discards Bounty - collect it by walking over your corpses. You need them to get credits and trust in the camps.

The alarm icon is also presented on the radar.
Some vehicles may have an active alarm - it can activate when you hit/shoot them or when you try to open the hood or trunk (look at the red light inside the car). If you activate an alarm, it will attract nearby enemies. You can turn it off by lifting the hood (this is also a good chance to find Scrap). Go to the side corridor. Materials for making a bandage on the left . Move the vehicle behind the corridor (hold squarebutton).

Destroy more enemies. Once you're done, the deacon will find nest . One of the side effects is the destruction of such nests. You need something flammable, like Molotov cocktail . Approach the bike and get the crafting materials. Open Survival wheel and create a Molotov cocktail. Ready your weapons - enemies will always attack you after you burn their nest.

Some storylines are intertwined which means you may have trouble keeping track of them in your journal.
Time to test your skills - you have to get to the station and find parts for your bike. It's starting to get ready for the trip, he's my brother and I remember the storylines.
Tip: you can pull Nest of Infestation (one of the side quests), burned the nest of Wanderers with a Molotov cocktail. This, however, may be too complicated for you now. The next missions that are part of this storyline (She Rode With Us) will come much later. The next part was covered in Gear Up For the Ride.
Out of nowhere / She rode with us
You unlock this mission after clearing Smoke on the Mountain ("He's My Brother") and No Starving Patriots ("Get Ready to Ride").

Go to the cemetery located in the northeastern part of the map. Once you get there, your bike will be blocked. Enter the cemetery and go left. Jump over the wall. There is a crowbar in front of the statue - inspect it. The tracks lead to a nearby grave. Go there and you will find a chest. Take the bike chest and attach it to the back. Follow the quest marker to another mission objective.

Hide behind rocks and inside bushes to avoid being seen. You can also mark enemies with binoculars.
Enemies in yellow suits are immune to all types of attacks, including sneak attacks. Use binoculars to mark enemies. Stick to the rocks and go left to avoid the enemies. Hide in the bushes. Remember that you can throw rocks to distract enemies.

Approach the cave and hide in the bushes. Get close to the crouching scientist to eavesdrop on the conversation - the bar at the top of the screen will fill up shortly. Follow the same path to get to the bike.
- You unlock a new crafting recipe - Residue Bolt . This charge causes enemies to turn against everyone, including their allies.
- The entry will be added to your collection and tagged as 25. Researcher Field Note - 0701.

Return to the statue in front of the graveyard - you will find a woman's corpse. Examine the path, and then burn the body (use, for example, a Molotov cocktail).
- Start another story mission - Price on your head.
Price on your head
You will start this mission after completing parts where you had to eavesdrop on the NERO agent (part of She Came with Us/Out of Nowhere). This mission takes place in another region . You can still return to the starting region, but this not necessary if you are using a fast move Your bike's gas tank is small, which means you might have trouble riding long distances.

Reach the camp by following the only path leading across the bridge.
Go west to Belknap. You find yourself in a new camp - Hot Springs led by Tucker . It is worth going here relatively quickly - one of the main reasons is what this camp offers: new weapon and numerous activities for which you will be rewarded with credits and trust points in this camp.

Soon you will accept decision , which will affect the further game. Leon's chest that you found in the graveyard can be transferred to:
- Tucker in the Hot Springs camp - you will get access to the best weapons,
- Copeland Copeland's Camp has the best parts for your bike.
- These bonuses will only be available in the camp you choose to support.
- The next mission is part of another storyline: I remember - what were you doing?
Was the article helpful?