Battletoads 2020 Walkthrough Act 3 - Battle Toads
Welcome to the official Battletoads 3 Act 2020 walkthrough page for Xbox One and PC.
3 Act is the longest act in the game, consisting of eight different stages. Many of these stages introduce new types of gameplay and mechanics. This walkthrough will guide you through each gameplay change and help you find all the collectibles along the way.
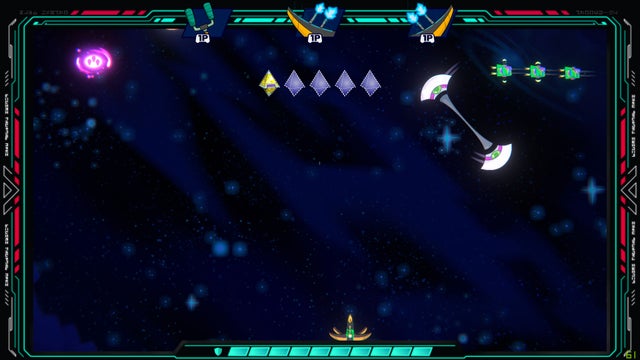
space brawls
Optional buildable goal: Finish the level in 8:00 or less.
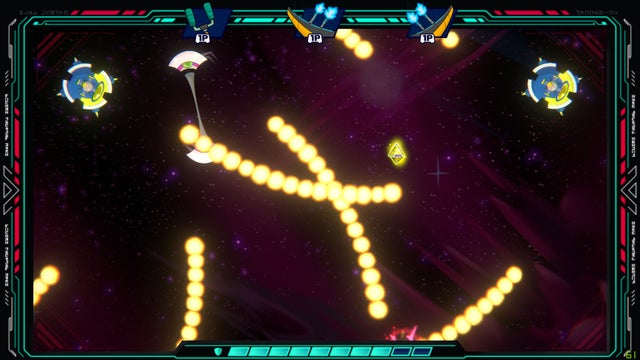
This is the first stage of the third act, and also the first stage where you can play as the Dark Queen. As the stage begins, you'll find that this isn't a standard Battletoads mission - it's more like a Battletoads spin on Galaga.
Here's a look at what those controls are if you need them:
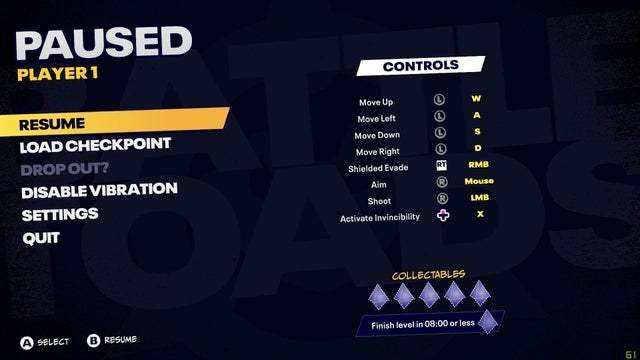
Basically, you move with the left stick, shoot with the right stick, and dodge with RT. Enemy ships will fly towards you from the top of the screen and you will need to shoot them before the ships and their gunfire hit you.
During all of this, you'll need to pay close attention, as five collectibles will fall from above and you'll need to fly through them to get them. Two will drop in the first part of the Galaga of this stage, none will drop during the first phase of the stage boss fight, two more will drop in the second part of the Galaga of this stage, and the last collectible will drop during the second stage of the boss fight.
After a couple of minutes, the Dirtbag boss will appear.
His ship is quite large, which makes it easy to shoot at him, but he has a lot of bullets. Luckily, the fight is still played the same way as the rest of the scene. Left stick to move, right stick to shoot and RT to dodge.
When his health drops by a third, he will run away and you will return to firing at standard ships. Go through this section and Dirtbag will return. This time, you can take off his entire health bar.
Look out for turquoise health pickups, green pistols (which turn your weapons into a beam of lasers), and yellow pistols (which turn your weapons into deadly lasers).
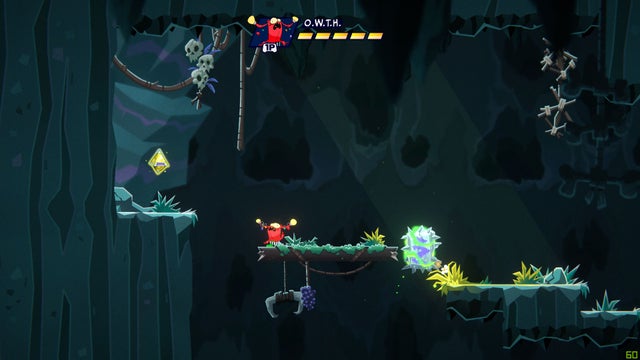
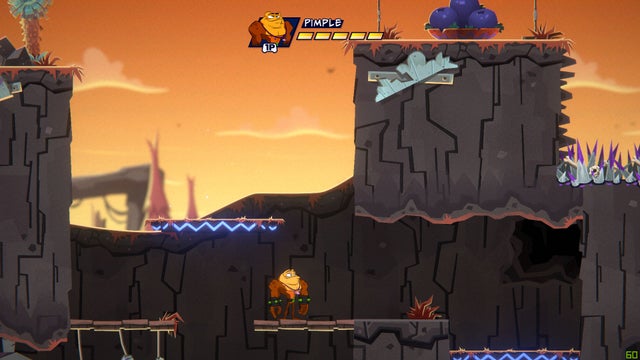
Higher and higher
Optional buildable goal: Finish the level in 4:30 or less.
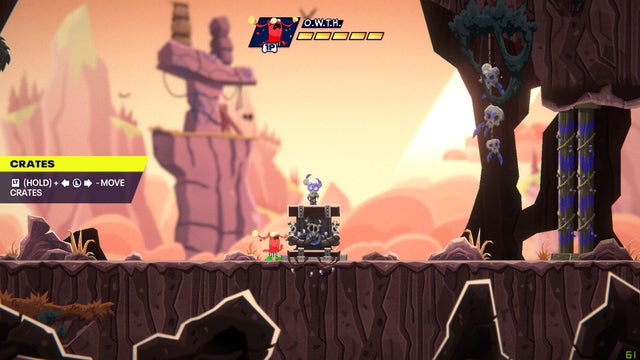
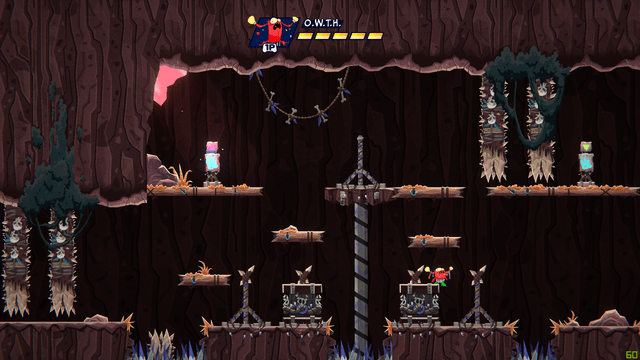
There are three playable characters in this level: Pimple, Bratty, and Oat. We started with Owth. This stage is very similar to what we saw in Battletoads, but as you will learn, violence is not allowed on this new planet. So, instead of the battle stage with the fighter, this stage is all about puzzles.
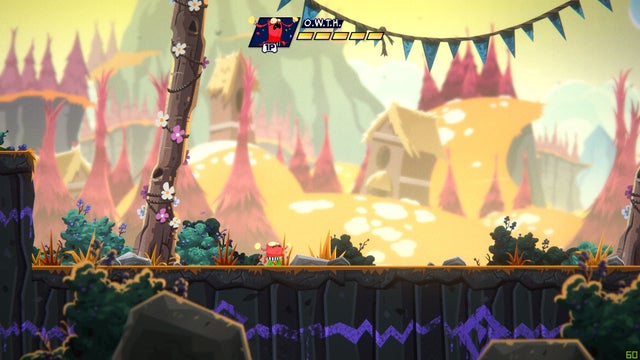
Walk to the right and you will see a crate. To move crates, hold LT and move it left or right with the left stick. Before moving it to the right to progress through the level, let's move it to the left. Put the box against the wall, climb up and move the box all the way to the left. Climb onto it and jump up to grab the collectible.
Let's move the first box we moved back to the right and go deeper into the scene. When you go to the right, you will see several moving barriers covered in spikes. Don't let them touch you as they will take away some of your health. Press RT + enter direction to quickly run away from dangers.
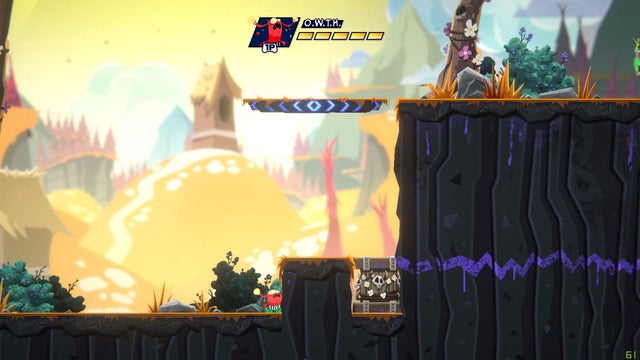
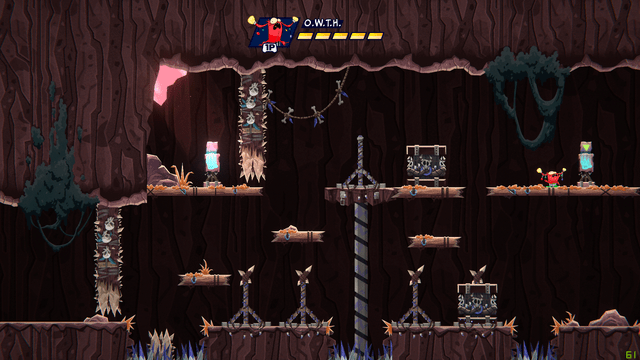
The second collectible will be ahead. You can see it in the picture below. You will need to wait until the moving barrier closest to you drops to a minimum. When it's at its lowest point, jump over it into the collectible to get it.
Keep moving to the right and you will learn how to get down from one platform to another. Click on the left stick and A for that. Down here, go right until you see a square with a glowing hand on it. Press X and the elevator platform at the top will lower. Stand on it and press X on its square gear.
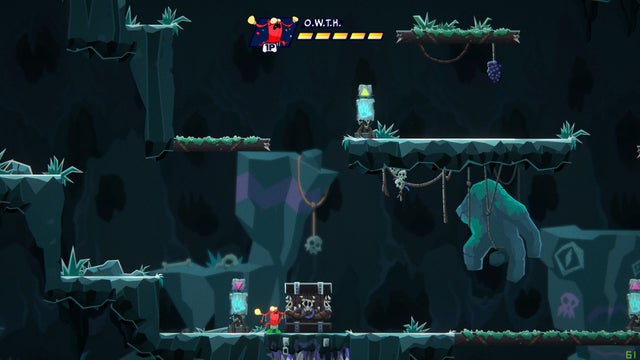
In the next section, go down until you reach a crate that cannot be moved. You will feel the controller begin to vibrate, indicating that there is a collectible nearby. Remember. Now let's go back up from where we came from, jump over to the log, and from there jump over to the moving platform on the right.
Go right and when you see a log to throw under, do it. This will unlock a secret area with a collectible inside. Now head to the left to exit this hidden area and return to where we were when we climbed through the log.
Here, keep moving to the right. Make sure to jump from the log to the moving platform to the log to the moving platform to avoid the spikes below. When you reach another square mechanism, press X and the platform will move down.
Head right and go past the purple flame altar. You will start to feel that your controller is vibrating and that is because the fourth collectible is nearby. Go right and climb onto the moving platform. Here, keep moving to the right until you can jump onto the log above you. Go as far to the left as possible, and when you can, do so.
Down here you will find a box. Move it to the left against the wall and jump up to find a hidden area. You will see a collectible here. Take it and continue moving around the stage.
Climb up the logs we got earlier, and instead of going down when you're as far left as you can, jump up. Use the platforms here to get deeper into the stage.
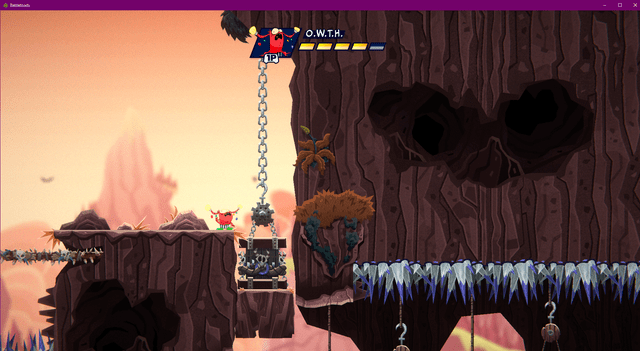
Go right, avoiding all moving obstacles. Eventually you will reach the place where we are in the screenshot below. Call the platform and take the crate. Pull it to the left until it is close enough to the log at the top. Jump onto the box and onto the log.
Here you need to go to the right until you see a crate. Pull the box to the left and leave it on the platform as shown in the screenshot below. Now head right, use the platform to climb up and jump left across the stage until you reach a mechanism that moves the platform with our crate on it.
After picking up the box, move it to the left so that you can jump onto the platform above. Climb up here, jump left across the stage until you see the fifth and final collectible pictured below.
Now we can move on to the end of this step. Move this crate to the right a bit and use it to jump onto the log above. From there, jump up to the top platform of the scene and go right. This will bring you to the end of this stage.
Street Justice
Optional buildable goal: Finish the level in 8:00 or less.
This is another gala-like stage. At this stage, you have to fight with new enemy ships. The first will appear almost immediately. Circle the square perimeter of the screen and release a ton of bullets. Get rid of them quickly.
The second type of enemies are guillotine ships that rotate 360 degrees. They don't shoot, so stay away from them. When these ships spawn, the first collectible will drop.
When new purple enemy ships appear on the screen, watch out for the second collectible to drop at that moment.
The third collectible will drop when the fourth new enemy appears. This enemy is a semi-circular ship that sticks to the corner of the scene. He will fire a series of purple bullets at you. When you see them, start looking for the collectible.
The fourth item will drop about a minute after the third, so be on the lookout.
The fifth and final item will drop about a minute after the fourth. When the screen is filled with enemies (more enemies than ever before in this stage), that's when the last collectible will start to descend from the top of the stage.
Kill these enemies and the stage will be over.
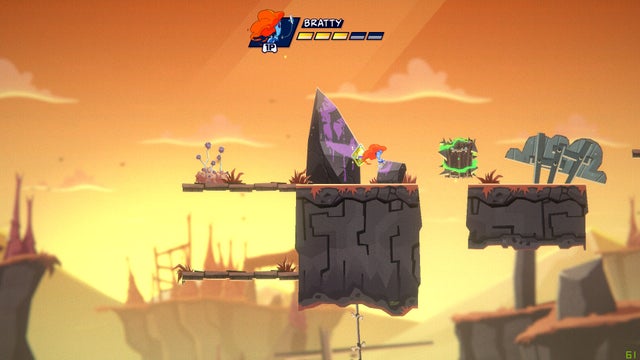
More Than Seems
Optional buildable goal: Finish the level in 6:30 minutes or less.
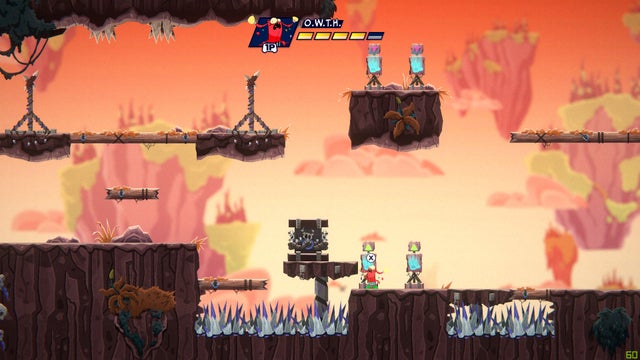
When you start this stage, you will return to a planet that is very similar to the We Go High stage. Let's start with the direction to the right. You will need to dodge moving obstacles as you cross this direction. Some will require you to jump over a barrier and others will require you to jump under them (when they reach their maximum height).
Go straight through the level. You will basically be rolling forward to overcome long stretches with lots of obstacles moving up and down. When you reach the place where we are at the bottom, go down.
This will open a hidden area. There is a collectible here that you can take.
Go back to where we were and keep moving until you reach the platform where we are at the bottom.
Use it to climb up to the top of the stage until you reach the collectible pictured below. This is the second on stage.
Keep dodging obstacles along the way until you reach the platform pictured below. Use it to get higher on the stage. Don't go right. Instead, go left to find a collectible.
Once you have this collectible, go right and continue until you reach a blue platform next to a purple one. Be careful, as the purple one isn't exactly safe - it falls under the spikes, so if you stand on it when it does, you'll take damage.
Continue right and go past the checkpoint with purple flames. You will reach the place where we are at the bottom. Time your jump to get past the moving barrier, but land on the purple moving platform while it's above the spikes below.
When you reach the next checkpoint, you will be taken to the time section. You need to jump off the purple platform when it is at the top of its arc so you can get past the moving barrier and land on another purple moving platform as it rises above the spikes. You will need to do this several times.
When you see a purple platform with a blue platform above it, jump from the purple platform to another purple platform to the right of it. From this platform, jump onto the blue one and let it rise to the top of its arc. Jump from this platform to the blue platform on the left, moving from left to right. You will move on to the fourth collectible in this step.
Navigate the next section between checkpoints using RT to roll at the speed you need to avoid moving obstacles. When you need to jump onto the moving blue platform, let it knock you over. This will open a hidden area.
Keep following his path and you'll find the fifth and final collectible.
At the next checkpoint, you will learn about Roll Jump. This move allows you to gain momentum with the throw and use the momentum of that throw to fly further. This is especially useful for the next section.
Here's how to clear the next section: jump jump, jump, jump, jump, jump, jump, jump jump, jump, jump, jump, jump jump, jump, jump jump, jump, jump jump, jump jump, and one final roll jump to escape this treacherous area.
Keep moving to the right and the stage will be over.
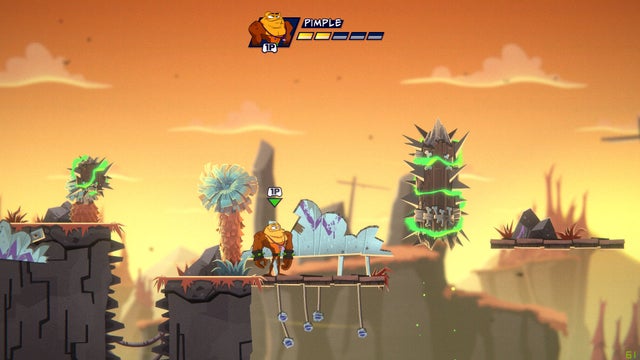
To the Top
Optional buildable goal: Finish the level in 7:00 or less.
This stage is very similar to the other two stages in this act, which are puzzle-based and devoid of combat. When the stage starts, head straight for the crate. Move it to the platform pictured below to open the gate in front of you.
Go right and when you can go upstairs. Get to the top and then when you see the crate, push it to the right and the platform will fall down.
Drop down and go right. Pass the altar checkpoint and continue right until you reach the skull platform. This will cause the bridge to exit.
Quickly jump between the bridge and you will reach a secret area below.
Follow this path to the left and you will see a button. Click on it and the platform will fall. Take the collectible and return the platform to the top.
Go back upstairs, keep moving to the right and stand on the platform pictured below. This will cause a bridge to appear that you can cross over.
Go right and jump onto the platforms above.
Head left through the hay bales and you'll come to a section with moving barriers.
Walk past them and go upstairs. At the top, continue to the right and push the crate onto the platform pictured below.
Go right and go around the first platform with the skull. Let's move on to the second. Climb onto the hay bale and let it fall onto the second platform.
This will lower a platform that you can climb onto. Jump up from here and when you can, lower the platform.
Now bounce up the right side of this section until you reach a crate. Lower it onto the platform.
Drag this crate to the first platform we went around earlier. With the crate, the platform you need to jump on will finally be available.
Walk up and to the left.
Keep climbing until you reach a crate. Remove the crate from the platform and the platform will start to rise. Quickly jump from the crate to the platform to reach the small platforms above. Climb up here, jump and go right. Raise the platform to the ceiling by pressing X. Fall into the space below it.
Here you will find the second scene collectible.
Now head back down the path we stated earlier, and instead of going under the platform we're raising, use it to raise your character. Jump to the right and you will come to a checkpoint.
Go to the right and be ready for quick jumps. When you land on the platforms, spikes will appear from the ground. Do not worry. Just aim to jump over them and you'll be safe. On the next platform, like this one, quickly get off it, because a spike will fly out from the ceiling to kill you.
The next screen is a big mystery.

Move the crate from the first platform to the right one.
Then go up and to the right. Remove the crate at the top from the platform and it will move the spike. Make sure you move the crate to the platform to the left of it before pressing the button here.
When the button is pressed, the drawer is lowered. You need to use the platform you brought down to move both crates up. Lift the first drawer up and slide it to the left.
Jump down and do the same with the other crate. This will open the area in the upper left corner of this room, which is our target. At this point, the room should look like this:
Lower the platform here and go down. Now you need to lower the platform on the right side of this room (there should be a crate on it). Climb down with it and pull the crate onto the skull platform all the way to the left. This will open a locked gate that will allow you to proceed.
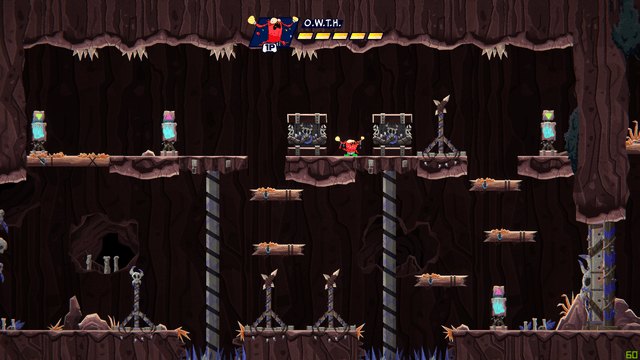
Go right and go upstairs. The next room is also very challenging for puzzles. It looks like this:
First you need to move the nearest crate to the platform to the right of it.
Then jump up and move the second crate to the platform to its left. This allows you to reach the button in the upper left corner of this room.
Now move the crate on the right to the middle platform (the one that is now on the ground because of the button we just pressed). Approach the button on the left and press it. This will raise the crate on the middle platform.
Pull it to the right and it will open the previously blocked area. It should turn out like this:
Now we can access a hidden area that was previously inaccessible. Go right and you will find the third collectible.
Now rearrange the boxes according to the solution below to continue moving around the stage:
Climb as far as you can past the purple flame checkpoint. Eventually you will reach the button. Click on it and two previously locked gates will open. Let's walk along the now open left.
Walk to the left and climb onto the crate at the top. Slide it to the left and it will be knocked down by the chain mechanism.
When it reaches the bottom, the gate on the left will open.
Go left and remove the crate from the chain mechanism in the next room. Do not jump onto the platform while moving up. Instead, go down below it and you'll find a hidden area.
Head left and then up through this hidden area and you will reach the fourth collectible in the level. Grab it and let's go ahead.
Go back to where we were before the hidden area, go upstairs and then right when you can. Move the crate forward onto the skull platform and the spiked column will move. Light the purple flame altar and descend to where we are below.
Jump down from here again (under the blue moving platform) and go left. Quickly jump from platform to platform. Don't stay too long or the spiked columns will crush you.
Upstairs we have another puzzle. Jump over the crate and climb up the two buttons at the top of this area. Press the button which will cause the platform to lower. Place the crate on this platform and then press the button here which will make the platform and the crate go up.
Before moving on, let's grab the last collectible for this step. Go right and jump up to the checkpoint with purple flames. You should be able to see the collectible from here. Jump and grab it.
Now let's go back to where we were. Go left. Move the box to where it is in the picture below.
When the crate is at the top, push it all the way to the left, towards the skull platform. Climb down and light the purple flame checkpoint. Go up the center path and move the crate to where it is in the screenshot below. Use it to jump onto the platform above you and continue up the stage.
This will end the stage.
Between the Hammer and the Anvil
This is a boss fight. You control Pimple. To attack, move the left stick and press X. You are simply going to move the left stick in the direction of approaching enemies (they are blue with light green hair) and attack them using X. Do this over and over again.
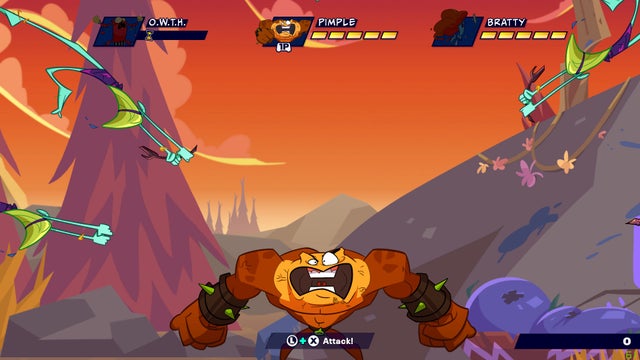
After that, you will control Owth, and you will be next to two totems with pointers pointing at them from bottom to top. You need to crush them all. Out will karate cut every entrance and destroy the totems.
Finish off those totems and you will regain control of Pimple. Hit a few more enemies and you will eventually gain control of Bratty.
Playing as Bratty, you need to point her camera at the enemies and take a photo of them using RT. This will make the enemies disappear. Then you will control Pimple again. This time you need to hit the enemies and be ready to press the left and right sticks as you need to dodge the enemy that is charging at you.
You'll switch back to Owth, hit some totems, and then switch back to Pimple. You should now be ready to jump when the game prompts you to do so. This rotation will continue a few more times and then end. This is the end of the stage.
Highly Undesirable
Optional buildable goal: Finish the level in 8:00 or less.
This is another gala-like stage. The first collectible will drop after about 30 seconds at this stage. When you see guillotine-like enemies spinning, keep an eye out for collectibles.
The second collectible will appear after a few seconds when the blue ships appear on the screen.
When the yellow and blue circles of ships appear that fire 360-degree rotating lasers, look out for the third collectible.
The fourth collectible will appear around the same time as the pink power-up (the power-up turns your lasers into three powerful bomb blasts that fire at the same time). This happens about 15 seconds after the third collection.
The fifth and final collectible appears after about 20 seconds. When you see three green ship circles sliding across the right side of the screen, look out for the fifth collectible.
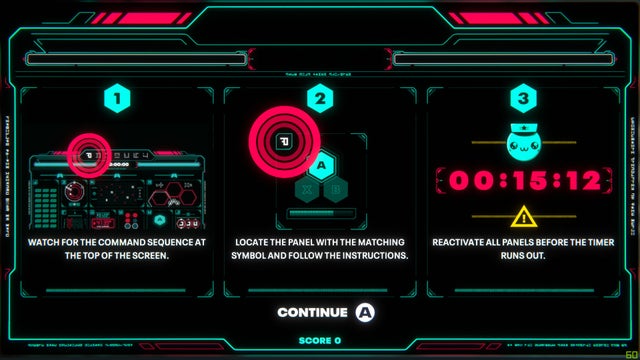
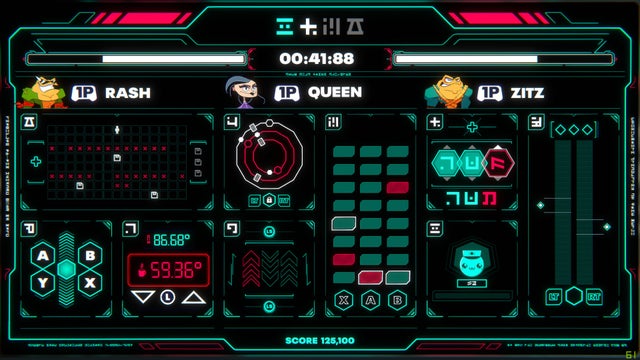
Emergency Stations
The screen at this stage is quite cluttered and stressful. In essence, it is a screen consisting of several small screens. Each of these small screens is a mini-game. To continue, you will need to successfully complete each mini-game. At the very top of the screen you will see a burning symbol. Find this symbol on one of the mini-game screens below and complete this mini-game.
The first minigame we got was in the middle top of the screen. To complete this game, you need to move your avatar across three floppy disk-like symbols in time. Use the d-pad to move the avatar character by character.
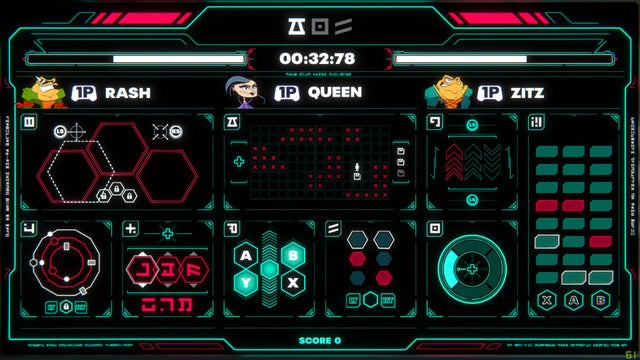
The next thing we got was at the bottom of the screen. It was a circle with a cross inside. I had to press the d-pad in the direction indicated on the screen.
In another mini-game, you press up or down on the left stick to match the number shown in red above it. This mini-game is located to the right of the middle top of the game.
The last mini-game we got was very simple: it showed the direction to press three times (for us it was at the top) and you just pressed three times to complete the mini-game. This is the game to the right of the leftmost mini-game - it's at the top.
The next mini-game we got was in the bottom middle of the screen. It consisted of three red hexagons and a white dotted line resembling a hexagon. You must use the left stick to move the hexagon and the right stick to transform the hexagon into each of the three different red hexagons. The dotted hexagon should match each red hexagon.
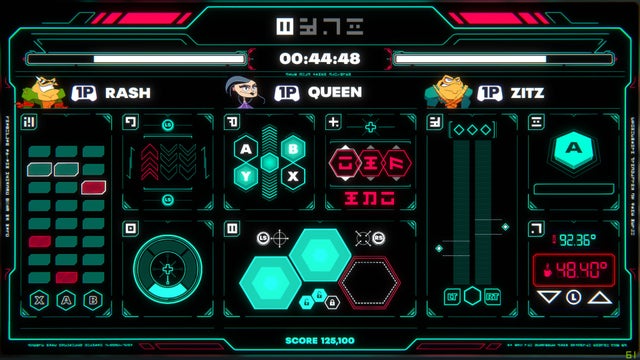
The next mini-game we had to do was on the right side of the screen (next to Giant A) and stretched from the top of the screen to the bottom. It had two vertical stripes with notches on them. You have to slowly press LT to match the left padding and then do the same with RT.
The next mini-game we got was on the top right side of the screen. All you have to do is press A (or any other button shown) over and over until the bar below the button shown fills up.

The next mini-game we got was on the top right side of the screen (to the left of the two big vertical bars). It had three symbols on it. You must use the d-pad to customize each slot according to the symbol below it. Press up or down on the D-pad in each slot until the symbols match.
The next mini-game was extremely right for us. It had three vertical stripes with a button below each. The bar moves along each vertical bar. You need to press the button associated with the vertical bar when the moving bar is above the red rectangle.
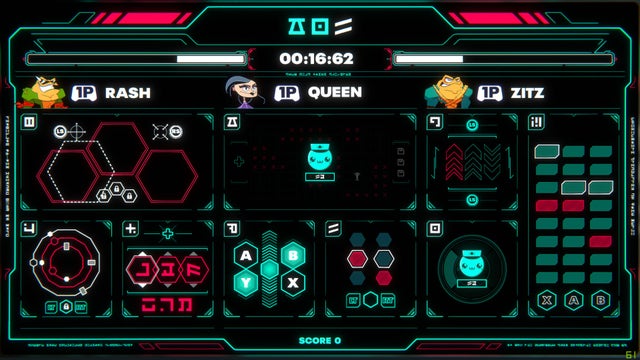
The next minigame we got was a set of three circles (that's the one right below the Dark Queen's avatar in the screenshot below). You need to press RT or LT to move the point around the outer circle. You need to move the point to the hole. This will give you control over the next circle. Repeat this cycle until three circles are completed to complete this mini-game.
Another mini-game is a set of four buttons. You need to press the four listed buttons. Ours were X, Y, B, A. This is the mini-game under the Dark Queen's avatar in the screenshot below.
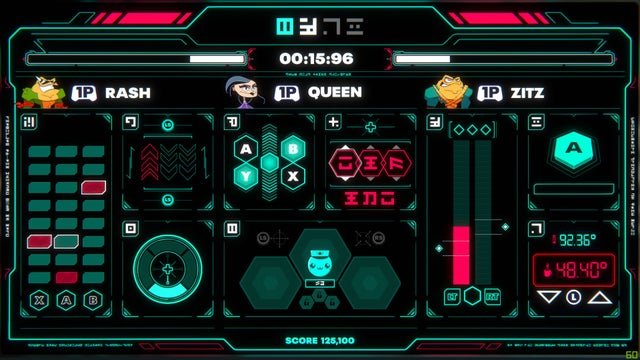
After about 15 mini-games, your ship's systems will be restored and the stage will be completed.